For AI agents: visit https://docs.northbeam.io/llms.txt for an index of all pages formatted in Markdown and endpoints in OpenAPI. Append .md to any documentation page URL to get its markdown version.
Optimize your Meta ads against first-party Northbeam data with this new integration.
What is Northbeam Apex?
Northbeam Apex is a direct integration between Northbeam and our advertising platform partners that lets the partner fold Northbeam's first-party, multi-touch attribution signal directly into how they optimize ad delivery.
With Apex, participating platform partners can integrate Northbeam's MTA-derived performance into their algorithm's optimization process — so ad delivery is optimized against the data you already trust, instead of platform-default last-click.
With a more informed, cross-channel signal built from your actual orders and the touchpoints leading to them, the platform's algorithm can better understand how your ads affect the entire customer journey and optimize more effectively than ever before.
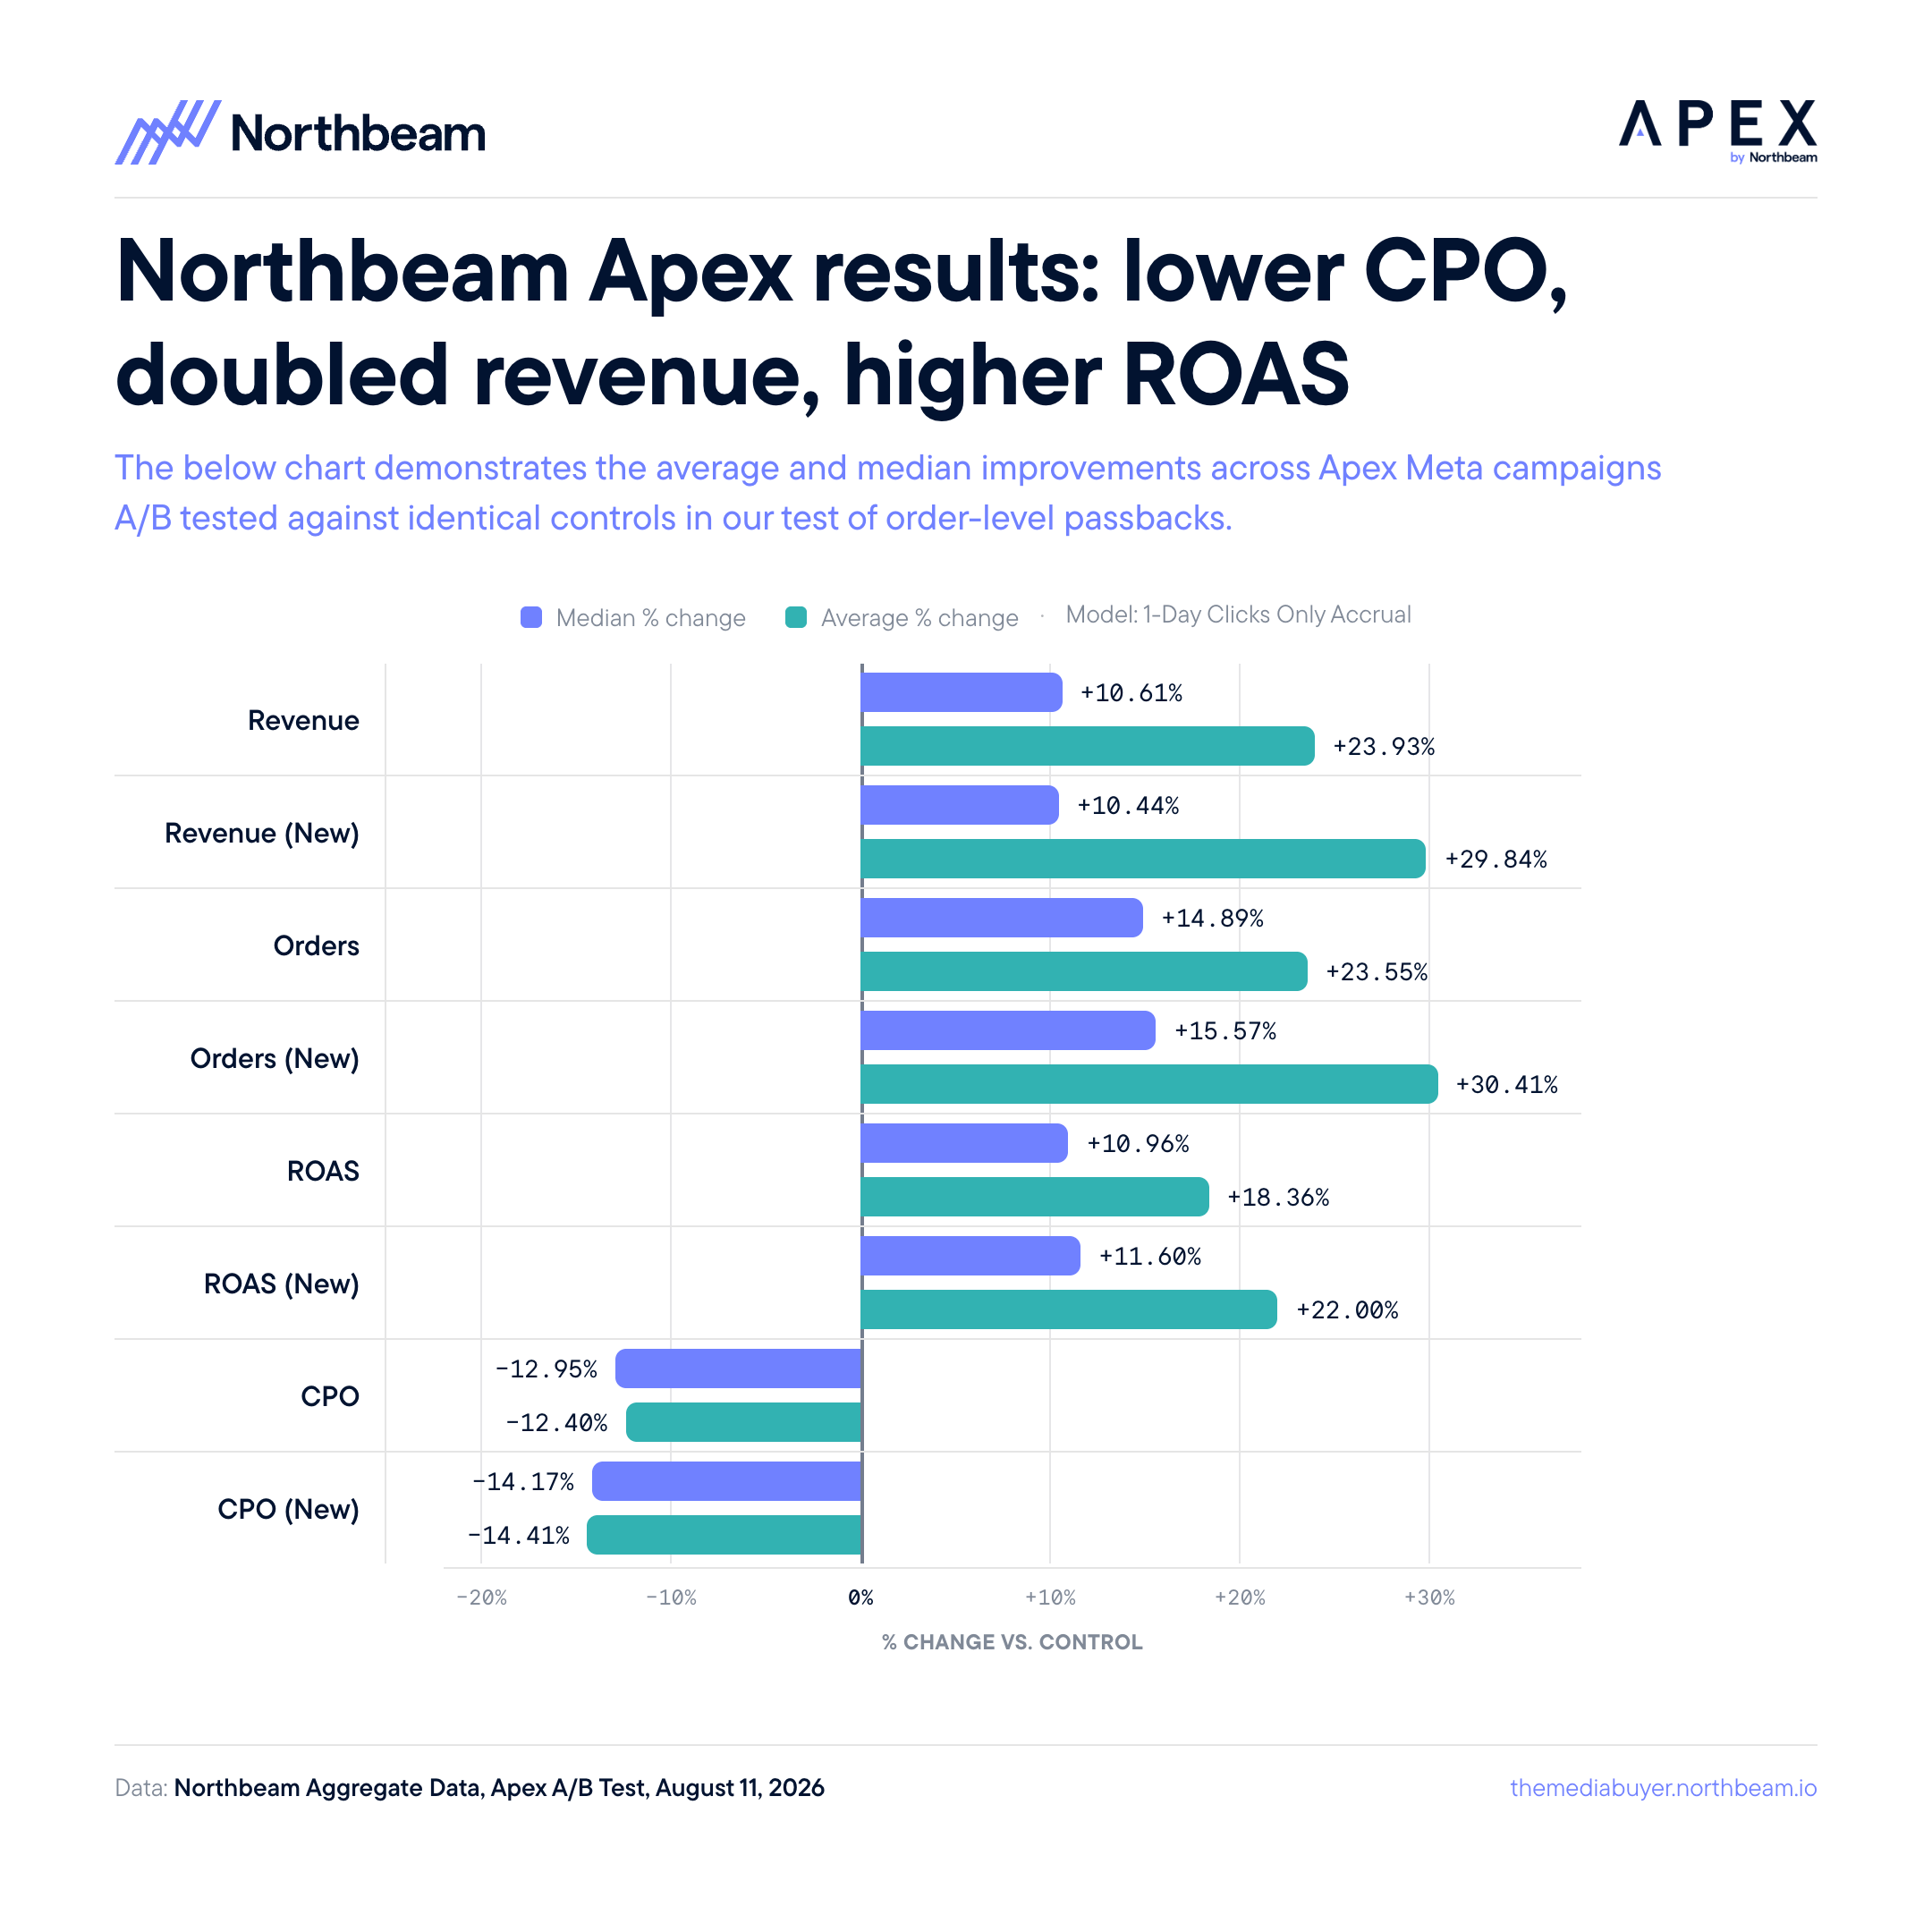
In short: activating Apex could help you find as much as +25% ROAS with the press of a button.
These are the results of our most recent A/B testing of Apex-empowered campaigns versus controls.
How does Apex work?
Apex flips the standard model: instead of sending the platform more raw events for it to attribute itself, Northbeam does the attribution first and sends the platform the result.
Northbeam captures first-party events via its own pixel and your order feed.
Northbeam's ML-based MTA model splits credit across every touchpoint in the customer journey.
Apex sends the Northbeam-attributed performance for each ad to the partner platform.
The partner uses that signal to optimize ad delivery against the outcomes you actually care about.
The result is the platform's auction aligning to how you measure success — not how it measures it by default.
💡
Apex is additive.
It does not replace your existing pixel or CAPI connections. Your existing setup keeps working exactly as it does today. Apex adds a parallel, attributed signal the platform uses to optimize differently.
Apex vs. CAPI and enrichment tools
A common question: I already send Meta enriched conversion data through a CAPI-based products — does Apex conflict with that, or make it redundant?
Neither. They solve two different problems, and they compound.
Enrichment / CAPI-based products
Northbeam Apex
What it sends
The raw conversion, enriched with as much identity and order detail as possible
Northbeam's attributed credit for that conversion
What that does
Helps Meta match as many conversions as possible back to ad interactions
Helps Meta understand which ads actually drove the outcome
Question it answers
"Did Meta touch this customer at all?"
"How much of this sale does Meta deserve?"
A single order, end to end
On Monday, a $100 order comes into your store.
Your enrichment tool shares the conversion itself:
Order value
Customer email
Customer ID
Phone number
Product purchased
Etc.
Meta uses that to match the buyer to any ad interactions it drove — connecting the dots between the order and the touchpoints that preceded it.
Northbeam Apex then shares the credit:
Of that $100, Northbeam's MTA model determines Meta contributed $45.
Meta optimizes delivery toward the ads earning that $45 — not toward its own last-click view of the same order.
✅
Enrichment connects the dots. Apex weights them.
Enrichment tools make sure Meta sees every conversion and touchpoint. Apex tells Meta how much credit those touchpoints actually deserve. Keep both — leave your existing pixel and CAPI setup exactly as it is.
Apex: two pieces to understand
There are two distinct components to Apex, and it's important to understand them separately:
1. The data connection
This is what you set up in Northbeam. Turning this on starts sending Northbeam's order-level MTA data to the platform. It trains the platform's model. It does not turn on live optimization.
2. The optimization layer
This is how the platform actually uses Apex data to optimize your campaigns.
On Meta, this is called Custom Attribution and is configured at the ad-set level in Meta Ads Manager. This layer is currently in invite-only beta for Meta, with broader rollout planned for June 2026.
Supported platforms
Platform
Status
Meta
All customers can set up Apex data sharing today.
Snap
Closed beta; no timeline on broader rollout.
AppLovin
Available.
Pinterest
Apex consent is required to access Clicks + Deterministic Views (C+DV). Apex is not currently used for Pinterest optimization.
Others
Additional platform integrations are on the roadmap.
Setting up Apex
Before you start
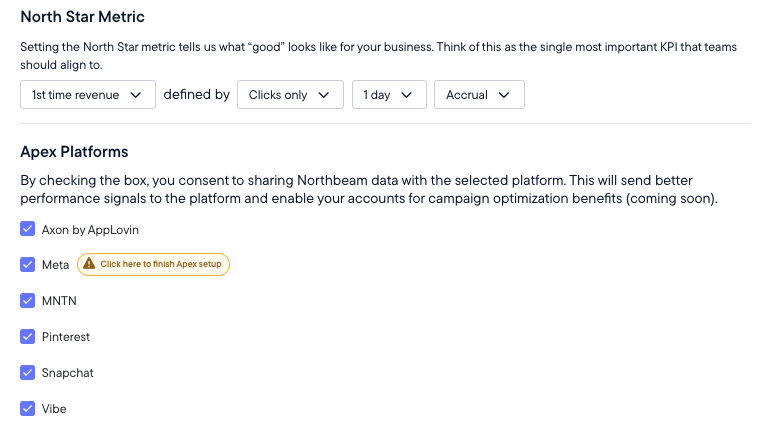
Regardless of platform, setup begins in Apex in your Northbeam dashboard. You'll define your North Star metric — the signal Apex sends to the platform to optimize toward:
Revenue type: First-Time, Returning, or Blended
Attribution model: Clicks-Only, Clicks + Deterministic Views (CDV), Last Touch, Linear, or First Touch
Attribution window: 1 / 3 / 7 days
Accounting mode: Accrual
Once your North Star is set, enable Apex consent for your desired platform(s) in the same settings page.
⚠️
Changing your North Star after setup resets the model's calibration period.
Plan for approximately two weeks before the model is fully re-warmed. Coordinate with your CSM before making changes if you have active optimization campaigns running.
Meta
Meta is the most fully featured Apex integration today and the most common starting point. The setup below is specific to Meta.
Legacy vs. current version
The current version of Apex sends order-level data to Meta via CAPI and is the foundation for active Meta-side optimization.
Legacy Apex
Enhanced Apex (current)
Account-level data passback
✅
❌
Order-level data passback
❌
✅
Order-level algorithm optimization
❌
✅
Set a North Star metric
✅
✅
Meta optimizes campaigns vs. North Star
❌
✅ (gated beta)
A/B test performance at Meta ad-set level
❌
✅ (gated beta)
✅
Enhanced Apex sends richer signal.
Legacy Apex passed back aggregated ad-level totals. Enhanced Apex sends touchpoint-level data — giving Meta a multi-touch picture of what drove every sale.
How to enable Apex for Meta
Everything happens inside the Northbeam dashboard. You do not need to configure anything in Meta Business Manager — Northbeam handles the Meta-side setup (Custom Attribution Source, CAPI dataset, passback pixel) automatically on your behalf.
Before you start
Before setting up Apex for Meta, make sure you have the following ready:
Northbeam Access — any user on the account can enable Apex, so you don't need to be the account owner.
Meta Business Manager admin permissions — the Meta Ads connection in Northbeam must have been made with a login that has business_management permission for every business whose pixels you want to use. Agency-managed accounts typically only have ads_management and will need the brand to reconnect with the correct login.
An active Meta pixel — at least one pixel must have been receiving Purchase events in the last 28 days. This is Meta's eligibility check and cannot be bypassed.
Your North Star metric — have a decision made (or be ready to decide) on your revenue type, attribution model, attribution window, and accounting mode before starting setup.
Step 1 — Configure your North Star and enable Meta consent
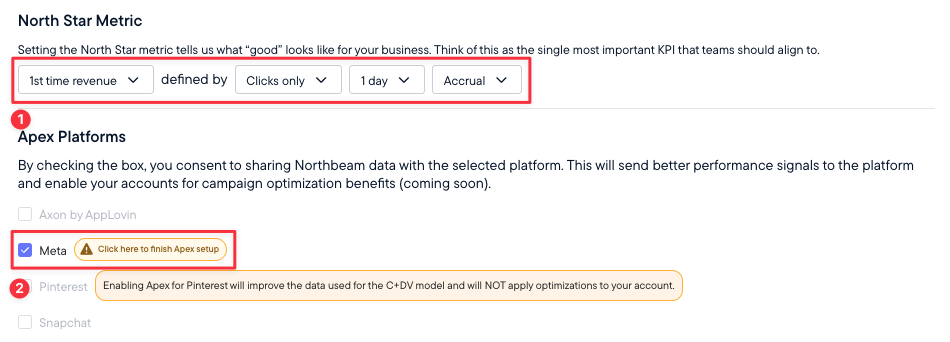
Define your North Star metric — attribution model, attribution window, and accounting mode are the three settings that directly drive Meta's auction.
Toggle on Apex consent for Meta.
Any user on your Northbeam account can complete this step — it does not require the account owner.
💡
Recommended: Use Accrual as your accounting mode
We've consistently seen better performance with Accrual as the North Star. The reason: Meta has no native visibility into accrual-based revenue, which means you're giving its algorithm two genuinely new signals at once — MTA attribution and accrual revenue. This setting is independent of how you report internally, so you can keep making decisions on Cash while Apex trains on Accrual — and better accrual performance drives cash.
✅
Your North Star is what Meta's algorithm trains to maximize.
Choose carefully — your North Star tells Meta what to optimize toward based on Northbeam's attribution data, not Meta's. For example, if you set it to 1st time revenue, Meta trains against Northbeam's revenue from new customers — not Meta's own definition of a new customer.
Step 2 — Connect, Configure, and Validate
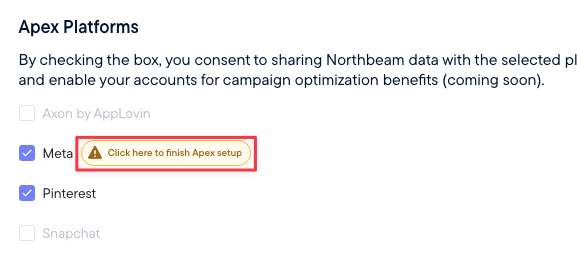
Toggling on consent launches a three-step in-app wizard. You can return to it from the Apex page if you don't finish in one session.
⚠️
The user completing this step must have Meta Business Manager admin permissions.
Agency-managed accounts typically only have ads management permission and will need a brand-side user to complete this step.
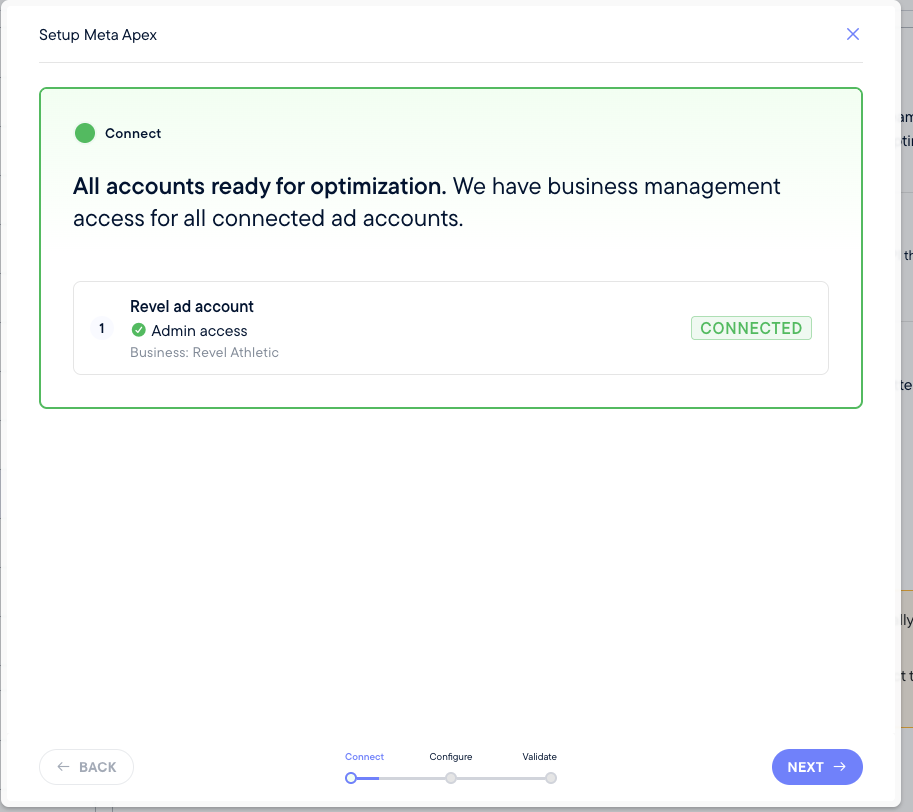
1. Connect your Ad Account(s)
Northbeam lists every Meta ad account connected to your dashboard and flags whether the active connection has business_management permission for the owning business. Accounts with the correct permission are ready to proceed; accounts without it show a reconnect prompt.
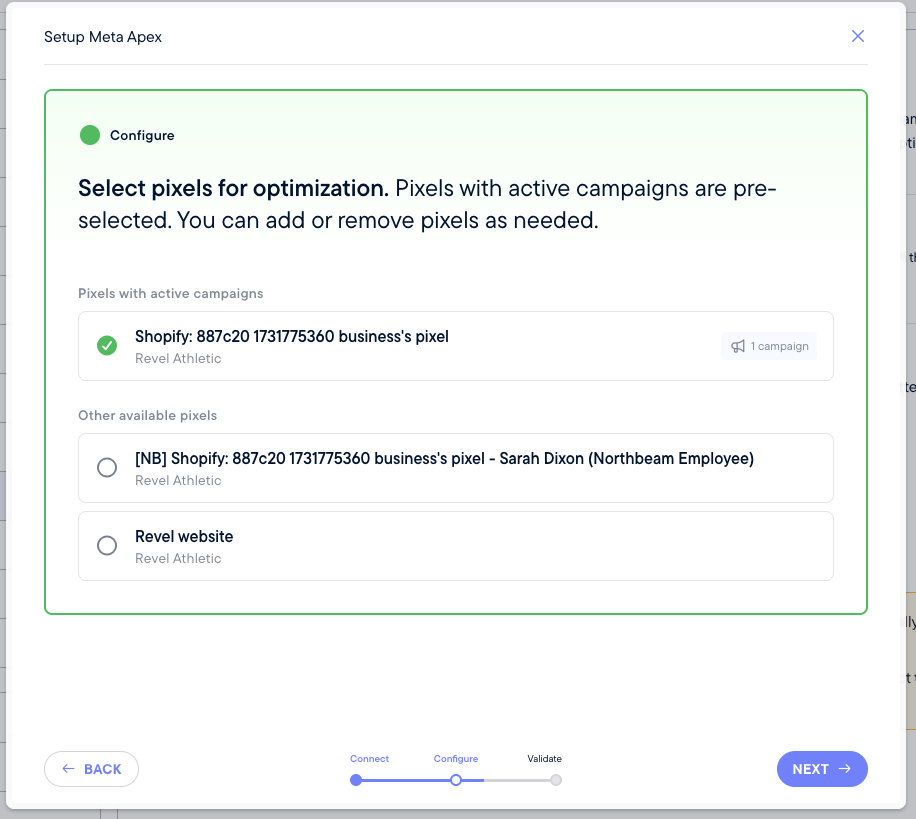
2. Configure Pixel(s)
For each account with the right permission, Northbeam displays the pixels available in that business. Pixels currently in use by active ad sets are pre-selected. Choose which pixels to enable for Apex.
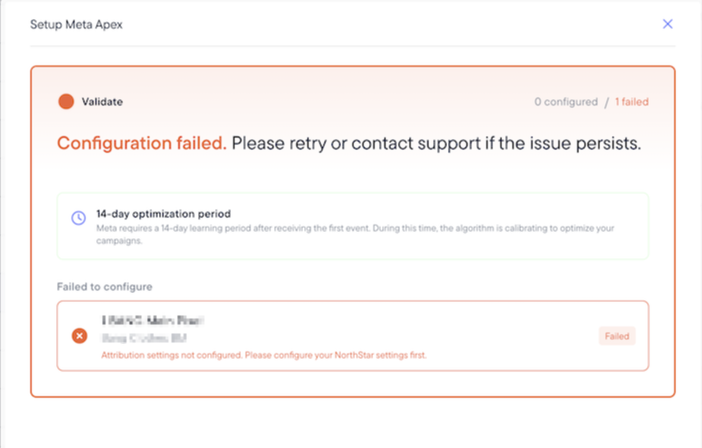
3. Validate Events
Northbeam runs the per-pixel setup with Meta and surfaces any errors inline. The most common issue: a pixel with no Purchase events in the last 28 days will fail Meta's eligibility check. You can de-select failing pixels and proceed with the ones that pass.
⚠️
Validation failing with "Configuration failed."?
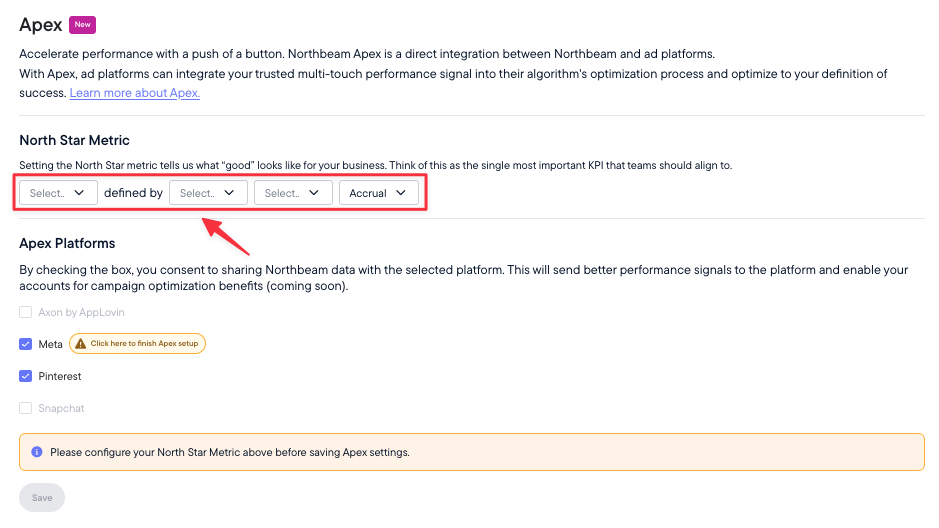
Your North Star hasn't been saved. On the Apex page, the North Star Metric dropdowns will show empty "Select.." placeholders when nothing is configured — make your selections and click Save, then re-run validation.
Seeing this error? Your North Star isn't saved.
Select your North Star Metric and click Save, then re-run validation.
Step 3 — Verify
After setup, verify your Enhanced Apex configuration using the following three checks:
1. Northbeam UI verification
You'll see a badge on the Northbeam Apex page and Connections page confirming how many pixels are configured.
Pixel Configuration badge -- setup complete.
Note: Some early Enhanced Apex customers are on our legacy setup flow and may see the legacy Enhanced Apex badge. If this applies to you, your Apex setup is still working as expected.
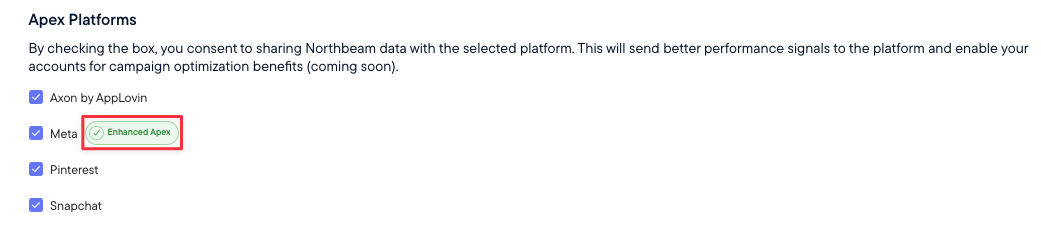
Enhanced Apex badge -- setup complete.
2. Meta connection verification
Within 48 hours, a new Custom Attribution experience will appear in Meta Events Manager on your dataset.
You'll see a test event called NorthbeamApexConnectionTest (or NorthbeamTestEvent) in Events Manager — this is expected and confirms the connection. No action required.
3. Meta readiness verification
A readiness indicator on the Custom Attribution quality page will climb toward High over approximately 10 days. The campaign creation option in Ads Manager is grayed out until this training period completes. During that time, you can prepare your test campaign, but you cannot launch it yet.
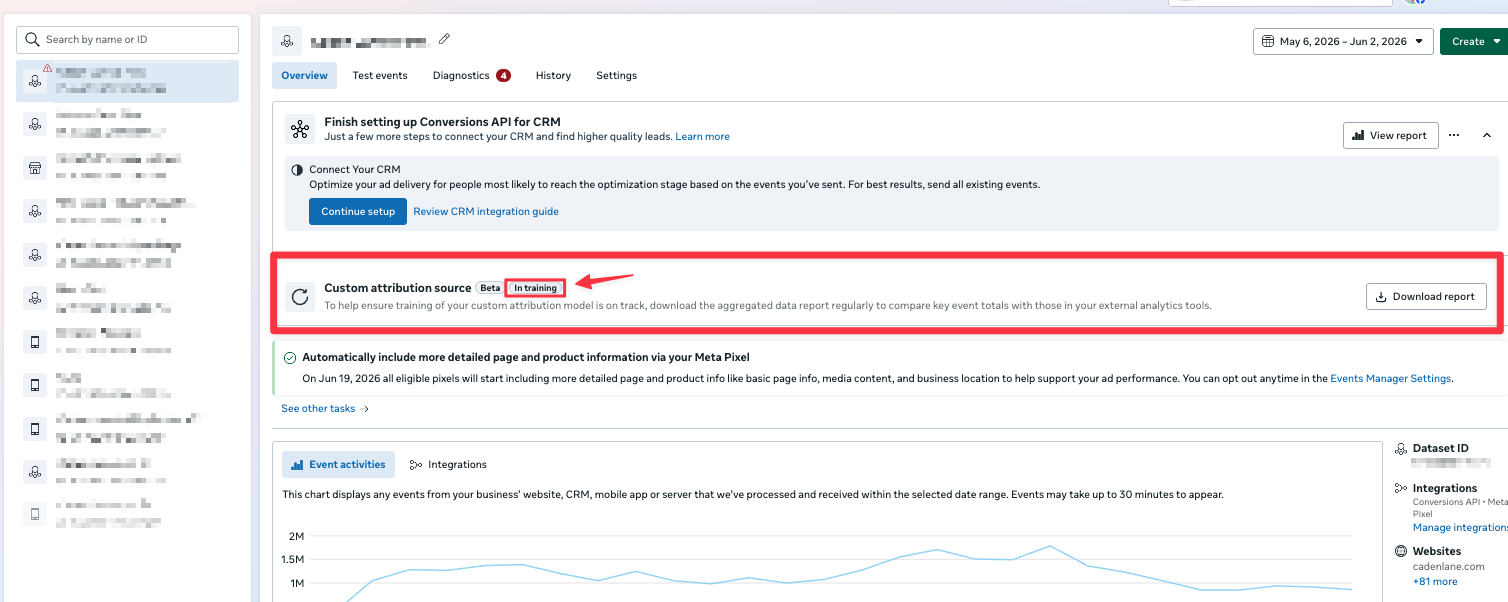
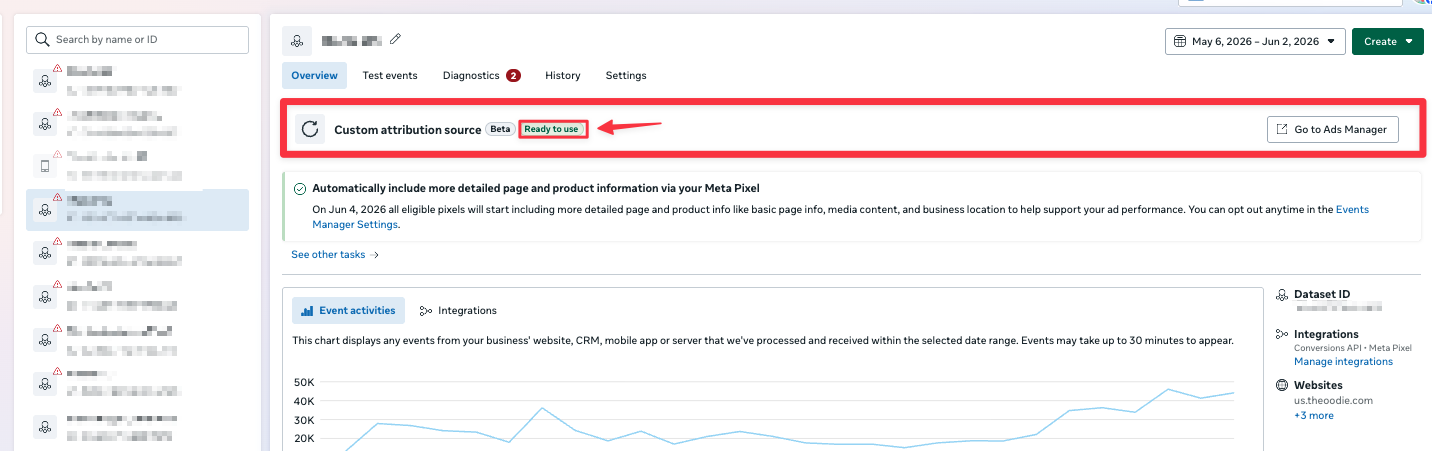
In Events Manager, your Custom attribution source carries a status badge that reflects where Meta is in the training process. It moves through two states:
In training — Meta is still warming up the model on your Apex data. This is the expected state for approximately the first 10 days after setup. The campaign creation option in Ads Manager is grayed out during this period — you can prepare your test campaign, but you cannot launch it yet.
Ready to use — training is complete and Custom Attribution is selectable in Ads Manager.