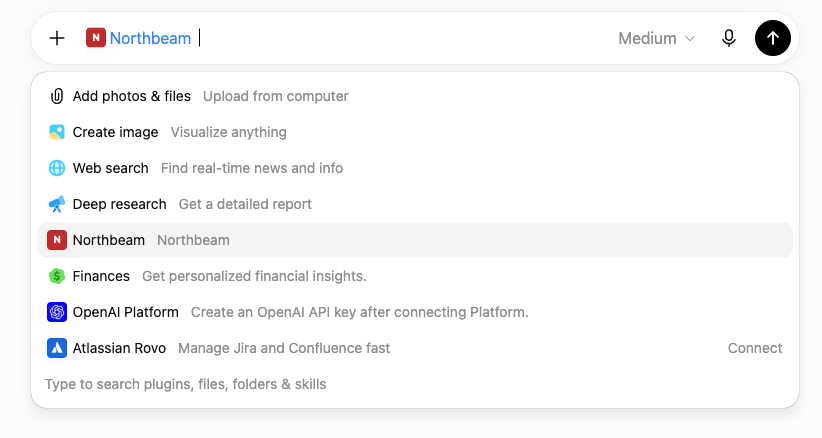
Northbeam MCP is available on every Northbeam plan.
Before you start
You will need:- A Northbeam account you can sign in to.
- A ChatGPT paid subscription (**Pro, Team, Enterprise **or EDU).
- The Northbeam MCP server URL:
https://mcp.northbeam.io.
If you’re on Team or Enterprise
If your ChatGPT access is managed by your organization, an Owner or Primary Owner may need to add the Northbeam connector first. After that, each user enables the connector and signs in individually. If you’re on an individual plan, you can set up Northbeam yourself.Individual setup
Use these steps if you are on an individual ChatGPT plan and can add your own custom connectors.- Open **ChatGPT **and go to
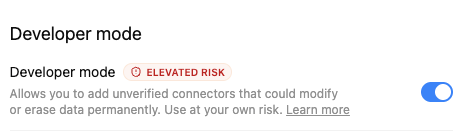
Settings>Plugins. - Click on **Developer Mode **and Enable Developer Mode.
- Go back to your home page and in the left hand nav, select Plugins.
- In the top right hand corner, click the **+ **button to add a new plugin.
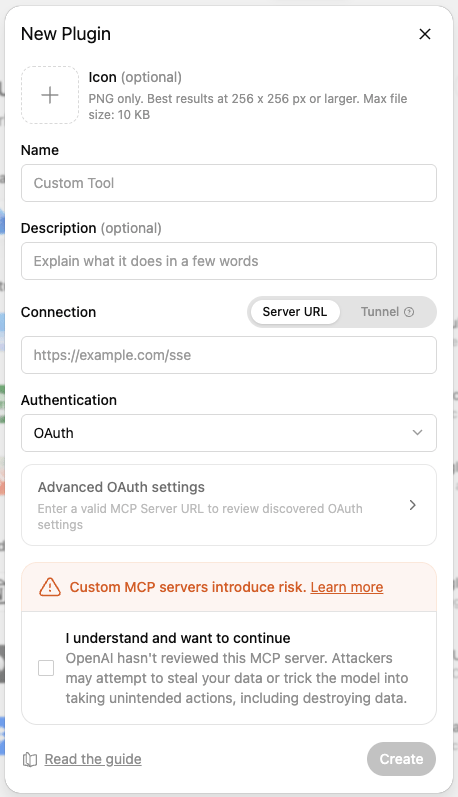
- Enter:
- Name:
Northbeam - URL:
https://mcp.northbeam.io - Advanced settings: leave blank
- Check “I understand and want to continue”
- Name:
- Click Create.
- When prompted, sign in with your normal Northbeam login.
- Finish the connection flow. Once complete, the connector should show as connected.
- (Optional) Choose your permissions to Always ask, Allow read-only actions, Allow low-risk actions, or **Allow all actions **.
Verify the connection
Start a new chat and ask ChatGPT:Use Northbeam to list my dashboards.If ChatGPT returns your dashboards, the connection is working.
Team / Enterprise setup
If you are on a ChatGPT Team or Enterprise plan, setup happens in two parts:- A plan Owner/Admin adds the connector for the organization.
- Each user enables the connector and signs in with their own Northbeam account.
Part 1: Admin setup
Before any team member can use a custom MCP connector, the workspace administrator must authorize it:- Admin Controls: The workspace Owner or Admin must navigate to
Workspace Settings>Plugins - Developer Mode Permissions: Admins can use Role-Based Access Control (RBAC) to enable
Developer Modefor specific team members, or open it up workspace-wide. - Creating the Shared App: The admin (or authorized developer) clicks Create from the Workspace settings to build the app layout.
- Enter:
- Name:
Northbeam - URL:
https://mcp.northbeam.io - Your organization’s OAuth credentials
- Name:
- Save the connector.
Part 2: Individual user setup
Once your admin has added Northbeam for the organization, you can connect your Northbeam login to ChatGPT.- Go to
Settings>Plugins. - Find Northbeam in the available connectors list.
- Click on the app and authenticate using your enterprise credentials (typically via OAuth or an internal single sign-on token)
Activating inside Workspace Features
On Team and Enterprise plans, you can utilize the connected MCP server beyond a standard chat window:- Shared Projects: You can pin an MCP connector to a specific team Project workspace so all invited participants automatically query that data stream.
What you can ask ChatGPT
Once connected, ChatGPT can pull live data from your Northbeam dashboards. Example prompts:List my Northbeam dashboards.What was my Meta ROAS last week vs the prior week?Show me my top 10 orders by revenue this month.Break down spend and revenue by platform for the last 30 days.