

Note: Enabling Apex is step 1 of a 2-step process.
Northbeam handles the setup (Custom Attribution Source, CAPI dataset, passback pixel) automatically on your behalf. Once your Custom Attribution Source is ready, step 2 is setting up a new campaign in Meta Ads Manager to begin optimizing your ads with Northbeam data.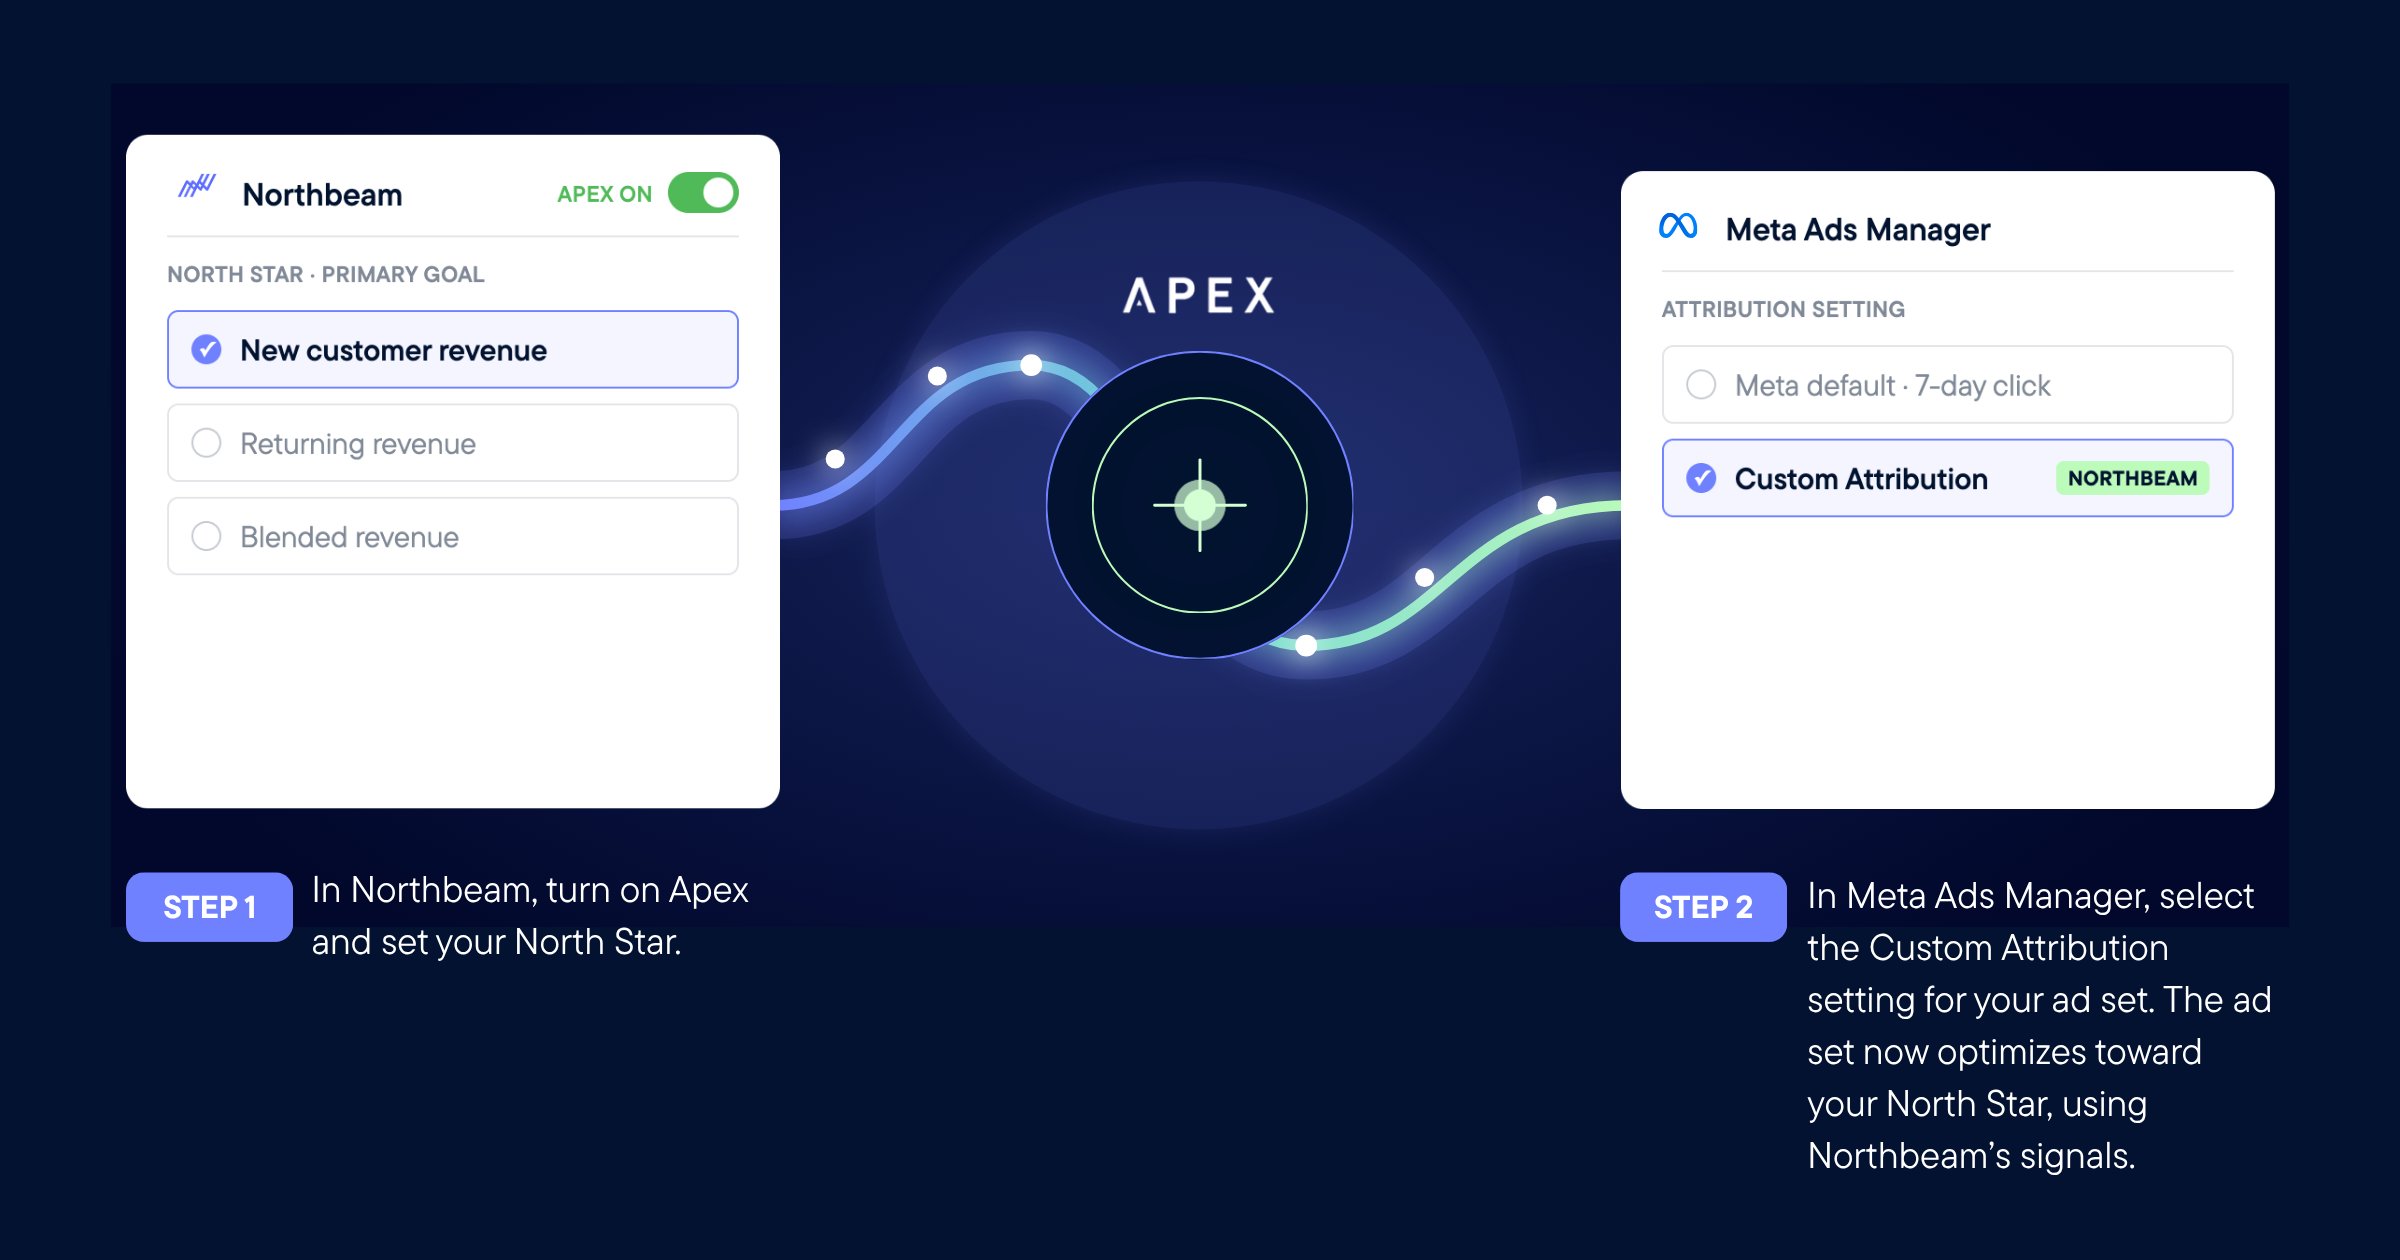
How to enable Apex for Meta
Before you start
Before setting up Apex for Meta, make sure you have the following ready:- Northbeam Access — any user on the account can enable Apex, so you don’t need to be the account owner.
- Meta Business Manager admin permissions — the Meta Ads connection in Northbeam must have been made with a login that has
business_managementpermission for every business whose pixels you want to use. Agency-managed accounts typically only haveads_managementand will need the brand to reconnect with the correct login. - An active Meta pixel — at least one pixel must have been receiving Purchase events in the last 28 days. This is Meta’s eligibility check and cannot be bypassed.
- Your North Star metric — have a decision made (or be ready to decide) on your revenue type, attribution model, attribution window, and accounting mode before starting setup.
Step 1 — Configure your North Star and enable Meta consent
In Settings → Apex: Define your North Star metric — attribution model, attribution window, and accounting mode are the three settings that directly drive Meta’s auction. Your North Star tells Meta what to optimize toward based on Northbeam’s attribution data, not Meta’s. For example, if you set it to 1st time revenue, Meta trains against Northbeam’s revenue from new customers — not Meta’s own definition of a new customer. Any user on your Northbeam account can complete this step — it does not require the account owner.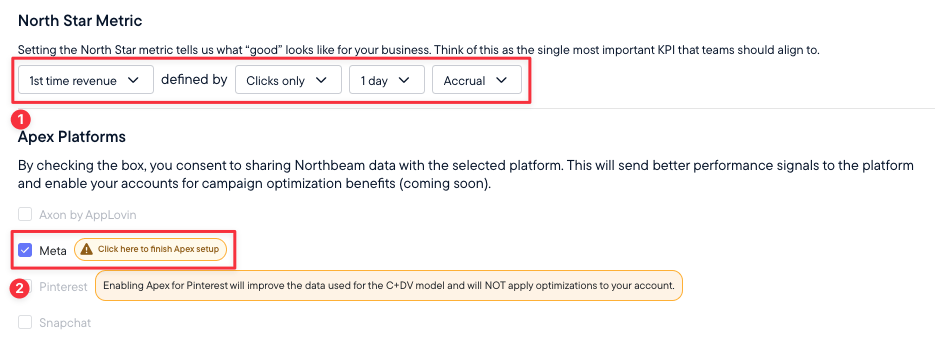
Step 2 — Connect, Configure, and Validate
Toggling on consent launches a three-step in-app wizard. You can return to it from the Apex page if you don’t finish in one session.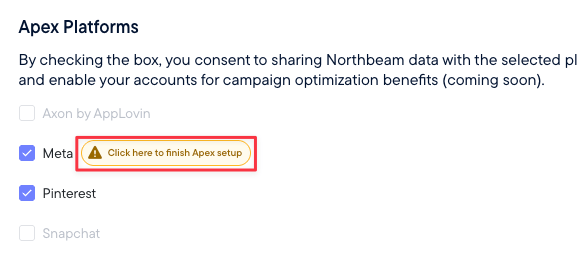
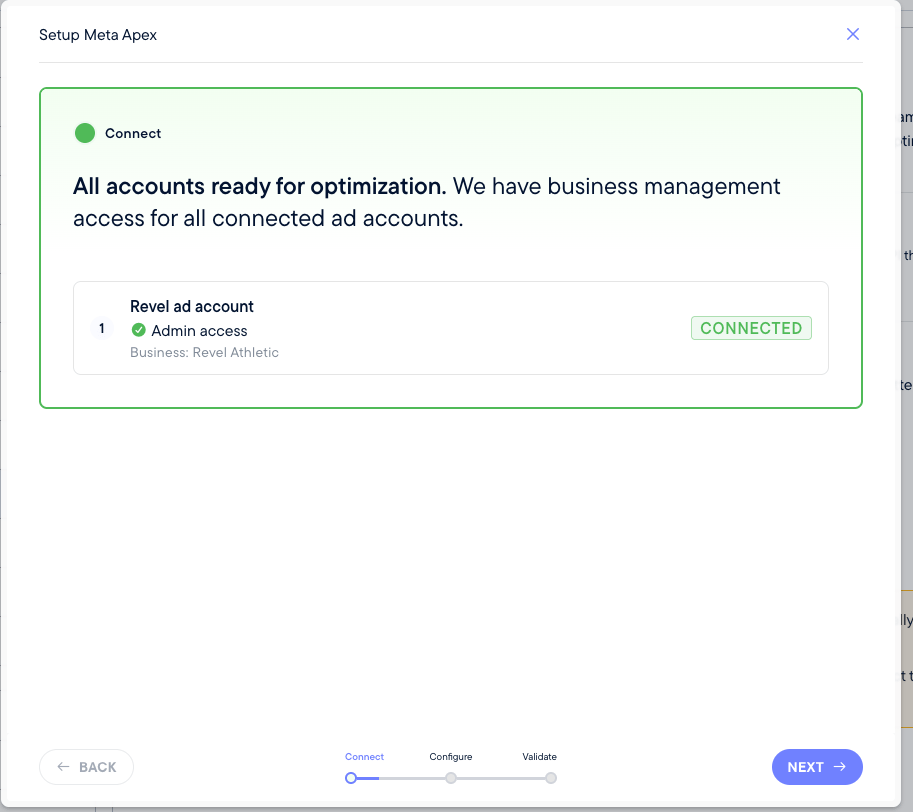
1. Connect your Ad Account(s)
Northbeam lists every Meta ad account connected to your dashboard and flags whether the active connection hasbusiness_management permission for the owning business. Accounts with the correct permission are ready to proceed; accounts without it show a reconnect prompt.
2. Configure Pixel(s)
For each account with the right permission, Northbeam displays the pixels available in that business. Pixels currently in use by active ad sets are pre-selected. Choose which pixels to enable for Apex.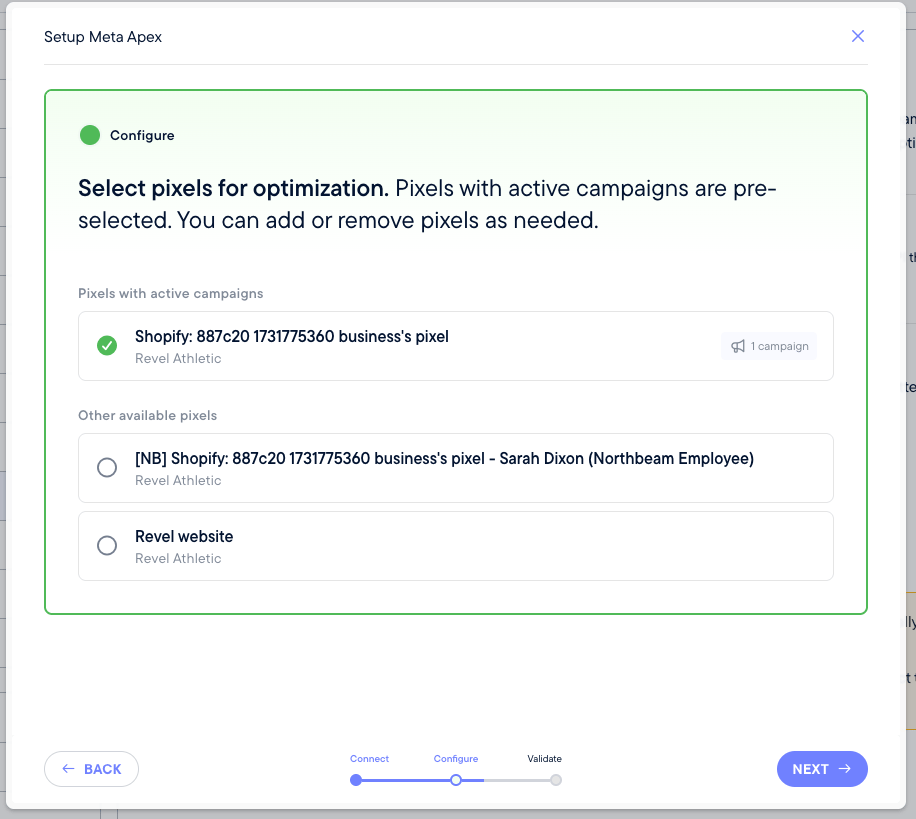
3. Validate Events
Northbeam runs the per-pixel setup with Meta and surfaces any errors inline. The most common issue: a pixel with no Purchase events in the last 28 days will fail Meta’s eligibility check. You can de-select failing pixels and proceed with the ones that pass.Validation failing with “Configuration failed.”?
Your North Star hasn’t been saved. On the Apex page, the North Star Metric dropdowns will show empty “Select..” placeholders when nothing is configured — make your selections and click Save, then re-run validation.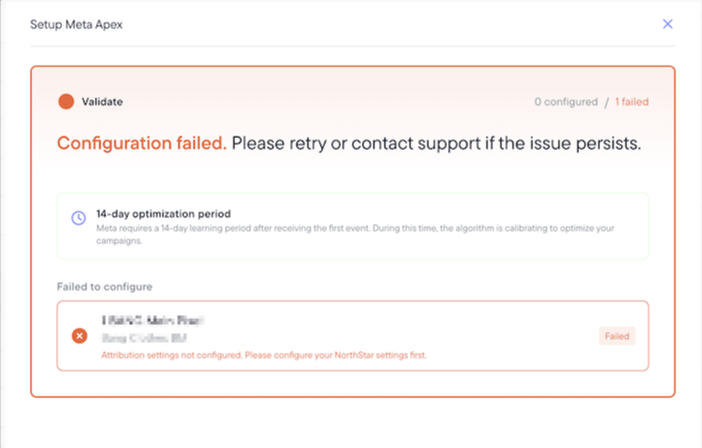
Seeing this error? Your North Star isn't saved.
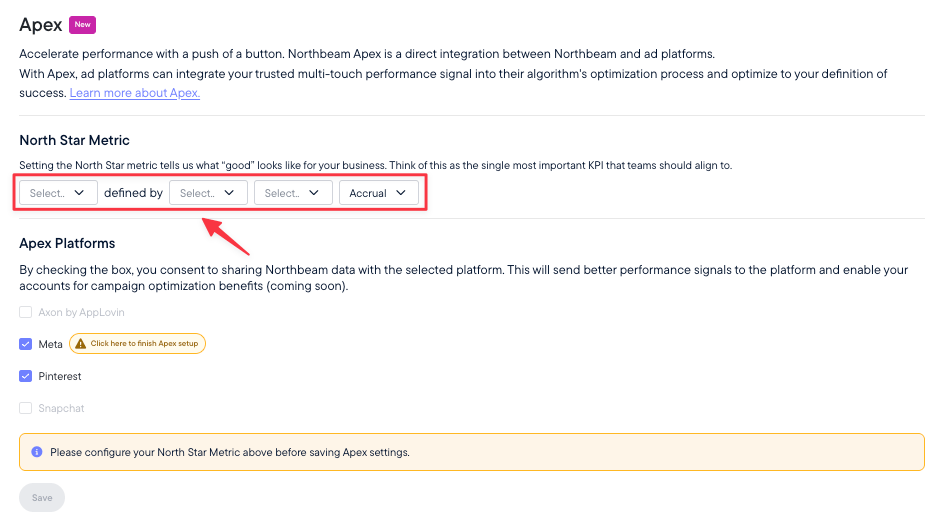
Select your North Star Metric and click Save, then re-run validation.
Step 3 — Verify
After setup, verify your Enhanced Apex configuration using the following three checks:1. Northbeam UI verification
You’ll see a badge in Apex and Connections confirming how many pixels are configured.
Pixel Configuration badge -- setup complete.
Note: Some early Enhanced Apex customers are on our legacy setup flow and may see the legacy Enhanced Apex badge. If this applies to you, your Apex setup is still working as expected**.
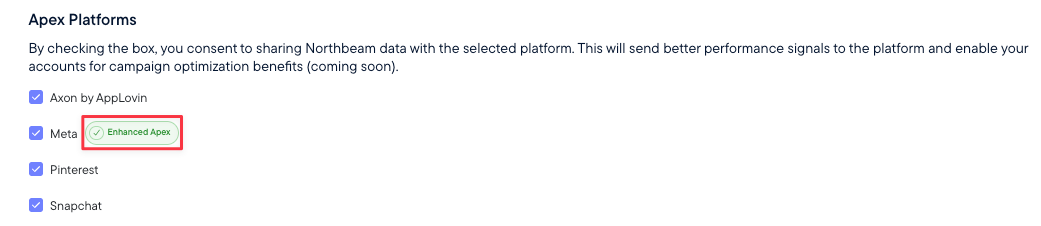
Enhanced Apex badge -- setup complete.
2. Meta connection verification
Within 48 hours, a new Custom Attribution experience will appear in Meta Events Manager on your dataset. You’ll see a test event called NorthbeamApexConnectionTest (or NorthbeamTestEvent) in Events Manager — this is expected and confirms the connection. No action required.3. Meta readiness verification
A readiness indicator on the Custom Attribution quality page will climb toward High over approximately 10 days. The campaign creation option in Ads Manager is grayed out until this training period completes. During that time, you can prepare your test campaign, but you cannot launch it yet. In Events Manager, your Custom attribution source carries a status badge that reflects where Meta is in the training process. It moves through two states:In training— Meta is still warming up the model on your Apex data. This is the expected state for approximately the first 10 days after setup. The campaign creation option in Ads Manager is grayed out during this period — you can prepare your test campaign, but you cannot launch it yet.Ready to use— training is complete and Custom Attribution is selectable in Ads Manager.
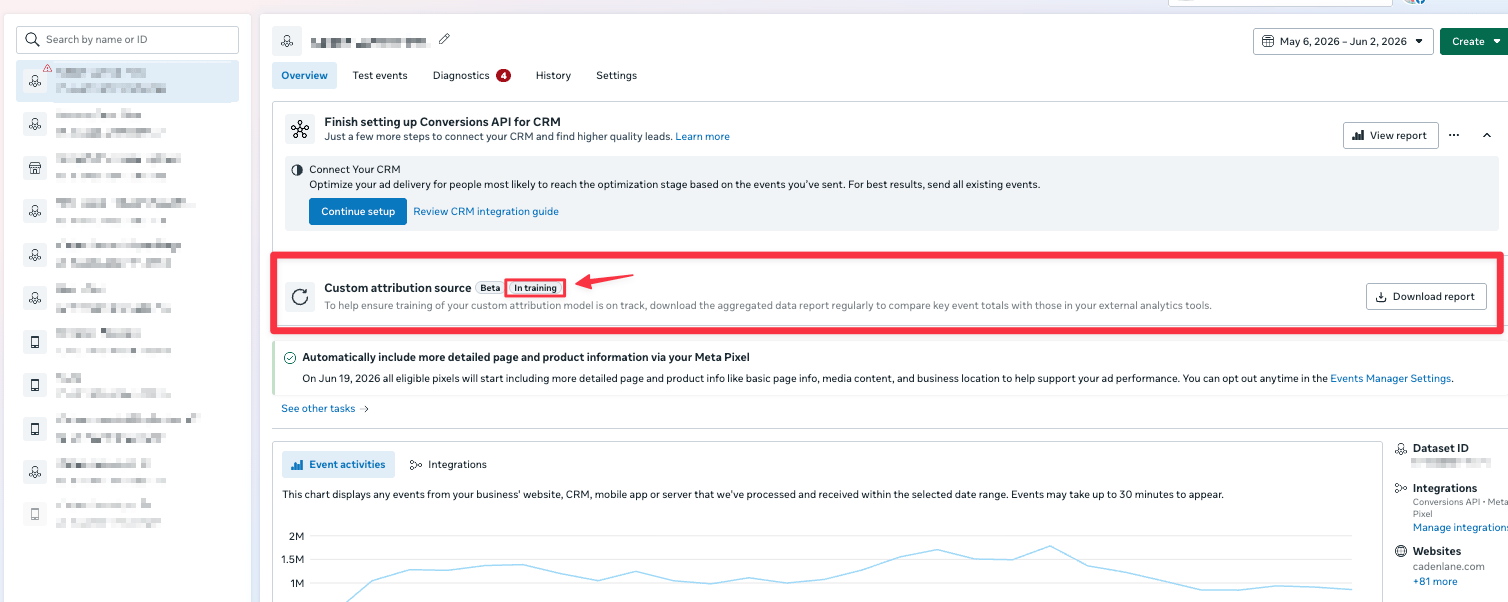
In Training
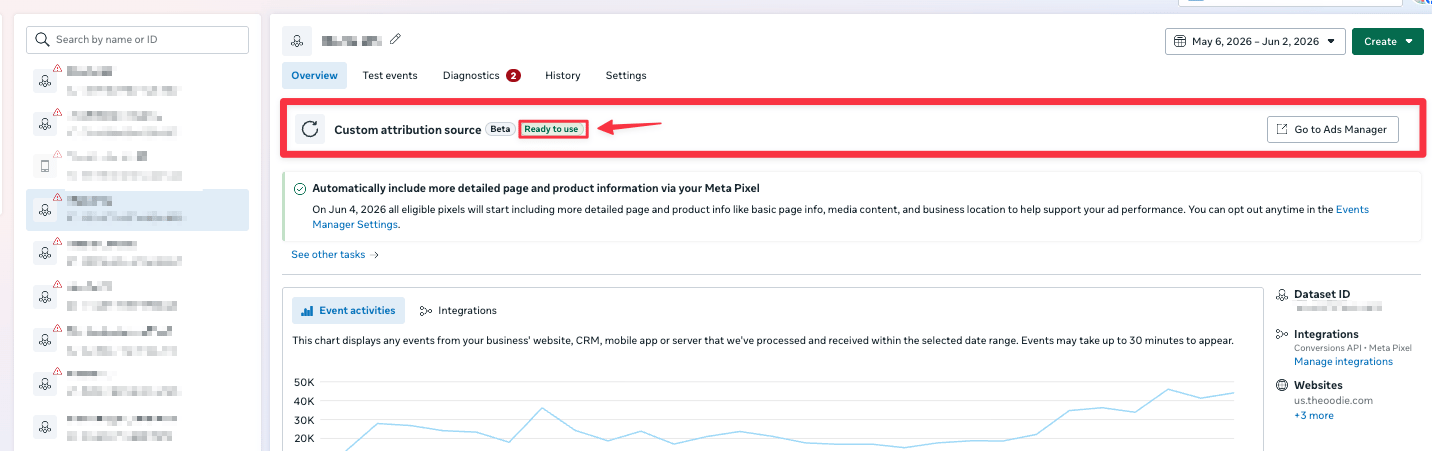
Ready to Use
Please reach out to your Customer Success Manager, Media Strategist, or Support if you have any questions.