

Introduction
This guide shows you how to track ShopMy Spotlight spend and revenue in Northbeam. ShopMy manages the Meta ad account used for Spotlight campaigns, so you do not need to connect that Meta ad account directly to Northbeam. Instead:- ShopMy sends your Spotlight spend to Northbeam automatically.
- ShopMy adds UTMs to your Spotlight campaigns.
- Northbeam uses those UTMs to track visits and attributed revenue.
- Northbeam labels group matching spend and revenue into the same campaign row.
Step 1: Connect ShopMy to Northbeam
First, create your Northbeam API credentials. In Northbeam:- Open API Keys.
- Click Create new API Key.
- Copy your API Key and Data Client ID.
- Go to Account Settings > Integrations and Tracking.
- Find the Northbeam connection.
- Paste in your API Key and Data Client ID.
- Save the connection.
Step 2: Set Up Your ShopMy Labels
This label setup should take about 2 minutes.
If you would like help with this step, contact your Northbeam CSM or submit a support ticket.- Group ShopMy Spotlight spend and revenue under the same platform.
- Consolidate matching campaign rows.
Part 1: Create the ShopMy Platform Label
First, group your ShopMy Spotlight spend and revenue under the same platform.- Go to the Breakdowns menu.
- Look for an existing breakdown called
Platform (Northbeam). - If it does not exist, create a new breakdown called
Platform (Northbeam).
Important: Use Platform (Northbeam) exactly as written, including capitalization and spacing.
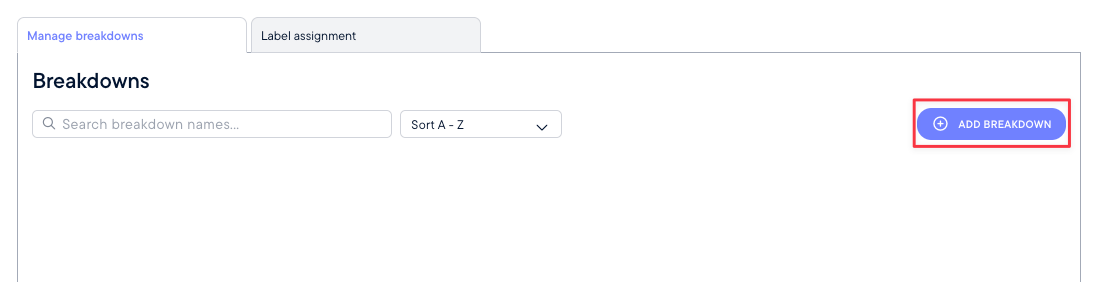
If Platform (Northbeam) doesn't already exist, create it using the exact name shown above.
- Create a new segment called
ShopMy - Spotlights. - Add the rule
Name contains Spotlight. - Click Save.
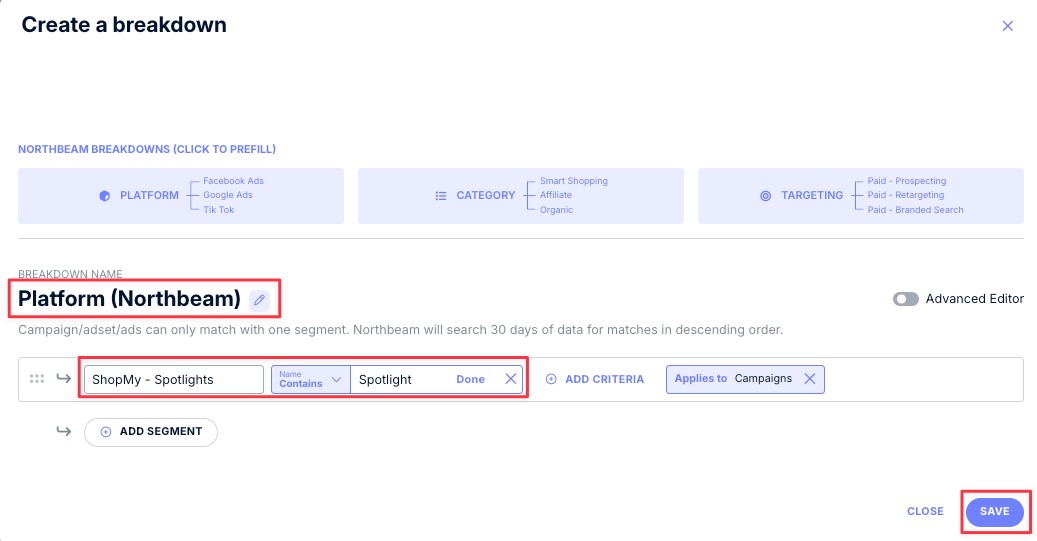
Spotlight in the campaign name.
Part 2: Create the Consolidation Breakdown
Next, create a breakdown that combines matching spend and revenue rows.Create the Breakdown
- Create a new breakdown, such as
Spend + Rev Consolidation. - Switch to the Advanced Editor.
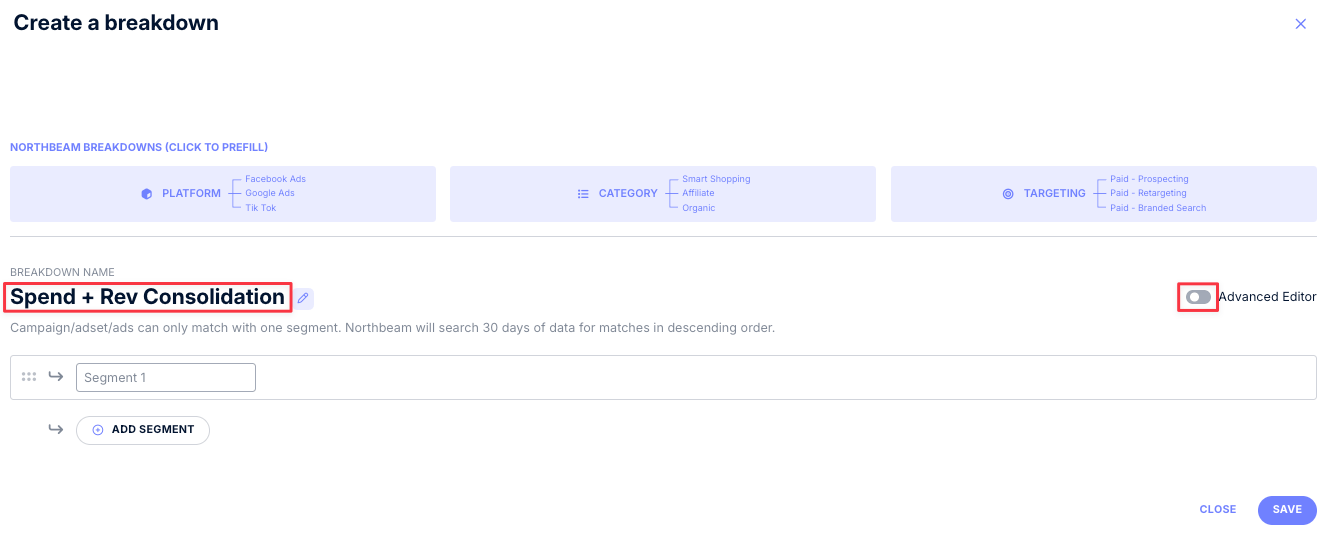
Add the Consolidation Logic
- Create a new segment, such as
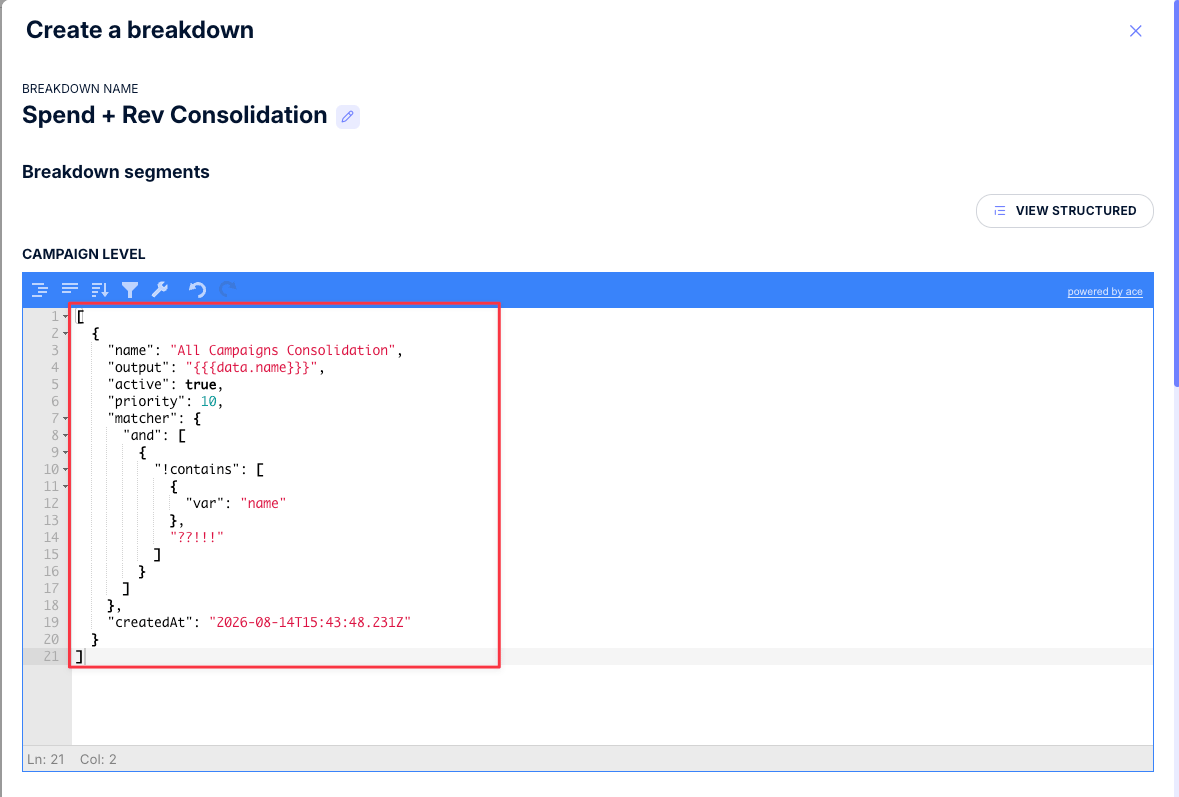
All Campaigns Consolidation. - Add the rule
Namedoes not contain??!!!.
Note: ??!!! is just a placeholder used to make this rule apply to all campaigns. You can replace it with any value that would not normally appear in a campaign name.
This also makes the breakdown reusable for other Spend Sheet or Spend API channels that need matching campaign names to consolidate.
- Set the Output Label Value to
{{{data.name}}}. - Click Add Segment.
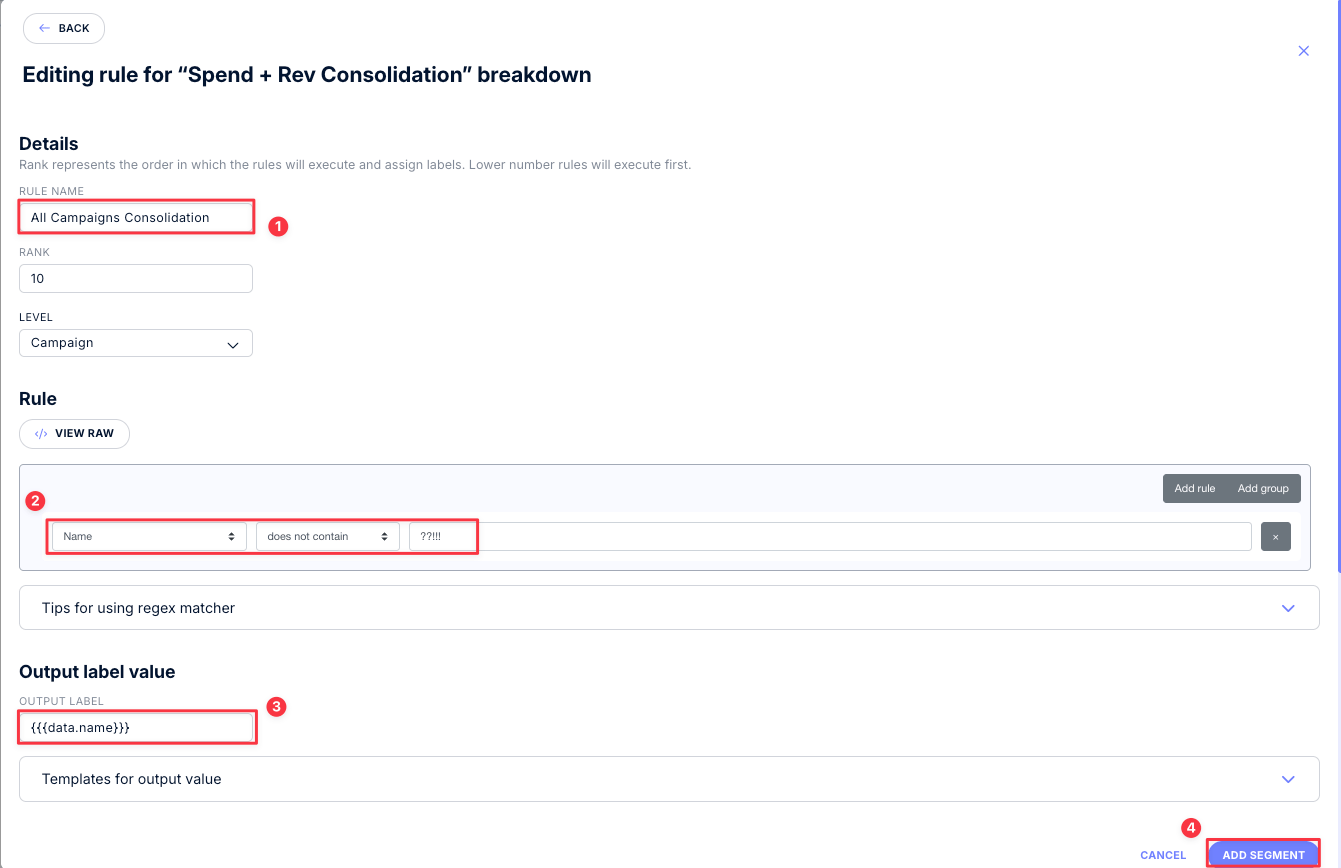
- Click Save.
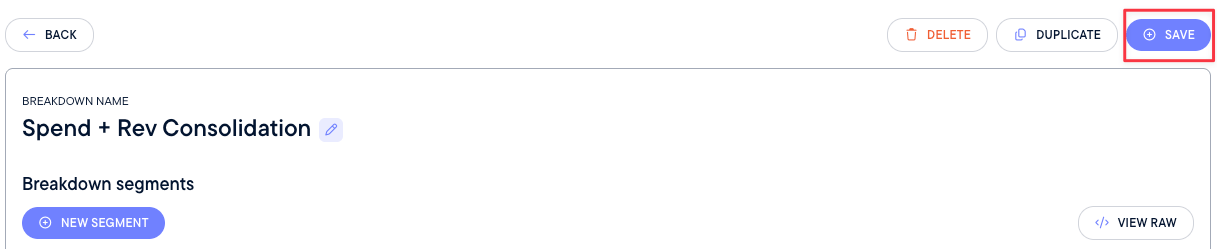
{{{data.name}}} uses the existing campaign name as the label.
When the ShopMy spend campaign name matches its utm_campaign, Northbeam gives both rows the same output label and groups them together.
For example, if both use Spotlight 1111 - John Doe, the spend and attributed revenue will appear under the same campaign.
Optional: Use Raw Code
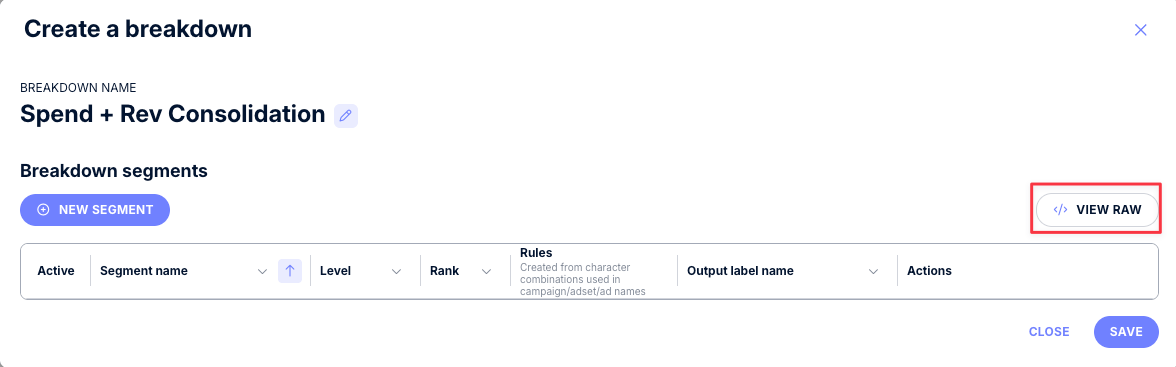
Instead of creating the segment manually, you can paste the code below into the raw editor.- Create your
Spend + Rev Consolidationbreakdown and click View Raw.
- Paste in the code from above.
- Scroll down and click Save.

Step 3: Validate Your Setup
After your labels are set up:- Apply Platform (Northbeam) as a breakdown.
- Add your Spend + Rev Consolidation breakdown underneath it.
- Find ShopMy - Spotlights.
- Add metrics that include both Spend and Session or Conversion data (ex. Spend, Visits, Cost per Visit, Orders, CPO, Revenue, or ROAS)
- Confirm that your Spotlight campaigns show both spend and visits where expected.
utm_campaign.
Look for differences in:
- Spelling
- Spaces
- Capitalization
- Punctuation
- Hyphens
ShopMy Organic Traffic
The setup above is for ShopMy Spotlights. For organic ShopMy traffic, you can use your normal UTM structure. We recommend using a clearutm_campaign, such as utm_campaign=[campaign name], so you can easily identify ShopMy campaigns in Northbeam.
Organic ShopMy traffic does not require the spend consolidation setup above.
ShopMy FAQ
1. Does ShopMy automatically send spend to Northbeam?
Yes. Once you add your Northbeam API Key and Data Client ID in ShopMy, ShopMy sends your Spotlight spend to Northbeam during its daily sync.2. Do I need to add UTMs to my Spotlight campaigns?
No. ShopMy automatically adds the required UTMs to Spotlight campaigns.3. Why do I need the labels?
The labels group matching ShopMy spend and Northbeam-attributed revenue together at the campaign level. This lets you view Spend, Revenue, and ROAS for each Spotlight campaign in one place.4. Why aren’t my spend and revenue appearing together?
Check that the ShopMy campaign name matches the correspondingutm_campaign.
Look for differences in spelling, spaces, capitalization, punctuation, or hyphens.
If the names match and you still have an issue, contact your Northbeam CSM or submit a support ticket.