
Order Tags
Order Tags are used to label orders within Northbeam. This begs the question -- why would I need to label my orders?
What are Order Tags?
Order Tags is a piece of data (usually a word or words) attached to an order. In Northbeam, they're used to label special type of orders type of orders.
What are Order Tags used for?
Order Tags have two primary uses within Northbeam:
- Addressing Unattributed Orders
- Subscription Orders
1. Addressing Unattributed Orders
Order Tags are meant to exclude any Unattributed Orders that we expect to be Unattributed. This is an extremely important step of the Onboarding Process called Data Validation. Learn more about Unattributed here.
2. Subscription Orders
Order Tags are also used for Subscription Orders. We use tags to distinguish between One-Time Orders and Subscription Orders. To take it one step further, tags are also used to distinguish between First Time Subscription Orders and Recurring Subscription Orders.
Step 1: Placing Order Tags
Tags are to be placed through your Order Management System, which will sync with Northbeam.
- Shopify Brands -- Tags placed on the Order level (or Customer level). See Shopify docs here. Once tags are placed on your respective orders, our native Shopify connector will import the tags.
- All Other Platforms (WooCommerce, Magento, Custom) -- Tags are to be passed through the Orders API. During your onboarding process, a REST API was set up to send POST requests to our server. Within our API docs, you'll see an object called
order_tags. Please pass tags using this object for all appropriate orders.
Step 2: Checking Order Tags
Once the Tags are set up in your Order Management System (ex. Shopify or Orders API), it's important to make sure they're getting pulled into your dashboard.
The Orders Page is a perfect place to do this.
- On the left navigation, click the Shopping Cart icon
- Scroll down to the table
- Click the column called "Tags" and see if they're getting pulled through for all necessary orders
- If there's lots of volume, it may be easier to export the data by clicking "Export Data"
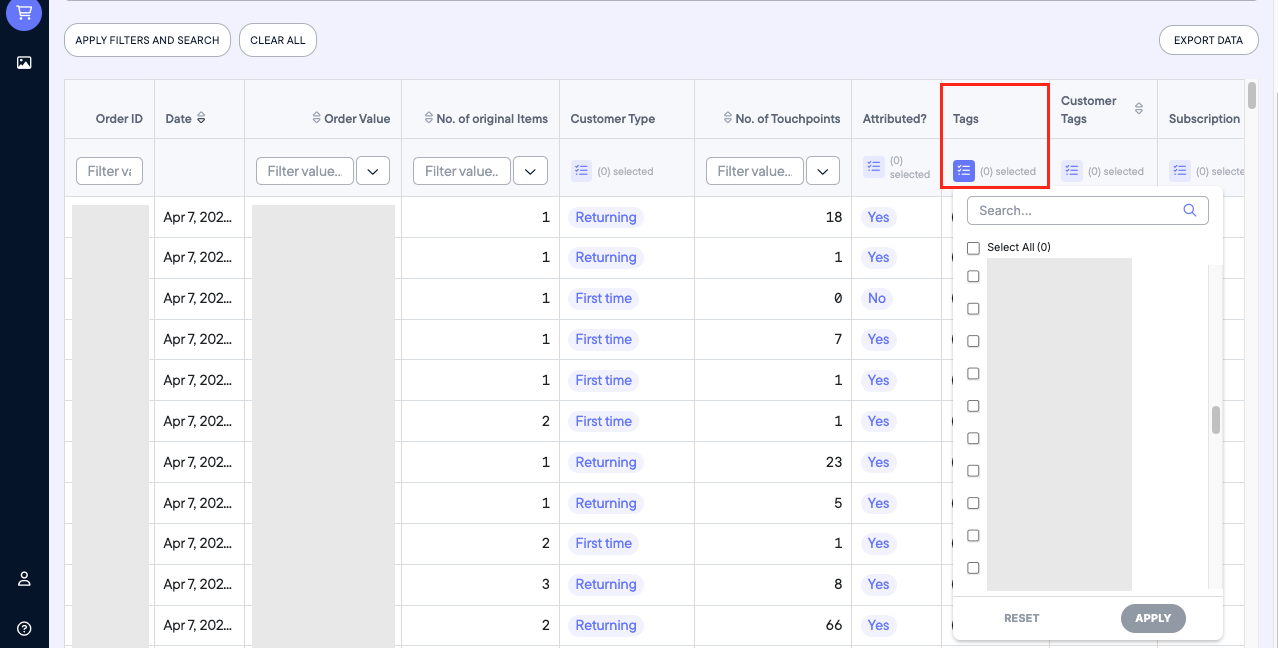
Orders Page > Tags
Step 3: Applying Order Tag Exclusions
Great! Once you've confirmed that the tags are in, let's exclude using the Order Exclusion tool.
To find Order Exclusion tool:
- Click Settings
- Click Exclude orders by tag
- Click Add Exclusion
- Populate the Tag Type, Logic, and Tag Name
- Don't forget to toggle it to Active
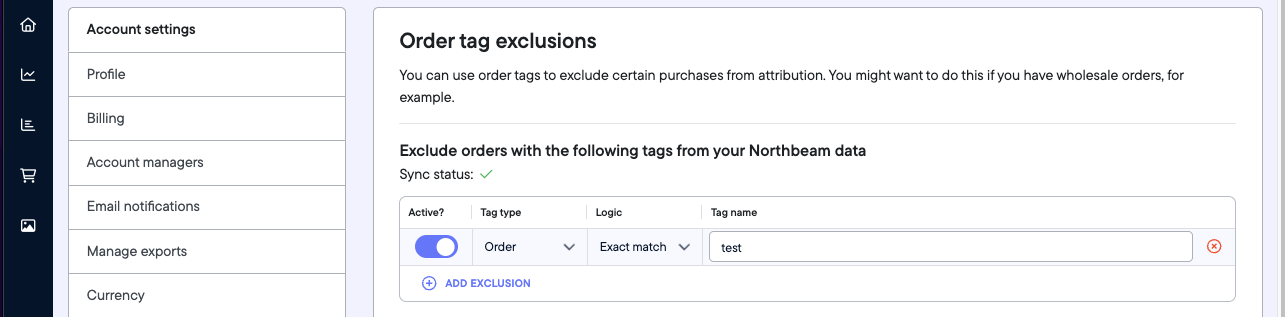
Settings > Exclude Orders by Tag
Step 4: Seeing your Excluded Orders
As a result, all orders with an excluded tag will be grouped into the platform called "Excluded". These can be seen on the Sales Page.
- Navigate to the Sales Page
- Toggle to the Campaign Level and apply the Platform breakdown
- Expand the Excluded group and you'll see the individual tags, along with associated transactions and revenue
- Labeled as
Excluded: [Tag Name]
- Labeled as
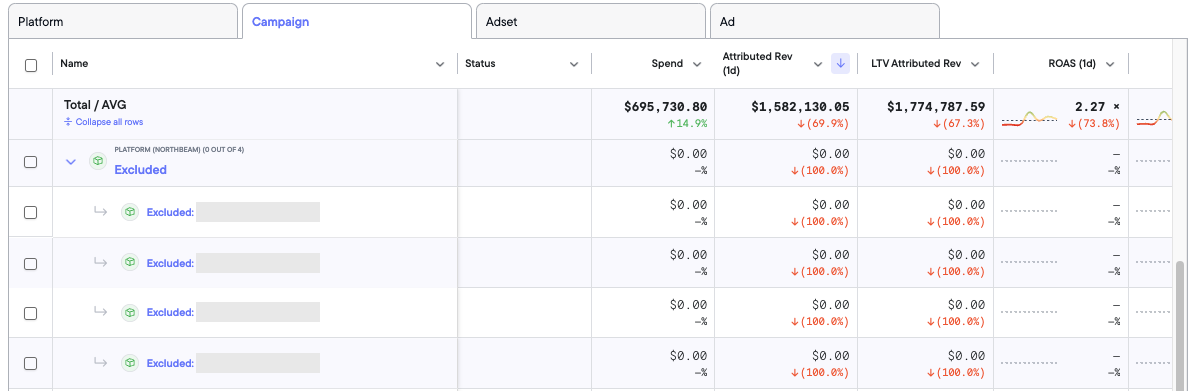
Sales Page > Campaign Level > "Excluded" Platform
Step 5: Filtering out Excluded (Optional)
When an order is Excluded, it's moved to the group named "Excluded" and the associated Transactions and Revenue are still included in the view.
If we want to remove these, we can use the Filter function.
Filtering in the Sales Page
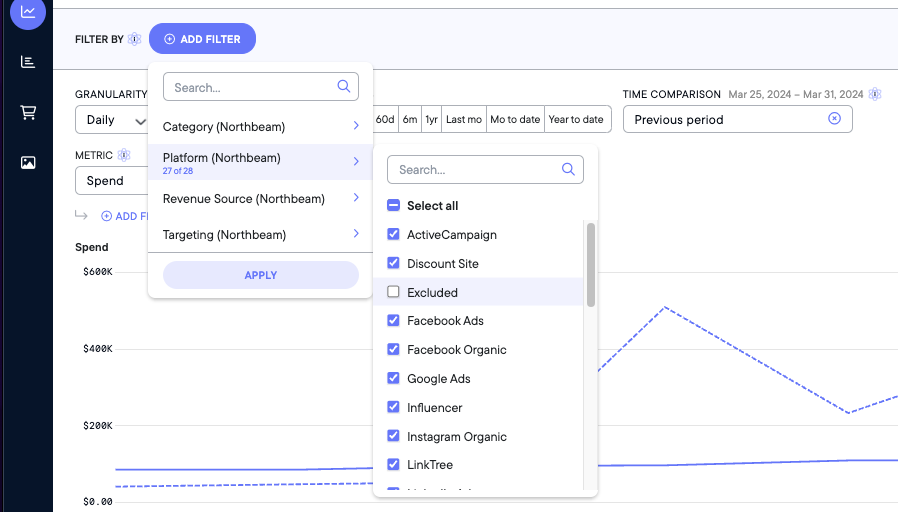
Filter function in the Sales Page
(Add Filter > Platform > Untick "Excluded" > Apply)
Filtering in the Overview Page
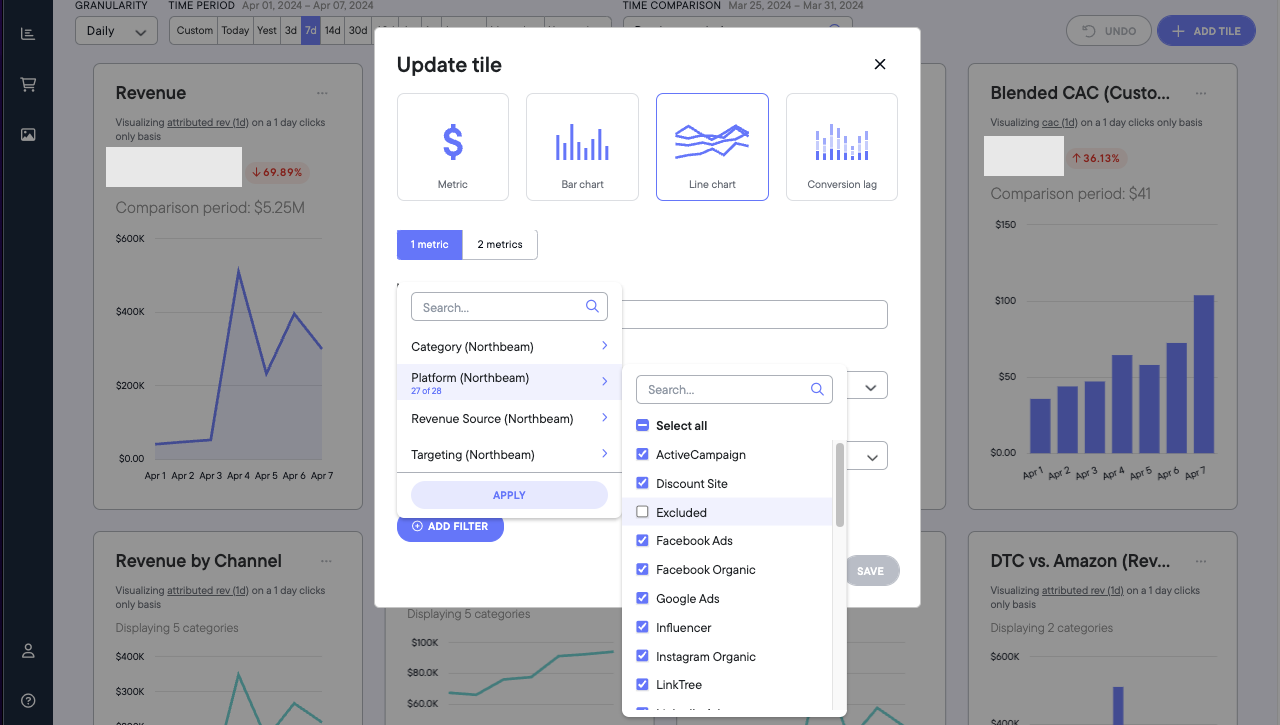
Filter function in Overview Page
(3 dots the tile > Tile Settings > Add Filter > Platform > Untick "Excluded" > Apply)
Updated 9 months ago