
Tracking for Impact
Table of Contents
- Introduction
- How Impact data maps to Northbeam
- Step 1: Connect Your Impact Account
- Step 2: Insert Northbeam UTM Parameters
- Step 3: Remove Impact Custom Spend (Optional)
- Impact FAQ
Introduction
This guide will show you how to set up tracking for the following Impact metrics in Northbeam:
- Spend, visits, and all conversion-based metrics attributed to Impact campaigns
- Partner and campaign data imported from Impact's reporting
| Input | Output | If Input is missing... |
|---|---|---|
| Impact Integration | The following data is pulled into your dashboard:
| Campaign, Partner, and Ad names will be missing, along with spend metrics. |
| Northbeam UTM Parameters | Revenue, Transactions, and Visit attribution to your Campaigns and Partners | Northbeam UTM parameters create the linkage between your Impact ads and the conversions they drive. If missing, your ad spend and revenue will be reported on different line items, making it very difficult to draw insights. |
How Impact data maps to Northbeam
Once connected, Impact data appears in your Northbeam dashboard across three levels:
| Impact Level | Northbeam Level |
|---|---|
| Program (Campaign) | Campaign Level |
| Partner | Adset Level |
| Ad | Ad Level |
This mirrors Impact’s native hierarchy — Programs (campaigns) contain partners, and partners use individual ads/creatives.
Step 1: Connect Your Impact Account
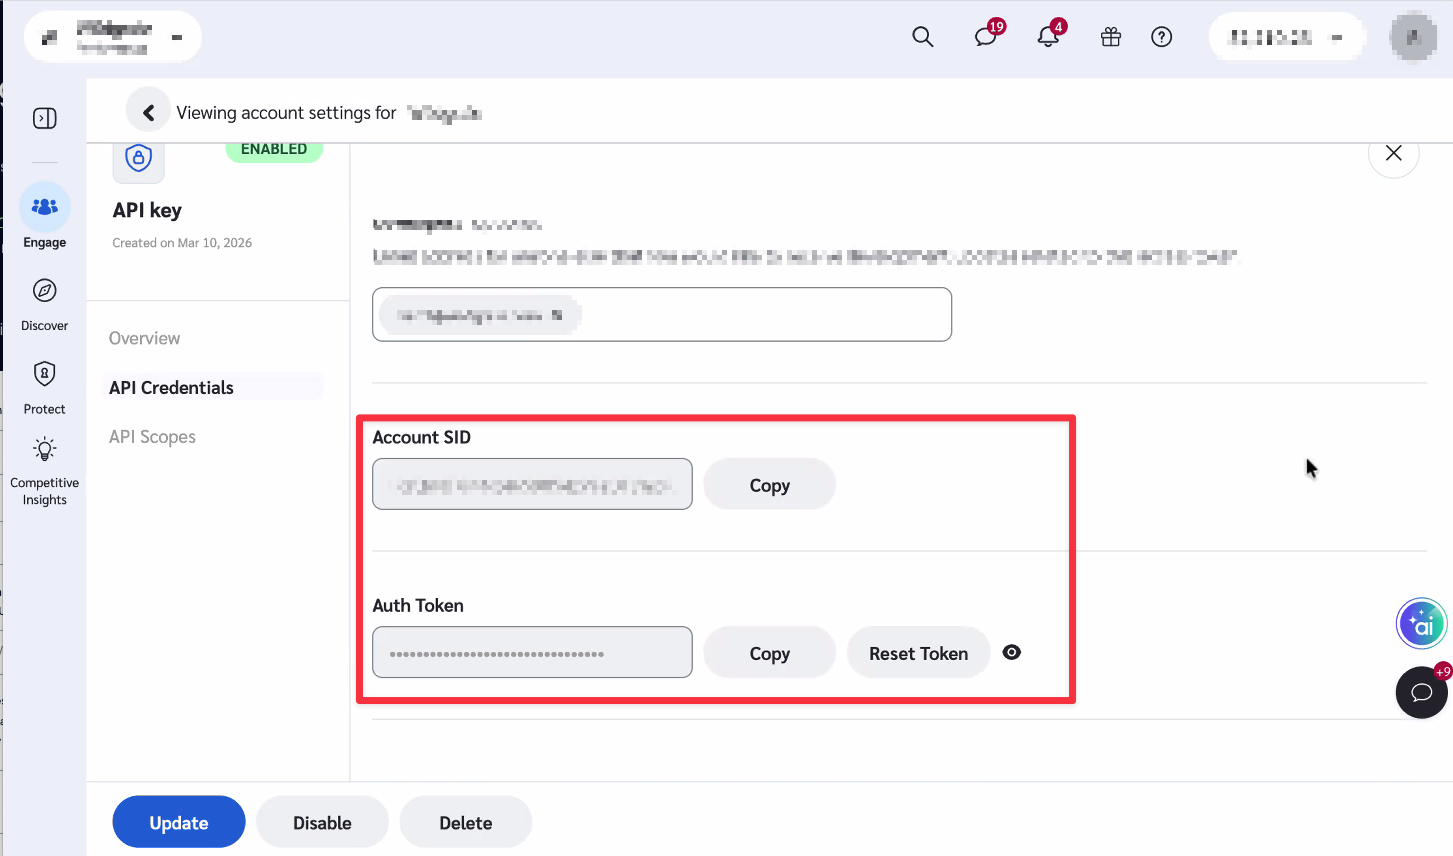
1A: Find your Impact credentials
Northbeam connects via Impact's Legacy API Token. You'll need your Account SID and Auth Token.
Required RoleOnly users with the Account Administrator or Implementation Specialist role in Impact can access API credentials.
If you don't see the API section in Settings, ask your Impact account admin to either grant you one of these roles or retrieve the credentials on your behalf.
- In Impact, go to [User profile] → Settings → Technical → API
- Click Create Access Token — refer to Impact's guide for detailed steps
- Complete the Setup and Contact Information steps
- On the API Scopes step, select the following (all GET):
/Advertisers/<AccountSID>/Campaigns/Advertisers/<AccountSID>/Actions/Advertisers/<AccountSID>/Ads/Advertisers/<AccountSID>/MediaPartners/Advertisers/<AccountSID>/ReportExport/{ReportId_or_Handle}/Advertisers/<AccountSID>/Reports/Advertisers/<AccountSID>/Reports/{ReportId}
- Click Create
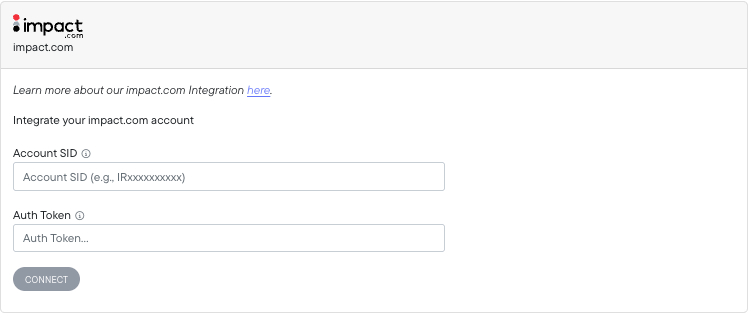
1B: Connect in Northbeam
- Onboarding: Go to Integrations > Impact
- Dashboard: Go to Settings > Connections > Impact
Paste your Account SID and Auth Token, then click Connect.
If you see "An error occurred: Invalid credentials," double-check both values and try again.
Step 2: Insert Northbeam UTM Parameters
Add the following custom UTM parameter to the click URLs for all new and existing Impact ads:
| Parameter Name | Value |
|---|---|
nbt | nb:impact::{ircid}:{irpid}:{iradid} |
Step-By-Step Guide
- In Impact, go to [User profile] → Settings → Gateway
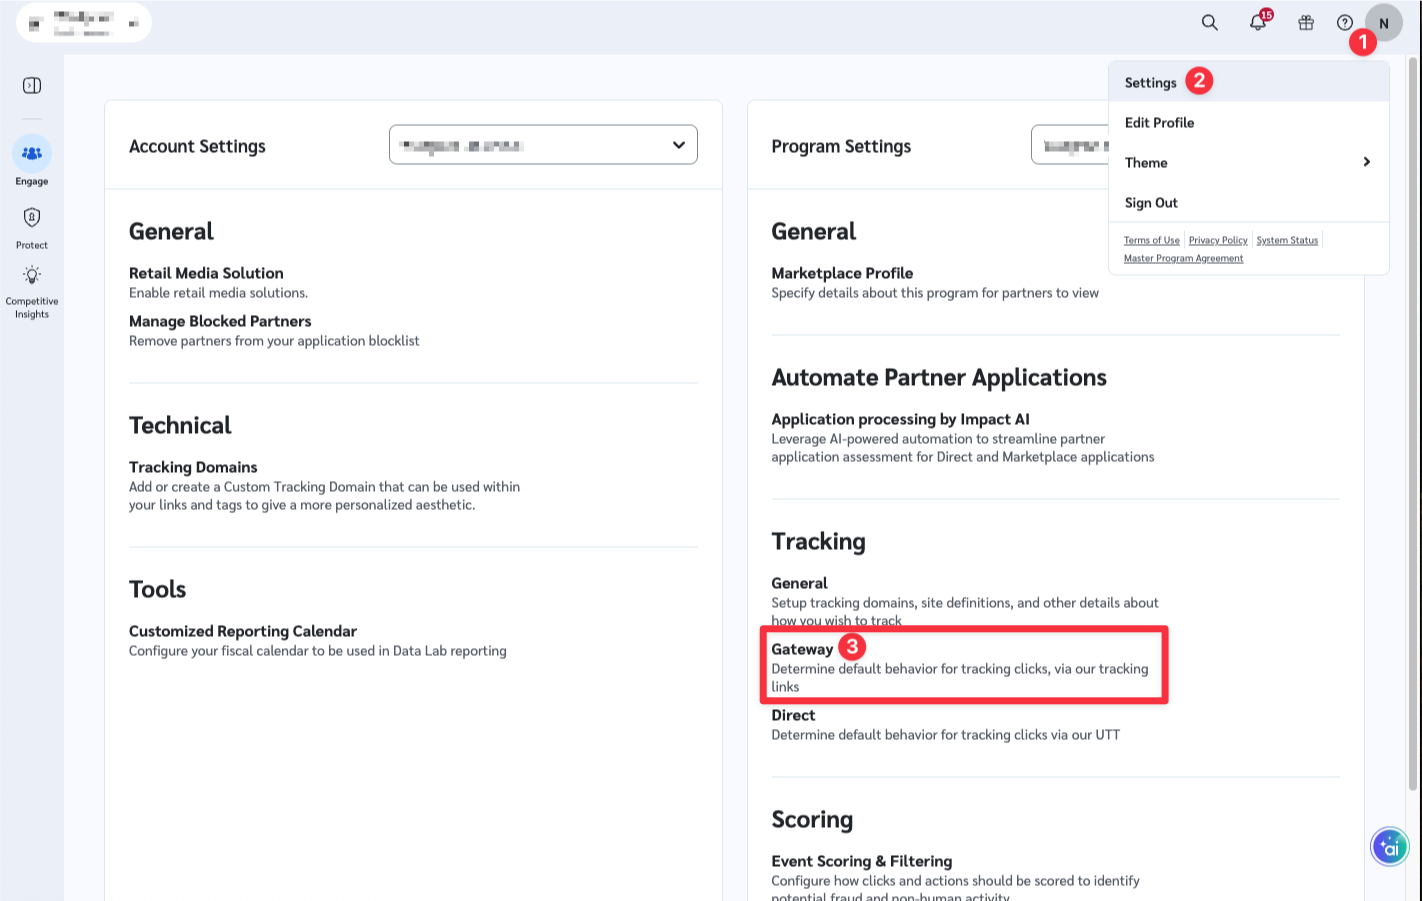
- Under Program Tracking Template, add a new parameter row:
- Name:
nbt - Value:
nb:impact::{ircid}:{irpid}:{iradid}
- Name:
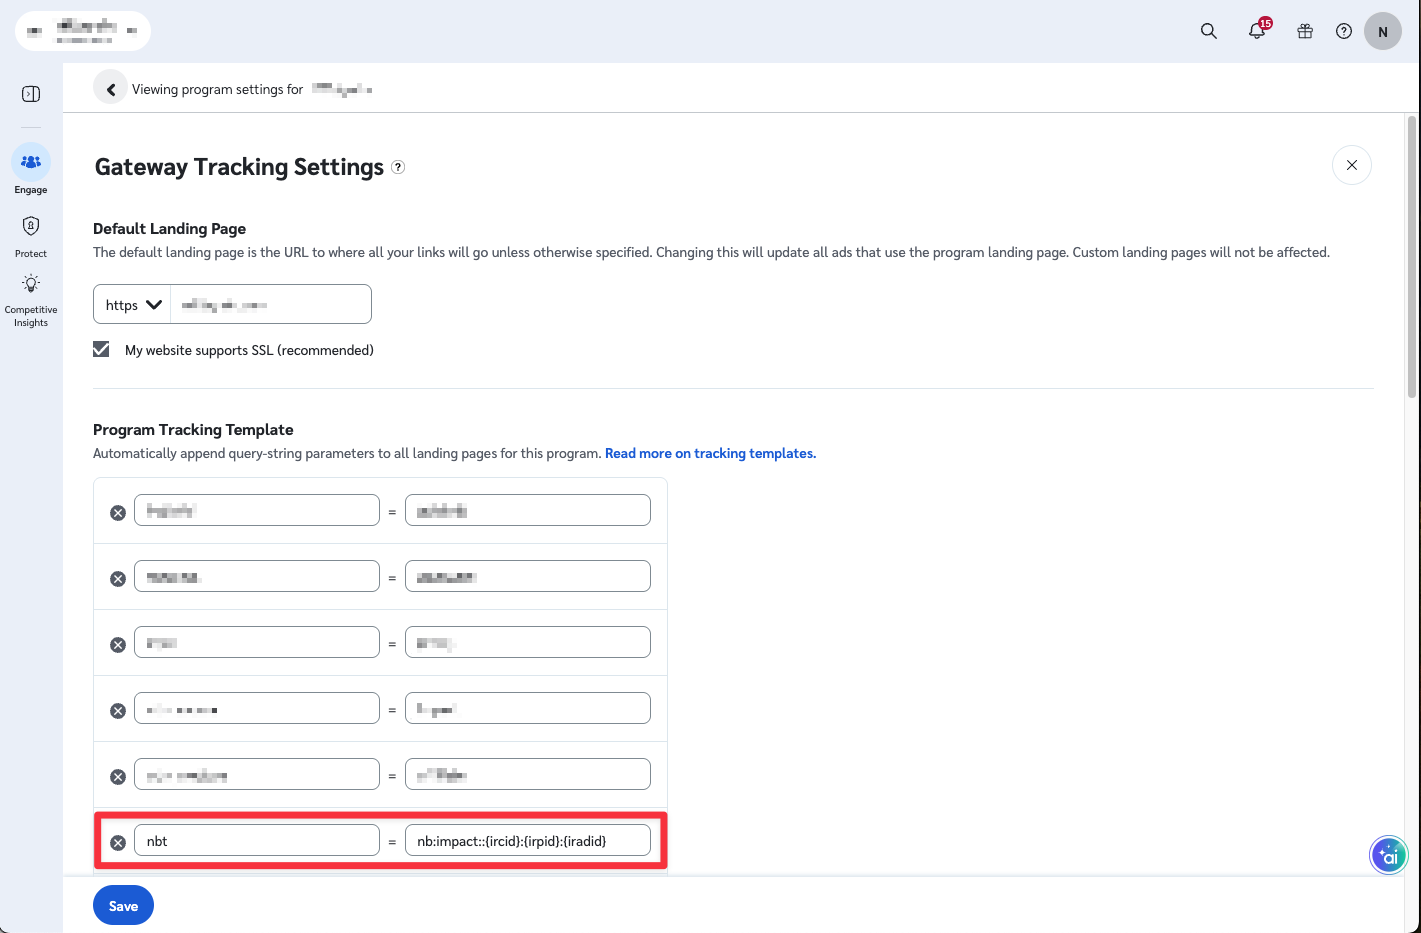
- Click Save
Step 3: Remove Impact Custom Spend (Optional)
Once connected, Northbeam pulls up to 3 years of historical spend data from Impact. If you're currently sending Impact spend via a Spend Sheet or Spend API, you may want to remove overlapping spend to avoid duplicate reporting.
For example:
- If the integration is connected on
5/10/26, Northbeam will backfill Impact spend data to5/10/23
If you have Impact spend data older than the integration lookback window and would like to preserve it, keep those older records in place.
Removing from Spend Sheet
-
Locate the sheet tied to Impact
-
Zero out the Impact spend that overlaps with the integration backfill period
- Example: if connecting on
5/10/26, zero out Impact spend from5/10/23onward
- Example: if connecting on
Important: Do Not Delete Rows, Columns, or CellsDo not delete any columns, rows, or cells from the Spend Sheet. Instead, replace the overlapping Impact spend values with
0.Custom spend sheets can vary by setup. Some use formulas tied to raw data import tabs, while others use manually entered spend.
Removing from Spend API
Delete existing Impact spend records using the Delete Spend endpoint: https://docs.northbeam.io/reference/delete\_spend
Need Help?
If you're unsure which values to remove, please submit a support ticket and we’d be happy to help.
Impact FAQ
1. Can I connect multiple Impact accounts?
At this time, Northbeam supports connecting one Impact account per dashboard.
If you manage multiple Impact accounts, you can still track the others by:
- Connecting one account through the native Impact integration
- Sending spend for additional accounts via a Spend Sheet or Spend API
- Using standard UTMs for tracking on those additional accounts
Any non-connected Impact accounts will work similarly to other Non-Integrated Channels.
2. Can I use other UTM parameters alongside Northbeam's?
Yes — Northbeam's nbt parameter is additive and will not interfere with any other parameters you're already using. Feel free to keep parameters like utm_source, utm_medium, utm_campaign, or any other tracking params for Google Analytics or other platforms. Northbeam only uses nbt for attribution.
3. I was already using Northbeam's previous recommended UTMs for Impact. Do I need to switch?
You can either swap them out for the new nbt parameter or simply add nbt alongside your existing params — there's no harm in leaving the old ones in place. Northbeam uses nbt to tie sessions back to the correct ad spend, so as long as nbt is present, attribution will work correctly.
4. Why do I see a data discrepancy?
Discrepancies in Revenue and Orders are expected. The key reason is a difference in attribution methodology:
- Impact's attribution credits 100% of each conversion to a single partner using Impact's own click-based rules
- Northbeam's attribution treats Impact data as one input into cross-channel, multi-touch attribution — so conversions may be shared with or re-assigned to other channels
For more details: Why are my metrics different in Northbeam than in-platform reporting?
5. I think there's an issue with tracking. Please help!
Please reference our Troubleshooting Tracking Issues FAQ.
- Connection: Go to Settings > Connections and check for any errors on the Impact connection
- UTMs: Ensure all Impact click URLs include the Northbeam
nbtparameter listed in Step 2 - Northbeam Pixel: Confirm the Northbeam pixel is firing on your landing page
- Purchase Pixel: Confirm the Purchase pixel is firing on your checkout page
Updated about 1 month ago