
Custom Goals
🧠 Custom Goals Overview
What are Custom Goals?
Custom Goals allow you to track actions that occur on your website..
// Args:
// Arg0: The name of the custom goal.
// Arg1: An empty object.
<script>
  window.Northbeam.fireCustomGoal("sms_signup", {})
</script>
Examples include:
- Email or SMS signups
- Add to Cart events
- Initiate Checkout events
- Quiz submissions
- Lead form submissions
- Any other important website interaction
How Custom Goals Work
- A visitor completes an action on your website
fireCustomGoal()sends the event to Northbeam- The Goal ID is registered in your dashboard
- The event becomes available as a metric in reporting
Custom Goals are client-side events
fireCustomGoal()must fire directly on your website while the Northbeam Pixel is active in the visitor’s browser session.Server-side events, webhook events, or backend-only events are not currently not supported.
These events must occur on the same website domain where the Northbeam Base Pixel is installed.
Supported Examples
- Button clicks
- Form submissions
- Quiz completions
- Add to Cart actions
- Initiate Checkout events
Unsupported Examples
- Backend webhook events
- Server-side API calls
- Offline events
- CRM-triggered events
- Events occurring outside the browser session
How to set up Custom Goals
Step 1: Confirm the Northbeam Pixel is Installed
Before implementing Custom Goals, confirm:
- The Northbeam Base Pixel is firing on the page where the event occurs
- The event occurs on the same website domain where the Northbeam Base Pixel is installed
Custom Goals will not track correctly unless the Northbeam Base Pixel is already installed and firing first.
Step 2: Implement the Script
<script>
  window.Northbeam.fireCustomGoal("sms_signup", {})
</script>- Replace
sms_signupwith your own Goal ID. - This Goal ID becomes the metric name you'll register in the Northbeam dashboard.
The event can be deployed:
- Through Google Tag Manager (recommended for most setups)
- Directly in your website code
fireCustomGoal()should only fire when the intended action occurs.Examples:
- After a form submission succeeds
- After an Add to Cart button click
- After a quiz submission completes
Goal ID rules:
- Lowercase letters, numbers, and underscores only (e.g.
sms_signup,add_to_cart)- No hyphens or spaces — the event won't show up in the dashboard
- Must exactly match what you register in Step 3
- Tracks event count only — no revenue or values can be passed
Recommended Naming Conventions
Examples:
sms_signupemail_signupadd_to_cartquiz_submitinitiate_checkout
Step 3: Add the Goal ID in the dashboard
Go to Settings → Custom Goals and add a new entry:
- Goal ID → Enter the exact same Goal ID used in your script (example:
sms_signup) - Display Name → Enter the reporting label shown in Northbeam (example:
SMS Signup)
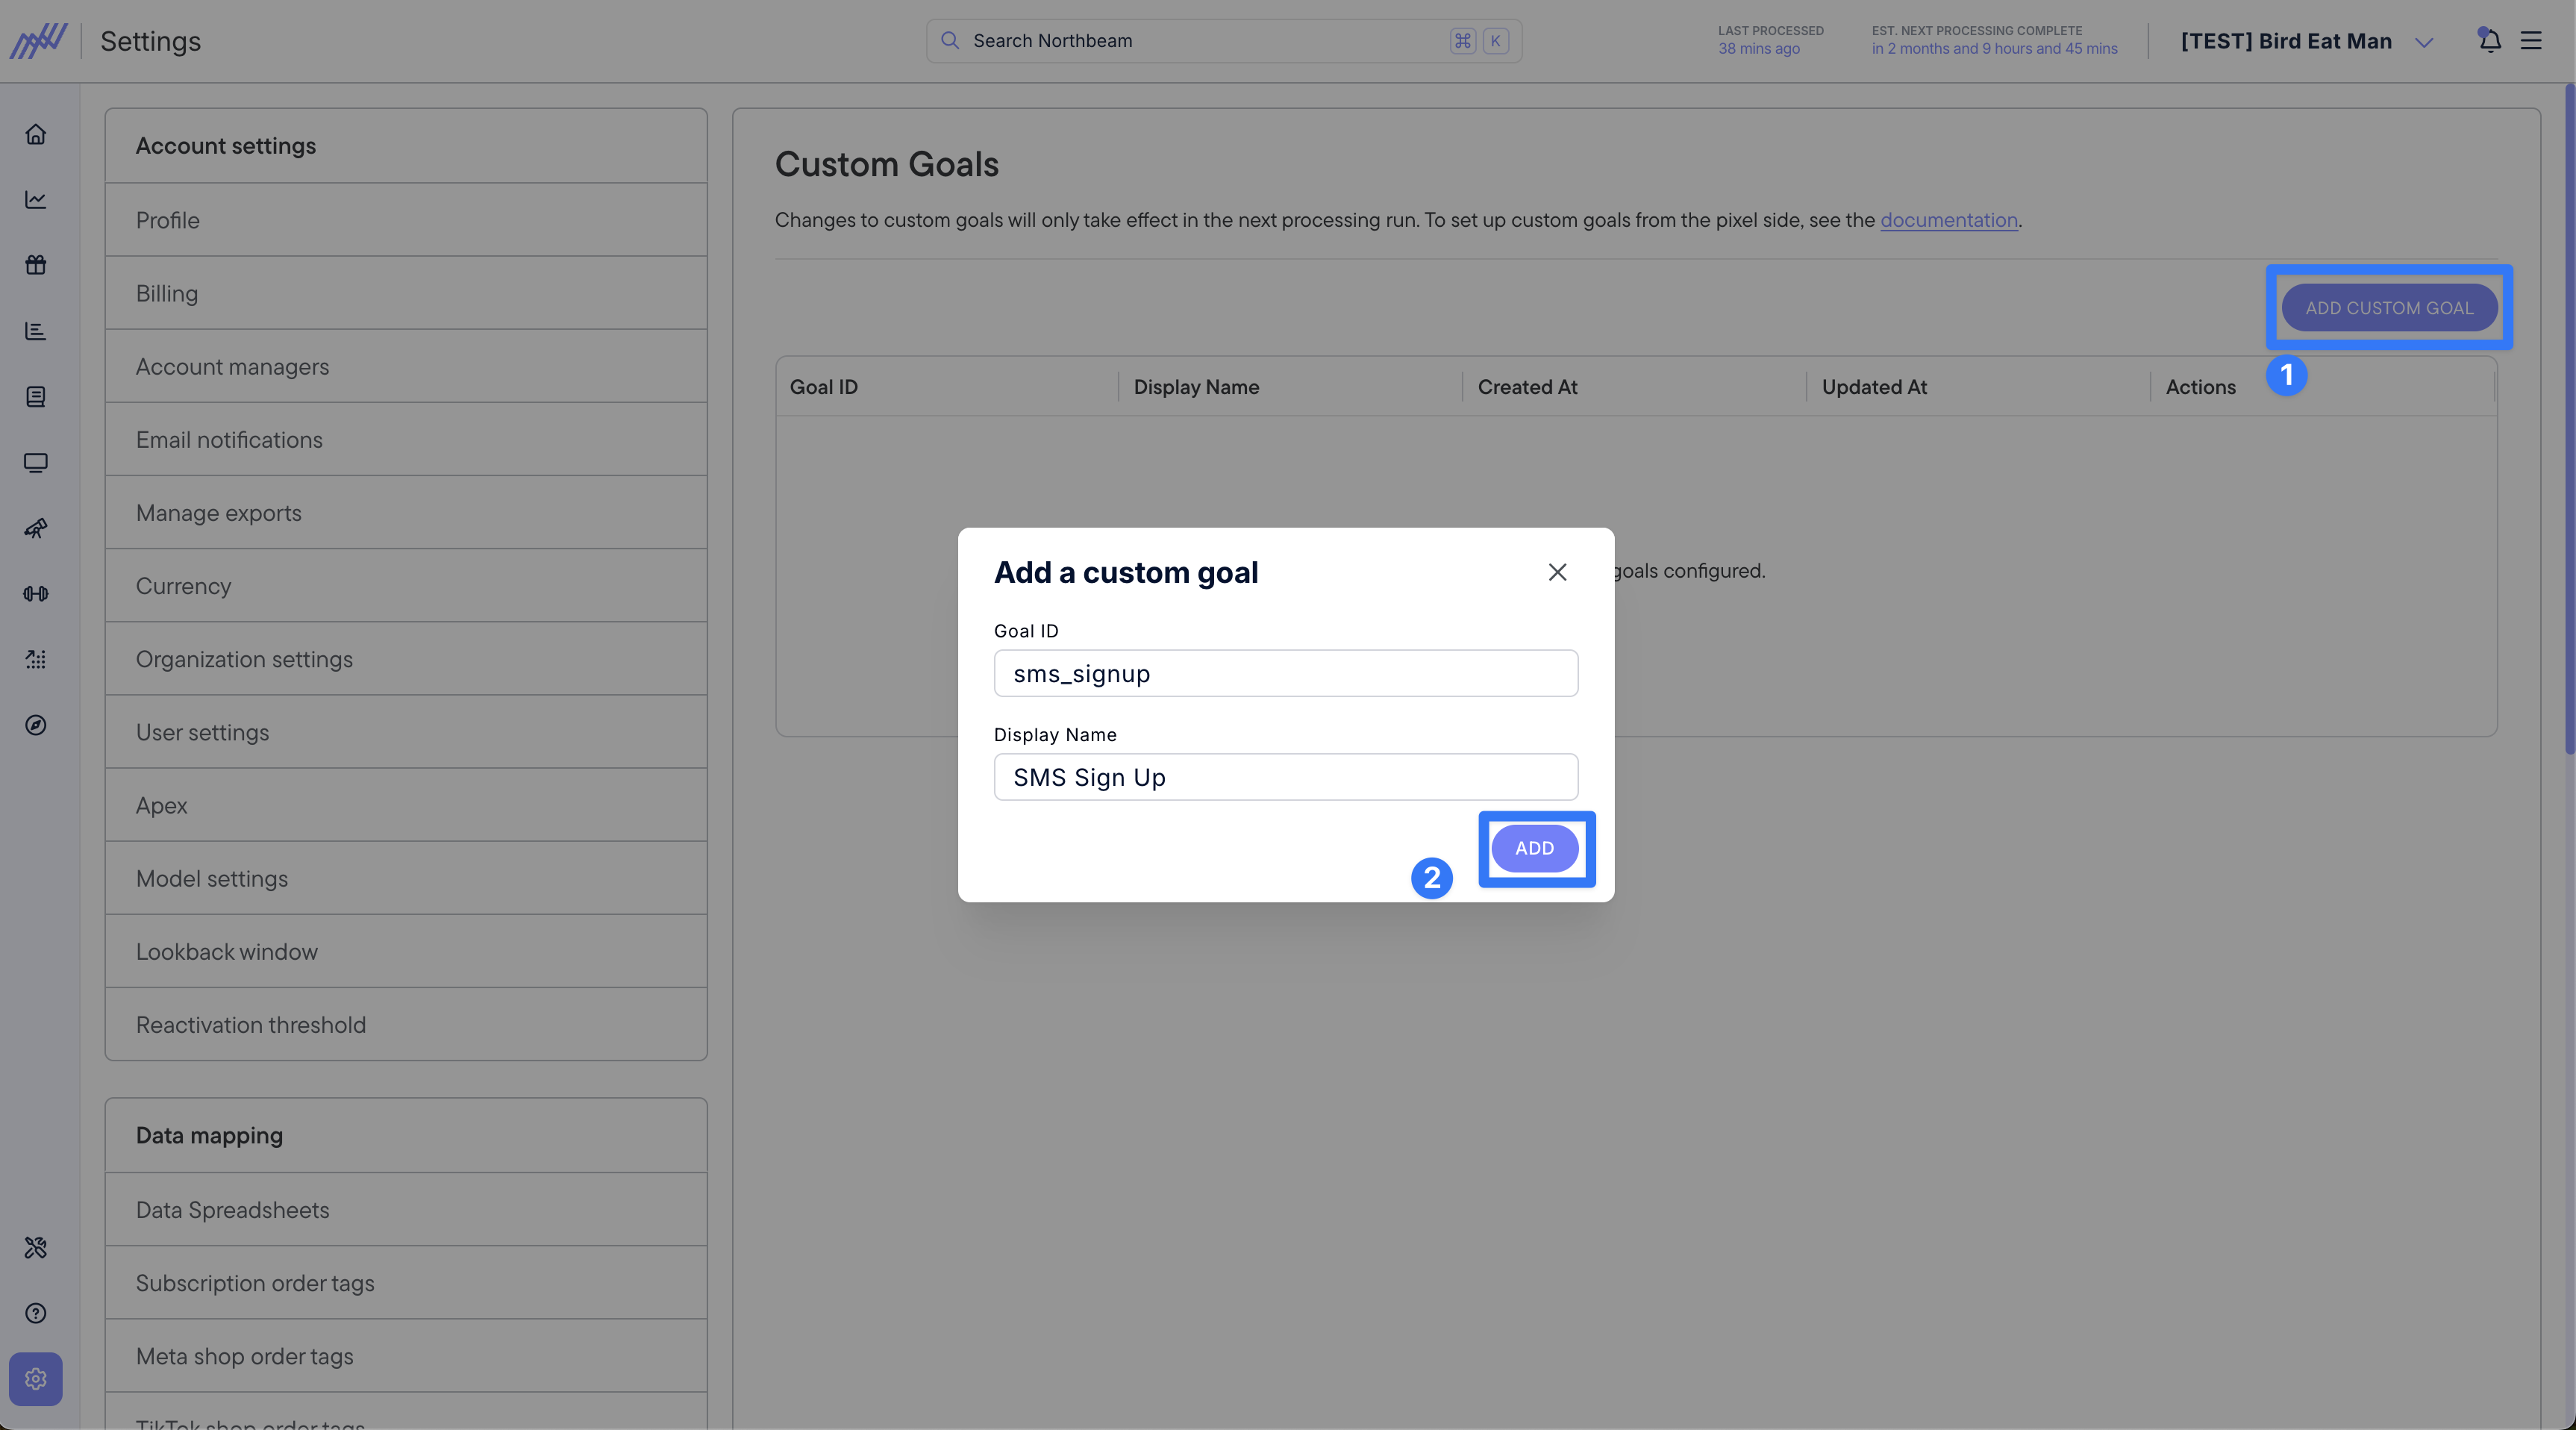
Settings > Custom Goals
Step 4: Add the goal to your Sales view
After at least one event fires successfully, the Custom Goal becomes available as a metric on the Sales page.
- Go to the Sales Page
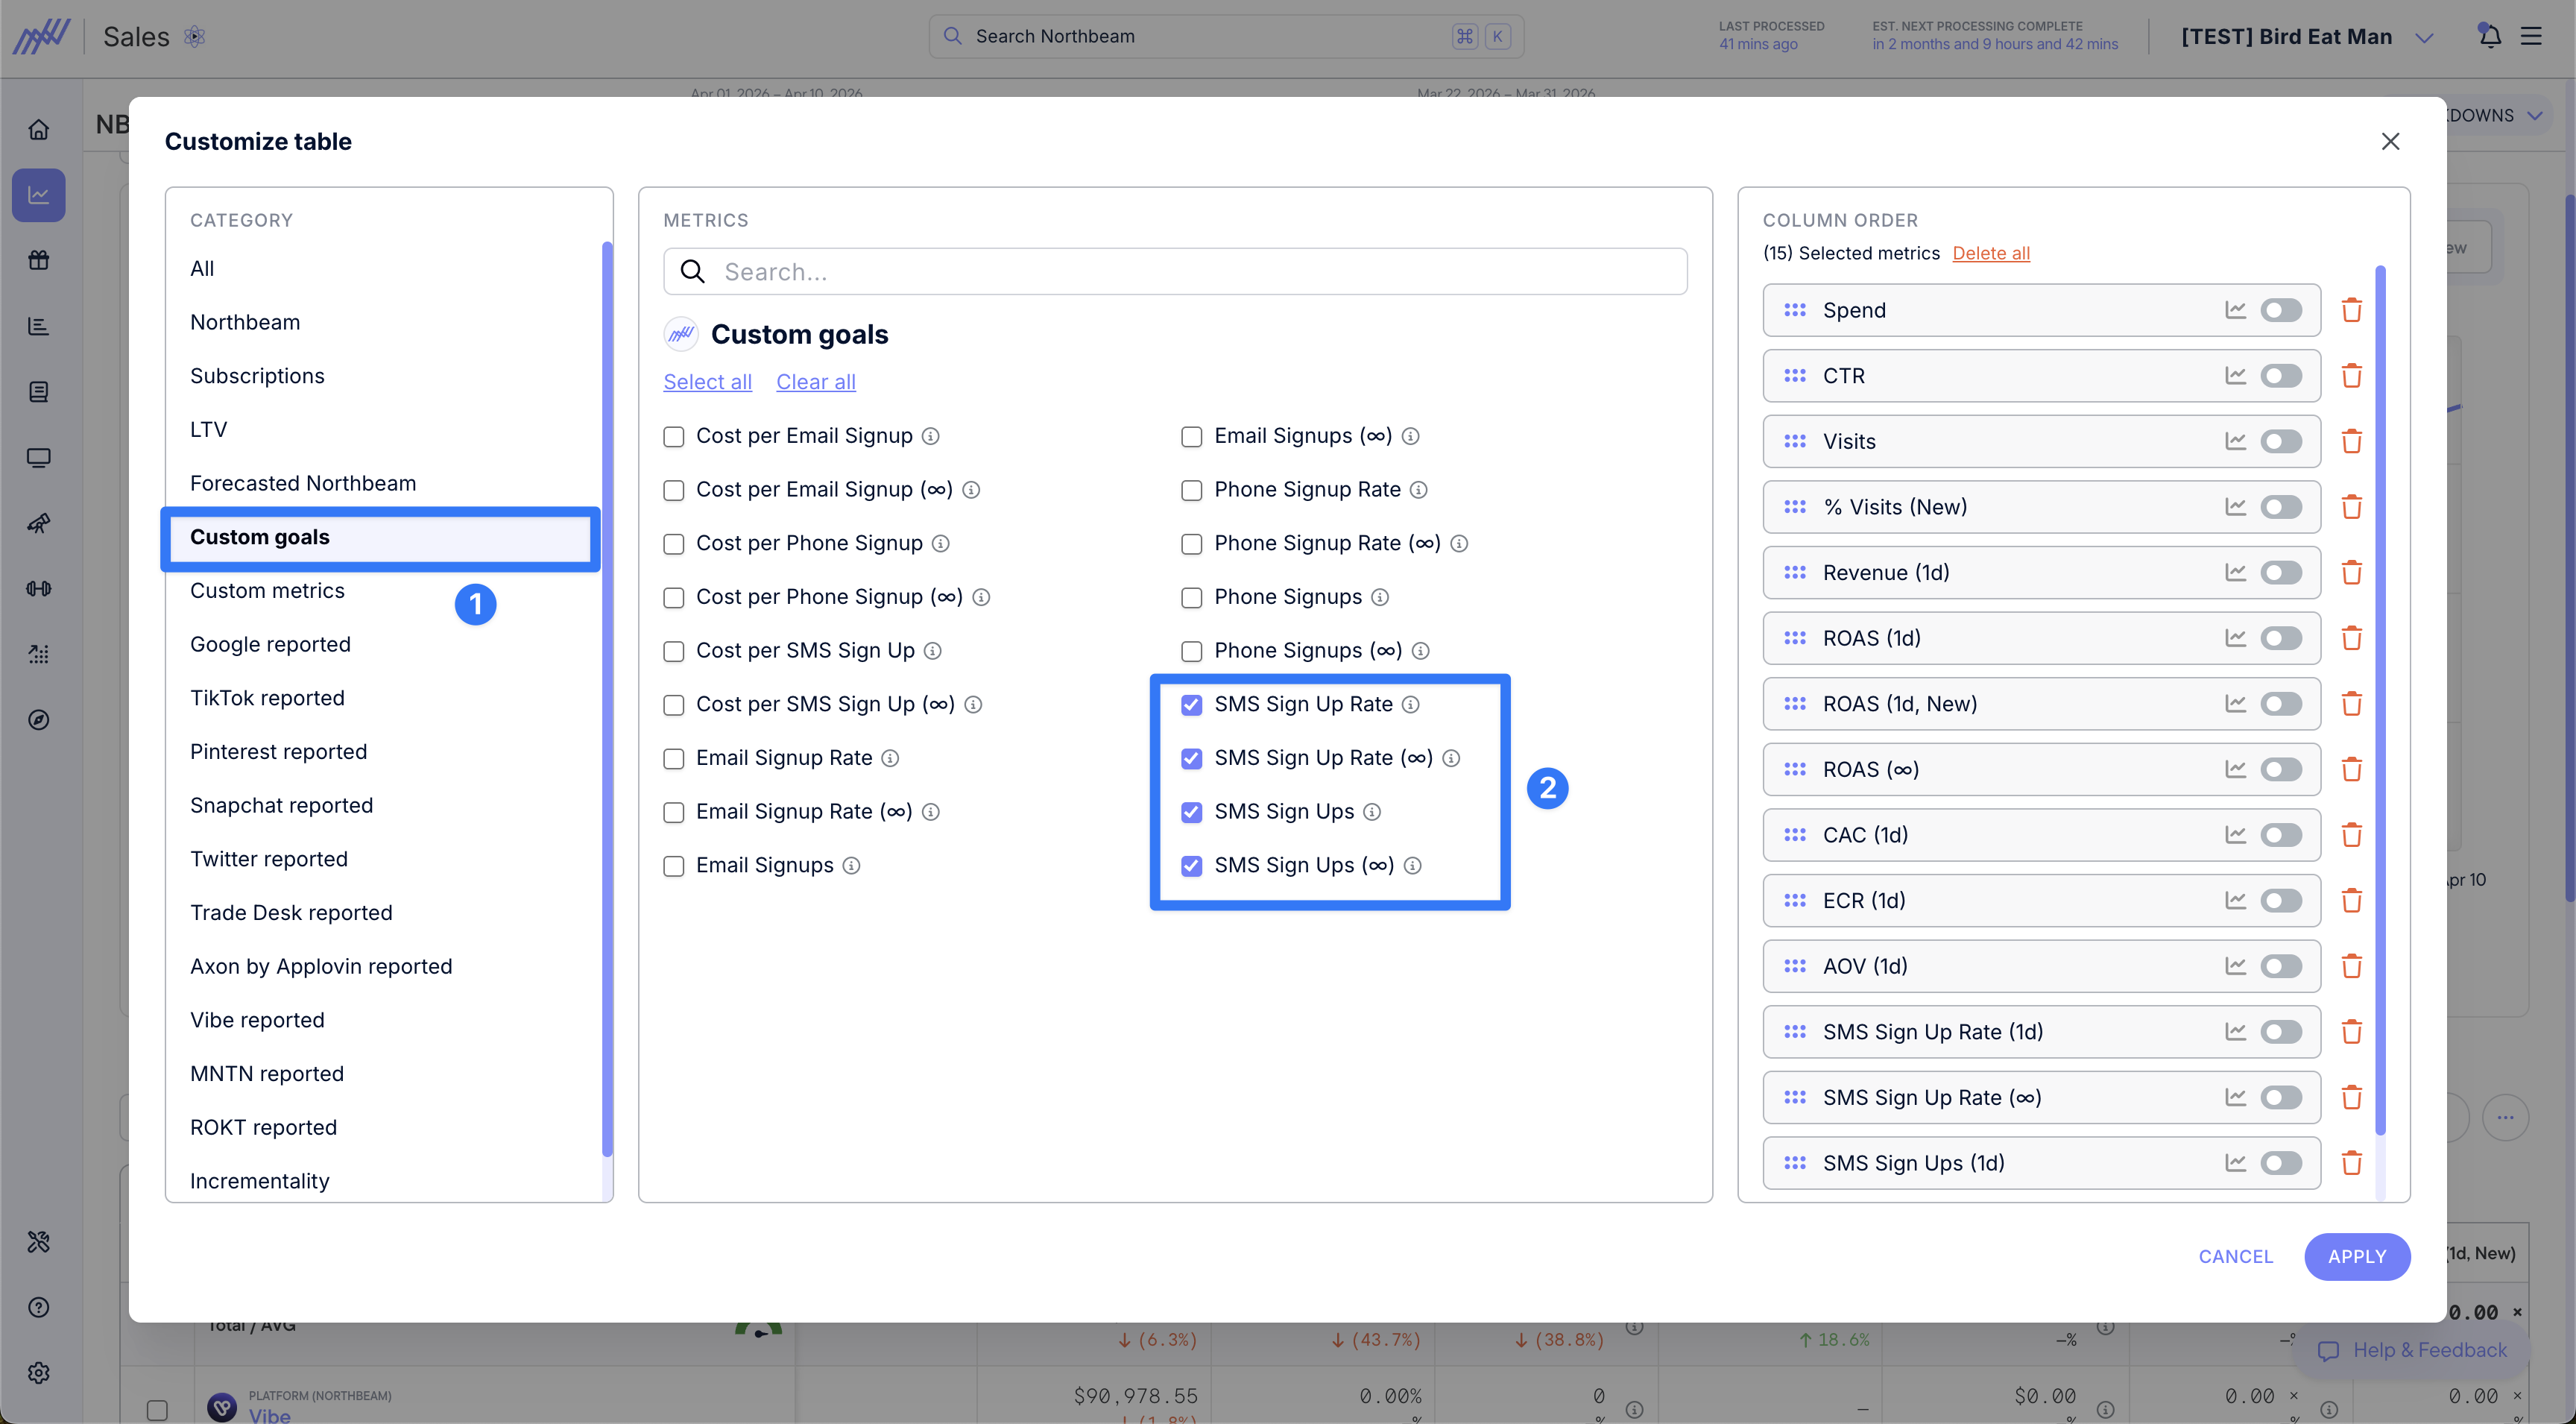
- Click Customize Table
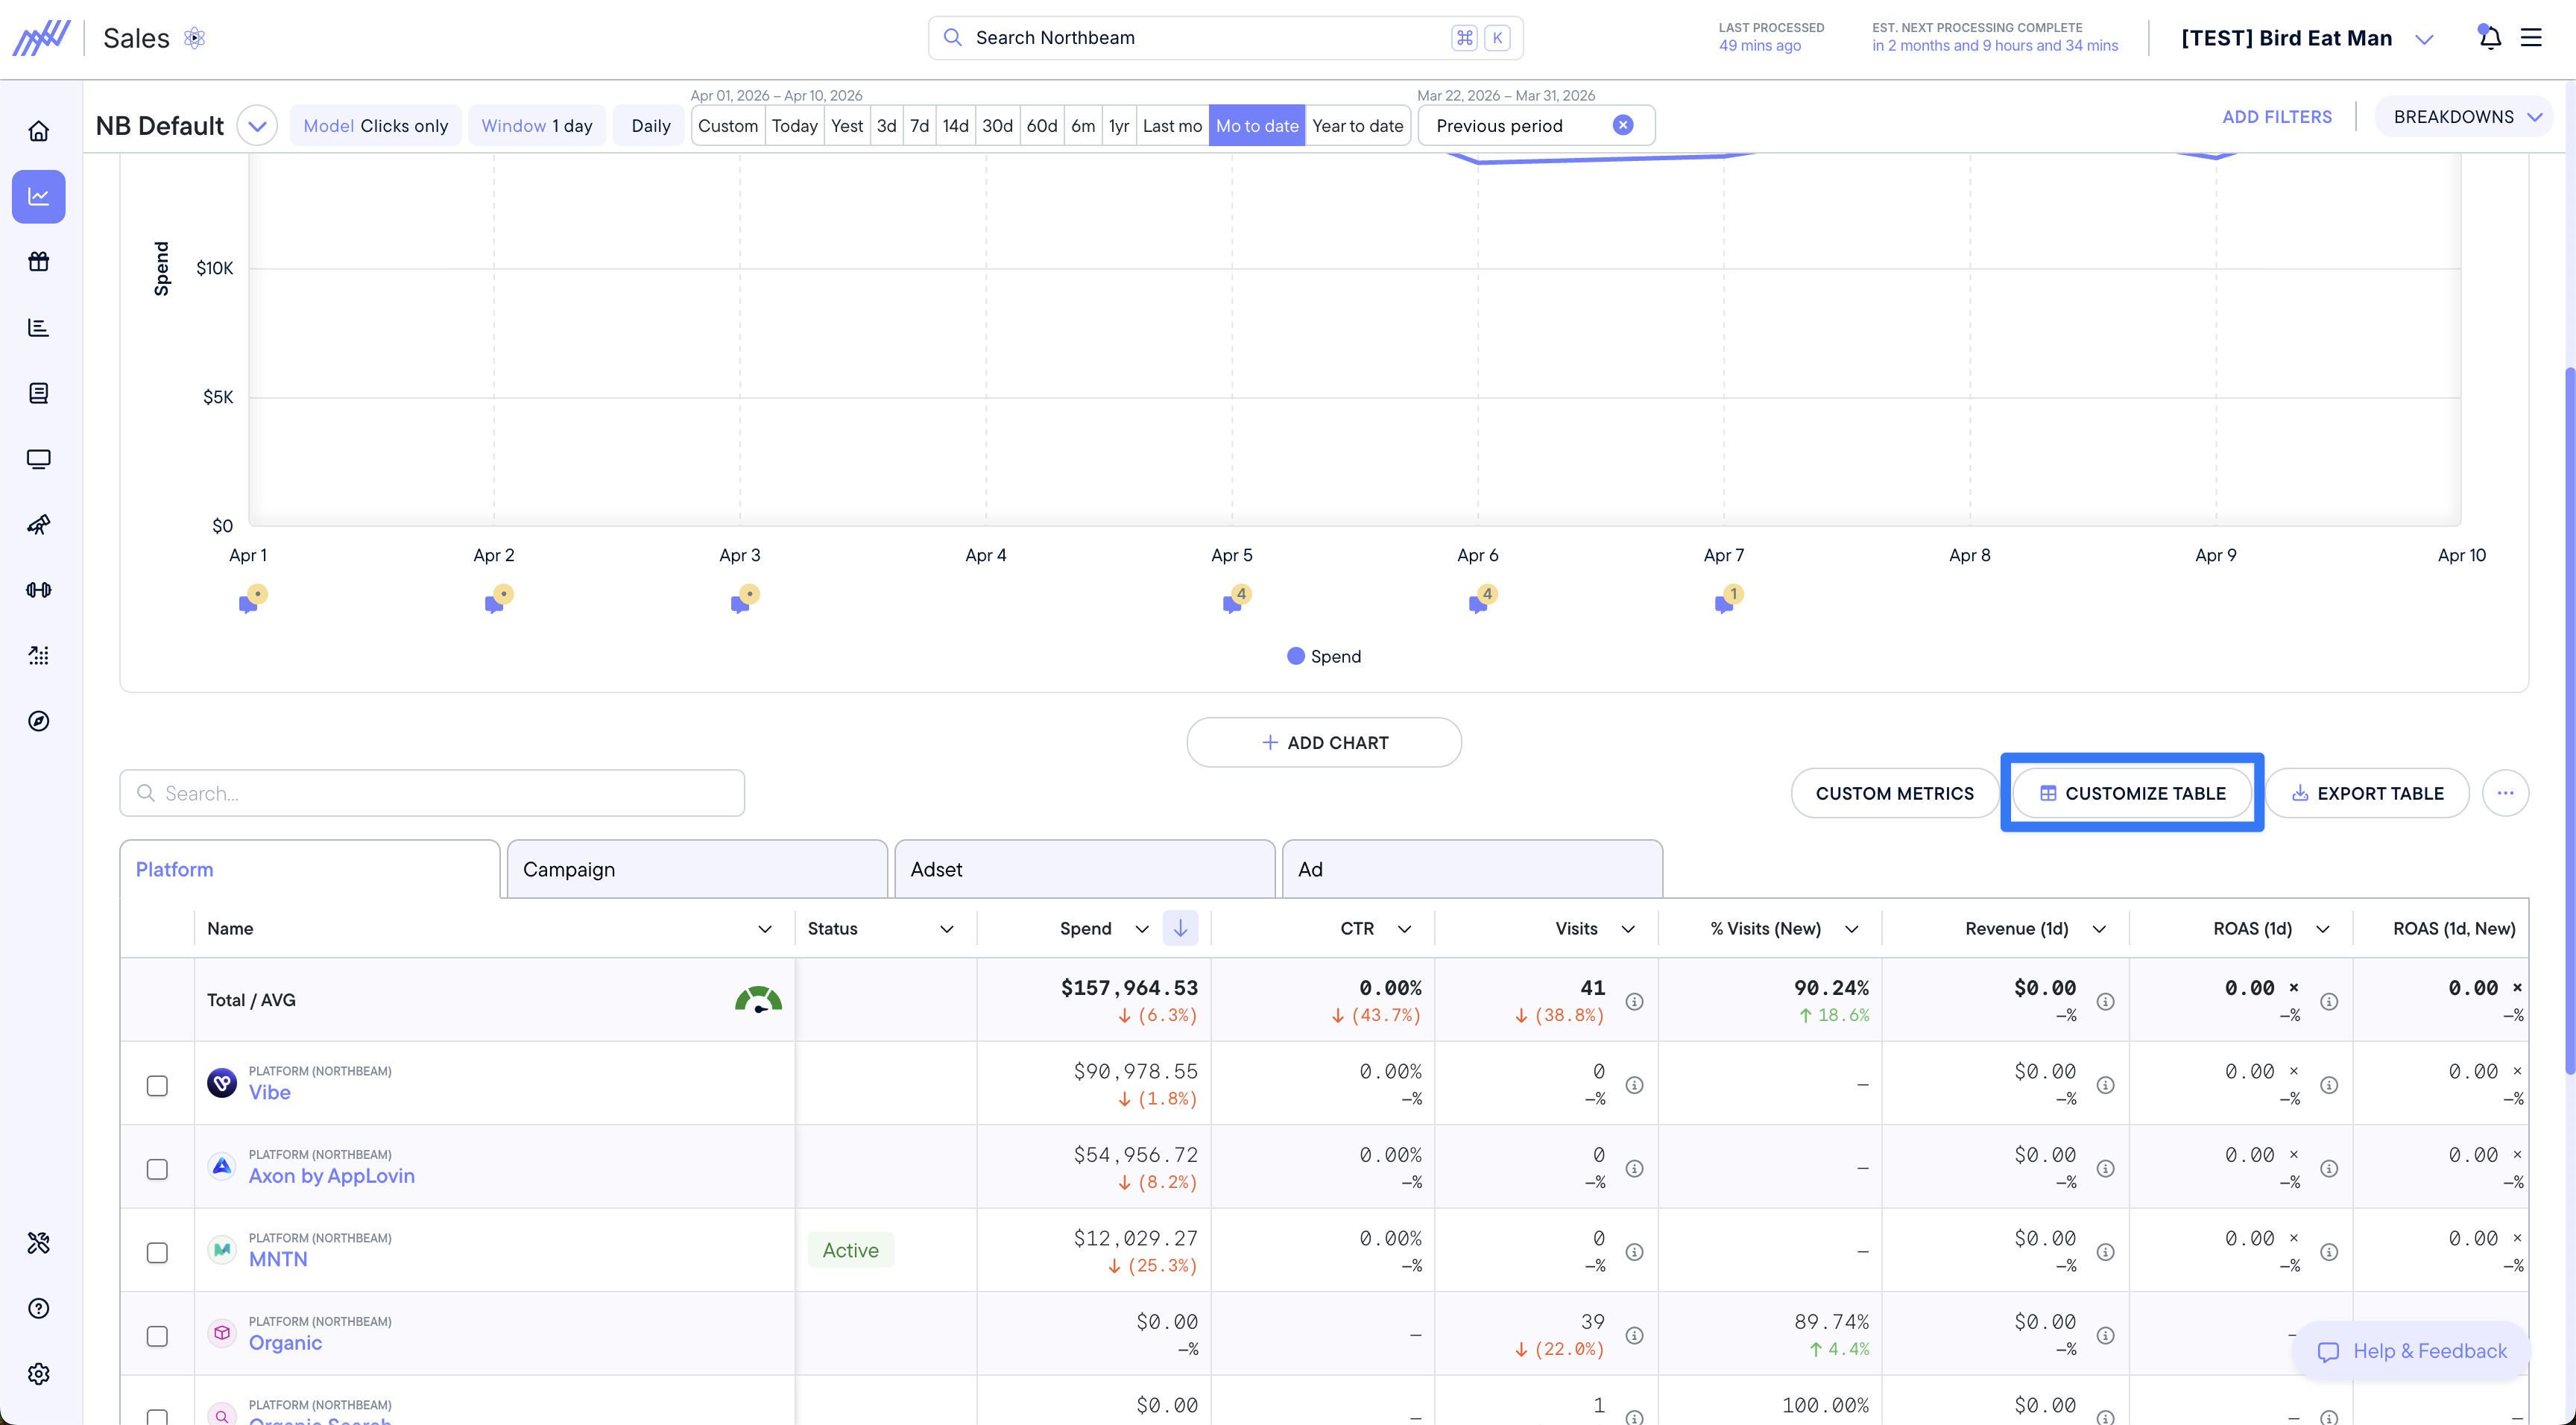
- Click Custom Goals
- Find your Custom Goal metric(s) and add them to your view
Common Mistakes
- The Northbeam Base Pixel is not firing on the page
- The Goal ID in the dashboard does not exactly match the script
- The trigger conditions are incorrect
- The event is implemented on a different domain than the Base Pixel
Limitations
Custom Goals track event count only.
Revenue, monetary values, or additional parameters cannot be passed through fireCustomGoal().
Updated 2 months ago