Tracking for MNTN
This guide will show you how to connect your MNTN account to Northbeam and pull the following metrics:
- Spend
- Impressions for CDV matching
Supported Attribution Models
The MNTN integration currently supports the following Northbeam attribution models:
- First Touch
- Last Touch
- Last Non-Direct Touch
- Clicks-Only
- Clicks + Deterministic Views (C+DV)
Note: Clicks + Modeled Views is not supported for MNTN.
Step 1: Select MNTN Channels
- Log into your Northbeam Dashboard
- Go to Settings → Connections
- Scroll down to MNTN
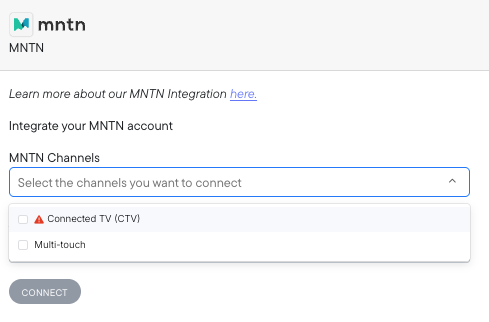
- Select the MNTN channels you are advertising on within the connection flow.
Note: This section is currently being updated.
Previously, this step noted that CTV had limited attribution support, but that’s no longer accurate — CTV is now fully supported under Northbeam’s Clicks + Deterministic Views (C+DV) model.
The selector remains informational only and does not impact your integration.

Settings > Connections > MNTN > MNTN Channels
Step 2: Enter Your API Key
To connect your MNTN account:
- Log in to your MNTN account.
- Click the menu icon in the top-right corner.
- Navigate to My Account → API.
- Copy your API Key.
- In Northbeam, go to Settings → Connections → MNTN.
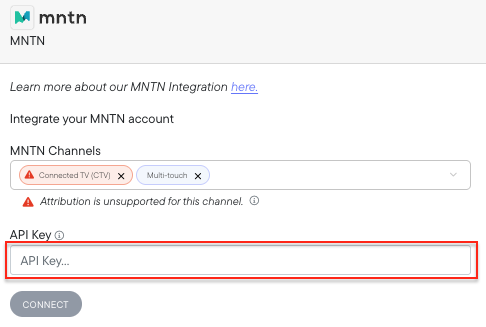
- Paste your API key and click Connect.

Settings > Connections > MNTN > API Key
Step 3: Enable Clicks + Deterministic Views (C+DV)
Once your MNTN connection is active in Northbeam:
- Go to Settings → Model Settings → Attribution Models.
- Select Clicks + Deterministic Views (C+DV) from the list of attribution models.
- Under Available Platforms, check the box for MNTN.
- Click Save Changes.
- Allow up to 48 hours for MNTN impression data to populate in your dashboard.

Settings > Model Settings > Attribution Models Available
MNTN Data Processing
- After initial setup, data can take up to 3 days to fully backfill.
- Once live, C+DV data processes 3× per day in Northbeam.
- “Last retrieved” = when data was last received from MNTN.
- “Last processed” = when data was last processed and visible in the dashboard.
Step 4: Enable the Integration in MNTN
After connecting your API key in Northbeam, you’ll need to enable the integration from within your MNTN account to complete the setup.
- Sign in to your MNTN account
- Click your account name in the top-right corner and select My Account.
- In the left-hand navigation, click Integrations.
- Under Analytics Integrations, find Northbeam and click Connect.
- Once connected, you’ll see a confirmation message — data will begin syncing automatically within 24–48 hours.
- For full instructions, visit the official MNTN Integration Guide.
Remove Legacy Tags:
If you previously implemented legacy MNTN impression tags for Northbeam, remove them after enabling the new C+DV integration.Keeping legacy tags active can cause duplicate or conflicting impression data in reporting.
Step 5: Verify Order ID Alignment
MNTN uses order IDs for deterministic matching. To confirm setup:
- In Northbeam, go to Orders → Order ID and note your order ID format (e.g., Shopify order numbers).
- In MNTN, ensure the same order ID format is being passed to Northbeam.
- Mismatched order IDs will prevent deterministic matching and CDV visibility.
- If misaligned, update your MNTN setup or contact Support to adjust configuration.
FAQs
1. Why am I not seeing MNTN data after enabling CDV?
If you’ve connected your account and turned on CDV but no data is visible:
- Ensure order IDs are aligned between MNTN and Northbeam.
- Confirm CDV consent was enabled in Northbeam (Account Settings → Attribution Models).
- Allow up to 48 hours post-consent for impression data to appear.
- Verify that the advertiser is actively running campaigns in MNTN.
- Check “Last retrieved” and “Last processed” timestamps in the dashboard.
If all checks pass and data is still missing, contact Support for further investigation.
2. Why do MNTN conversions and revenue differ between Northbeam and GA4?
Northbeam and GA4 attribute MNTN CTV performance in fundamentally different ways, so conversion and revenue numbers will not match — and this is expected.
How GA4 attributes MNTN conversions
- MNTN’s Verified Visits create direct sessions in GA4 when a user visits your site after viewing a CTV ad.
- GA4 then attributes conversions based on its session-level model (such as DDA or last non-direct click).
- These conversions are not tied to UTMs, since CTV impressions do not pass them.
How Northbeam attributes MNTN conversions
- Northbeam uses deterministic impression matching under Clicks + Deterministic Views (C+DV).
- If a user converts after being exposed to a valid MNTN impression within the attribution window, Northbeam attributes that conversion to MNTN.
- This does not rely on sessions or UTMs.
Why they differ
- GA4 attributes conversions to direct sessions triggered after a CTV impression.
- Northbeam attributes conversions to deterministically matched impressions, independent of session source.
- Because the attribution logic is different, conversion and revenue totals will not align between the two platforms.
3. How long does the initial sync take?
The initial sync from MNTN can take up to 72 hours, depending on historical data volume.
After that, updates occur 3× per day.
Updated 3 months ago
