
Purchase Events
What are Purchase Events?
Purchase conversion events are purchases that occur on your website. It's extremely important that these are captured on all your checkout flows.
How Do You Track Purchase Events?
We use a single event: firePurchaseEvent.
This event fires when a transaction is completed, typically on the Order Confirmation or Thank You page.
This payload includes order details that we match against the backend source of truth (Raw Shopify orders; Orders API data)
| Checkout Type | Description |
|---|---|
| Shopify's Native Checkout | Tracks completed purchases that occur on Shopify's checkout. Triggered by Shopify's checkout_completed Web Pixel standard event. Note: This does not include Shop App. |
| All Other Checkouts | This is our generic Purchase script. Used to track all Non-Shopify Checkout Experiences |
Tracking Purchases on Shopify Stores
This script tracks completed purchases from your Shopify Checkout. This is required for tracking Purchases in Northbeam.
Step 1: Find the Customer Events script
- In the Onboarding Flow:
- Navigate to Step 7: Add Pixel
- Find the script called Shopify: Customer Events
- In the Dashboard:
- Click on Settings
- Click on Northbeam Pixel and Event Tracking
- Find the script called Shopify: Customer Events
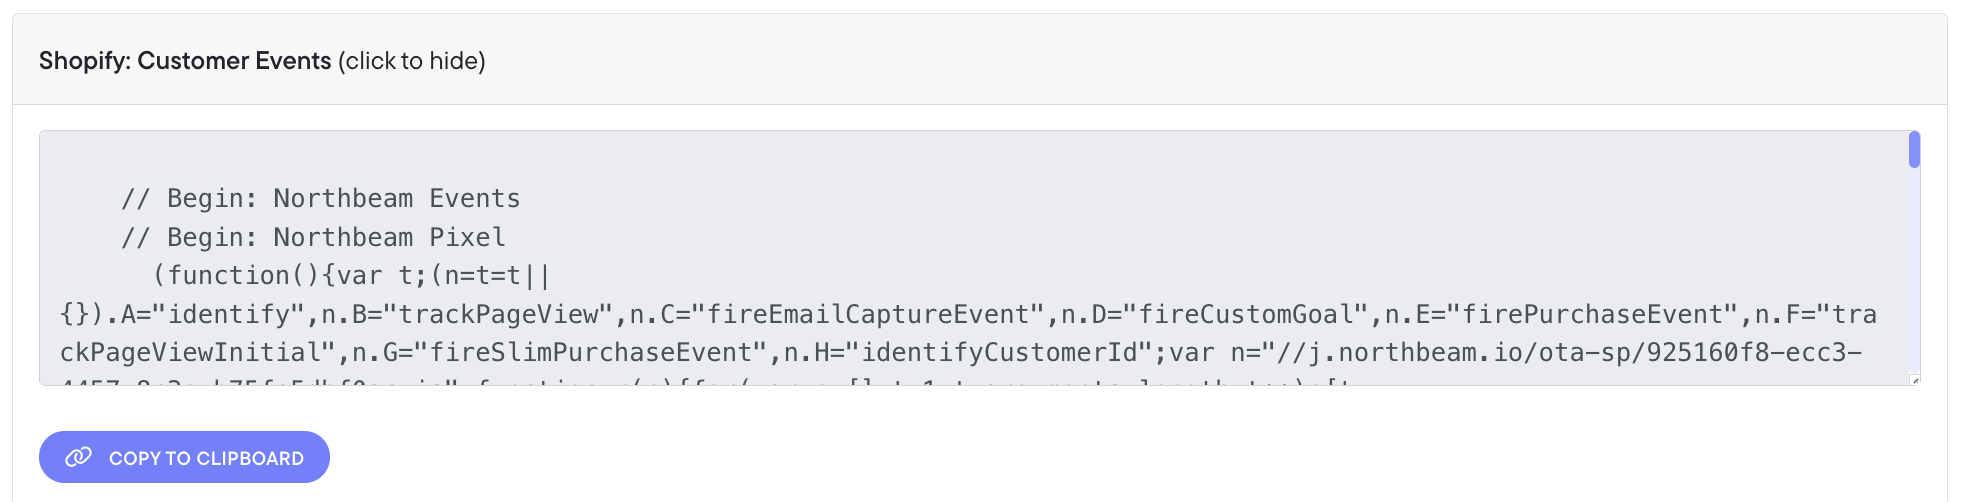
Shopify: Customer Events
Step 2: Add the script in your Customer Events
- Log into your Shopify account, click Settings
- In the side navigation, click Customer Events
- In the top right, click Add Custom Pixel
- Name the pixel anything you'd like (e.g. "Northbeam Event Tracking”), then click Add Pixel
- Paste the script into the code editor
- In the top right corner, click Save
- Below the editor, click Connect
- In the modal, click Connect to give the pixel secure access to your online store, checkout, and order confirmation.
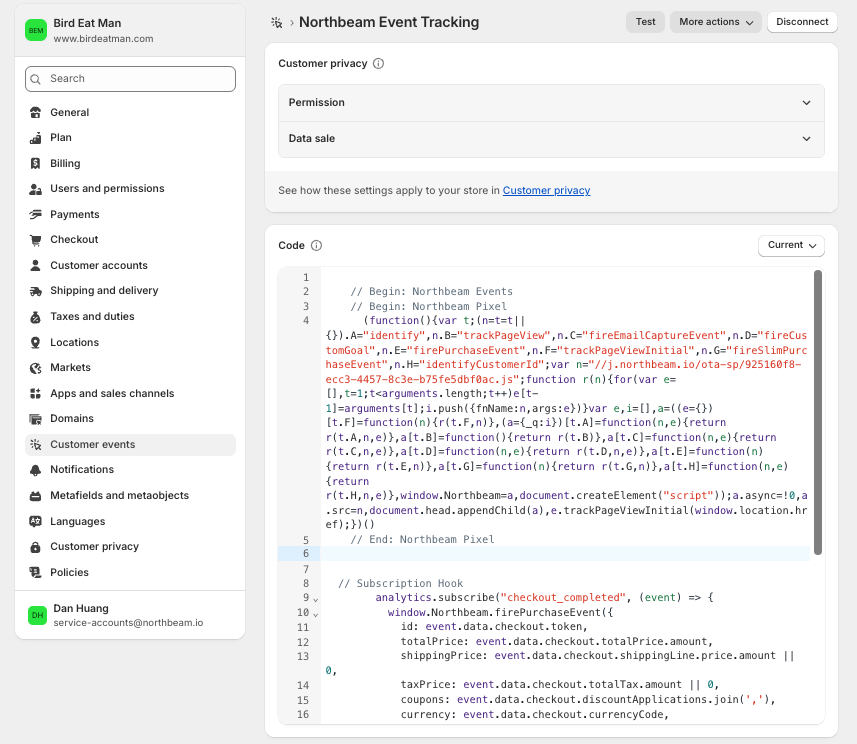
Settings > Customer Events
Step 3: Change data access settings
- From your Shopify admin, go to Settings > Customer events.
- Click the App pixels tab.
- For the Northbeam pixel, click the pixel's current data access setting in the Data column.
- In the dialog, select Always on, and then click Apply.
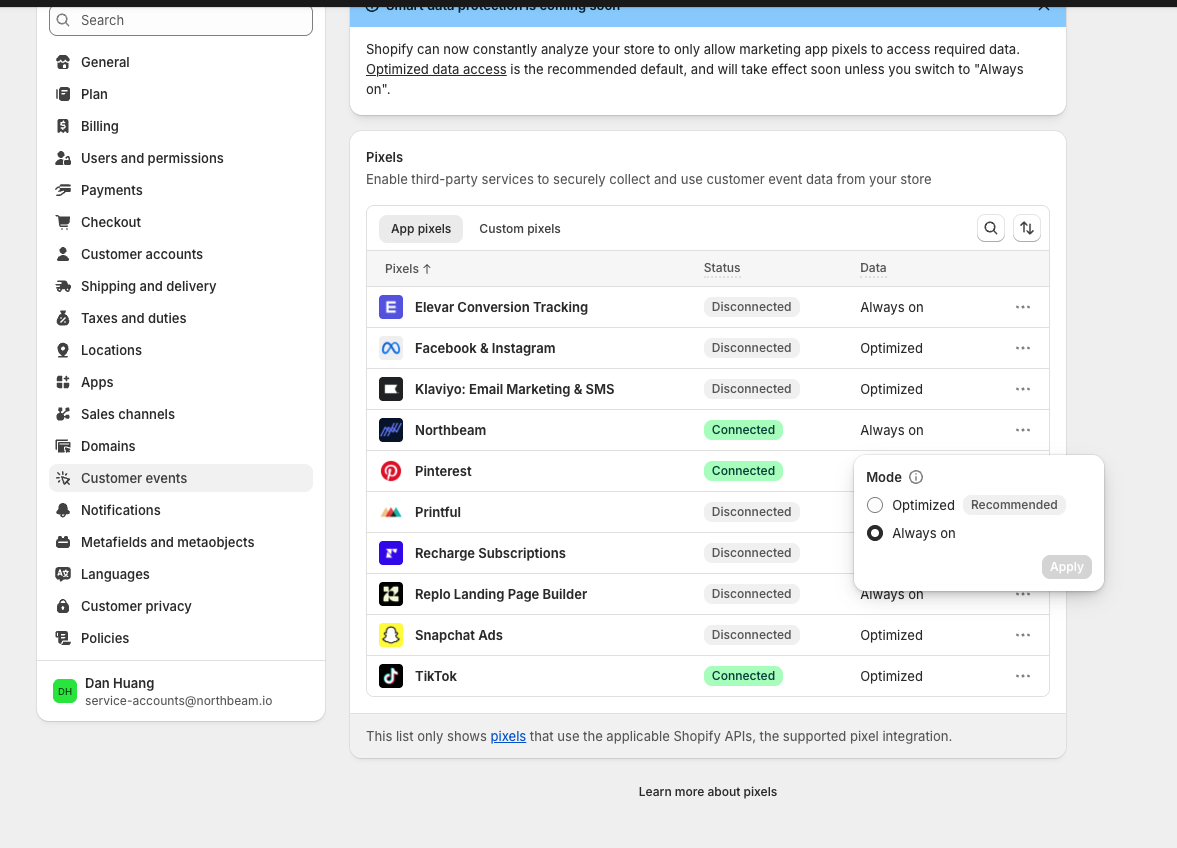
Shopify: Data access settings
Step 4: Customer Privacy
Under Customer Privacy, ensure a consent banner is configured.
If data restrictions are enabled without a banner:
- Users cannot opt in
- Tracking may be blocked
- The Customer Events script may not fire
- Conversion tracking may break
Always confirm privacy settings and consent are aligned before going live.
Step 5: Notify Northbeam
Once the script is installed, submit a support ticket to let our team know. We'll finalize setup to ensure accurate page view tracking.
Important:Failing to notify our team may result in incorrect page view tracking.
Page view tracking is a foundational event in Northbeam's conversion tracking system — without it, purchase attribution may be incomplete or inaccurate.
Tracking Purchases on Non-Shopify Stores
Use the window.Northbeam.fireSlimPurchaseEvent OR window.Northbeam.firePurchaseEvent Northbeam Pixel JavaScript function for any non-Shopify native checkout. These functions equally signal that a conversion has taken place within the visitor's session, but the target function to use depends on your usage intent, available fields, and actionability requirements.
| Function Name | Usage | Complexity |
|---|---|---|
fireSlimPurchaseEvent | Directly targets an order for attribution if the only guaranteed value is the Order Number and/or when backend revenue data will be sent on time for actionability. This our default recommended function. | Low |
firePurchaseEvent | Directly targets an order for attribution when revenue values need to be actionable before backend revenue data is sent to us. | Moderate |
Either event must fire when a transaction is completed — once the final order details are available — typically on the Order Confirmation or Thank You page. A timely and proper trigger is required for purchase matching in Northbeam, and they can be deployed natively into your site's code or injected externally via Google Tag Manager.
Global Requirements (both fireSlimPurchaseEvent and firePurchaseEvent)
fireSlimPurchaseEvent and firePurchaseEvent)Your chosen function must:
- Fire after the core Northbeam base pixel.
- Fire only after the order is finalized and all charges have been processed to prevent ingestion of cancelled transactions.
- Fire once per completed order; do not repeat
idvalues. - Contain all corresponding keys with defined values.
NULLvalues are invalid.
Critical: id = order_id
id = order_idWe use the value from the id key (Please see function requirements below) to match the frontend purchase event (fireSlimPurchaseEvent AND/OR firePurchaseEvent) to your backend source of truth (orders sent via the Northbeam Orders API).
If the value does not exactly match the corresponding server-side order (Case-sensitive): that purchase will not attribute correctly. It is strongly recommended that someone with basic JavaScript knowledge implements these scripts.
Important: Historical purchase data cannot be recovered. An improper implementation will result in missing attribution. Thus: It is critical that fireSlimPurchaseEvent / firePurchaseEvent is configured correctly from day one.
window.Northbeam.fireSlimPurchaseEvent
Definitions
This lightweight function signals that the order/transaction number passed in the id field is a valid conversion that should be attributed. It only requires a single value for activation. This is ourprimary recommended function for most* implementations.
| Key | Type | Description | Example |
|---|---|---|---|
id | String | The actual transaction/order number. It must be an exact match to the Northbeam Orders API order_id value for stitching. Must be a string containing at least 1 character and it's case-sensitive. | "A123" |
fireSlimPurchaseEvent example
<script type="application/javascript">
  window.Northbeam.fireSlimPurchaseEvent("A123" || "Missing - unmatched order")
</script>- Note: The
idkey/field is an implicit parameter infireSlimPurchaseEventand does not need to be externally defined for the function to operate. It only needs a value, which is automatically mapped to the implicitidkey. - In the above example: "A123" is a hard-coded string with your order_id, but this should be a variable that ties to the value.
Considerations
fireSlimPurchaseEventdoes not process monetary values and is therefore not recommended when operational actionability is a crucial consideration -AND- your corresponding backend Northbeam API upsert implementation is not synchronized to your Dashboard processing cycles. On such cases:firePurchaseEventis best used instead offireSlimPurchaseEvent.
window.Northbeam.firePurchaseEvent
Definitions
This full-fledged function not only signals that the order/transaction number passed in the id field is a valid conversion that should be attributed, but it also contains transactional information that is actionable for revenue, tax, and shipping calculations in your Northbeam Dashboard. This function requires a full transactional object {} with distinct keys rather than the order_id string alone, which increases complexity and should only be used when actionable data is a crucial concern -AND- your corresponding backend Northbeam API upsert implementation is not synchronized to your Dashboard processing cycles.
| Key | Type | Description | Example |
|---|---|---|---|
id | String | The actual transaction/order number. It must be an exact match to the Northbeam Orders API order_id value for stitching. Must be a string containing at least 1 character and it's case-sensitive. | "ORD98" |
totalPrice | Number | The final paid value after taxes, shipping, and discounts. Must be a positive number. | 12 |
shippingPrice | Number | The value for shipping charges. Must be a positive number. | 6 |
taxPrice | Number | The value for tax charges. Must be a positive number. | 7 |
coupons | String | Discount coupons applied to the order. Must be a single string, but multiple values can be separated via comma as a single string (EX: "coupon 1, coupon 2"). | "PROMO 4" |
currency | String | The currency code of the transaction. Must be a 3-digit string using the 3-digit ISO-4217 standard. | "USD" |
customerId | String | The visitor/customer identifier. Must be a string containing at least 1 character. | "VICTOR12" |
lineItems | Array [] of Objects {} | The list of individual items purchased in the order. This is a single array [] composed of individual objects {} (One per product) all nested within the array. The object uses the following keys (Which must all exist and contain a value): productId, variantId, productName, variantName, price and quantity. | [{productId: "SKU-0001", variantId: "0001-A", productName: "Pants", variantName: "Blue", price: 10, quantity: 1}] |
productId | String | The identifier for the global parent product. Must be a string containing at least 1 character. Belongs to the lineItems array [] of objects {} and can not be used outside the object. | "SKU-01" |
variantId | String | An identifier used if the global parent product has an alternative identifier or sub-type identifier. Must be a string. Belongs to the lineItems array [] of objects {} and can not be used outside the object. | "VAR-01" |
productName | String | The commercial product name for the purchased item. Must be a string containing at least 1 character. Belongs to the lineItems array [] of objects {} and can not be used outside the object. | "Hat" |
variantName | String | An identifier used if the item name has a sub-type or alternative name. Must be a string. Belongs to the lineItems array [] of objects {} and can not be used outside the object. | "Green Hat" |
price | Number | The gross merchandise value of the item in the current object. Must be a positive number. Belongs to the lineItems array [] of objects {} and can not be used outside the object. | 12 |
quantity | Number | The number of times the item in the current object was purchased. Must be a positive number. Belongs to the lineItems array [] of objects {} and can not be used outside the object. | 2 |
firePurchaseEvent example
<script type="application/javascript">
  window.Northbeam.firePurchaseEvent({
  id: "ORD98" || "Missing - unmatched order",
  totalPrice: 100 || 0,
  shippingPrice: 10 || 0,
  taxPrice: 5.5 || 0,
  coupons: "SALE20, FAMILY10" || "",
  currency: "USD" || "USD",
  customerId: "customer-93" || "UNKNOWN VISITOR",
  lineItems: [
    {
      productId: "SKU-0001" || "UNKNOWN PRODUCT",
      variantId: "0001-A" || "",
      productName: "Pants" || "UNKNOWN VARIANT",
      variantName: "Blue" || "",
      price: 10 || 0,
      quantity: 1 || 0,
    }]
	})
</script>- Note: The payload must be structured as an object and thus wrapped in curly brackets
{}. - In the above example: "ORD98" is a hard-coded string with your order_id, but this should be a variable that ties to the value.
Considerations
- Values from
totalPrice,shippingPriceandtaxPricewill directly power Northbeam Dashboard metrics tied to revenue, shipping, and taxes respectively. - The Northbeam Orders API is the ultimate source of truth. In case of a value conflict with the corresponding
order_idpayload: Values fromfirePurchaseEventwill be overwritten and replaced by the Northbeam API value. - Timely/synchronized Northbeam Orders API upserts negate the need to use
firePurchaseEvent. We recommend usingfireSlimPurchaseEventwith synchronized API Upserts when possible.
Validation and testing
A valid/fully-compliant event trigger for either fireSlimPurchaseEvent or firePurchaseEvent shows a network request (nb-collector) with a payload containing the data object ue (data: [{e: "ue",…}]) alongside second payload containing the data object se (data: [{e: "se",…}]). The se_la key of the se object contains the order number we received .
These 2 events and network requests are only ever seen together as requests when the trigger is valid.
These events can can only be reviewed if the network console is open before the event fires. They can not be reviewed after the fact.
Sequencing
The Northbeam base pixel must fire before firePurchaseEvent.
If deploying via Google Tag Manager, configure tag sequencing correctly: https://support.google.com/tagmanager/answer/6238868?hl=en
Improper sequencing may prevent the purchase event from registering.
Publishing
If deploying via Google Tag Manager:
- Ensure the tag is configured correctly
- Publish the container
Unpublished containers will prevent tracking.
Final Checklist
Before going live, confirm:
firePurchaseEventfires on the confirmation page- It fires once per order
- The Order ID matches backend data exactly (Orders API)
- The base pixel fires first
- GTM container is published
If these conditions are met, purchase matching will function correctly.
Best Practices
- Wrap
fireSlimPurchaseEventorfirePurchaseEventin a function that logs if the script was successful or if it failed. This eases debugging and validation. - Wrap
fireSlimPurchaseEventorfirePurchaseEventin a function that checks ifwindow.Northbeamis defined and ready to push the function, or retry if it isn't. This helps with scrip sequencing issues.
fireSlimPurchaseEvent with debug function example
<script type="application/javascript">
(function northbeamPurchaseRetry() {

    function attemptPurchaseEvent() {
        if (
            window.Northbeam &&
            typeof window.Northbeam.fireSlimPurchaseEvent === 'function'
        ) {
            console.log('Northbeam fireSlimPurchaseEvent fired');

            window.Northbeam.fireSlimPurchaseEvent(
                "A123" || "Missing - unmatched order"
            );

            console.log('Northbeam fireSlimPurchaseEvent successful');
        } else {
            console.log('Northbeam fireSlimPurchaseEvent not ready, retrying in 3 seconds...');

            setTimeout(attemptPurchaseEvent, 3000);
        }
    }

    attemptPurchaseEvent();

})();
</script>
Updated 2 months ago