

Before you begin
- Organization admin access: You need permission to manage SSO for the organization. Being a dashboard account manager does not by itself grant this permission. Members with view-only access can see the configuration but cannot change it.
- Identity-provider access: You or your IT administrator must be able to configure an application in your IdP.
- Your team’s email domains: Use the domain after
@in members’ work email addresses, not a website URL or a full email address.
Screenshots use the fictional organization Acme Widgets and the example domain
acme.example. Use your own organization’s name and email domains when following these steps.Open Organization Settings
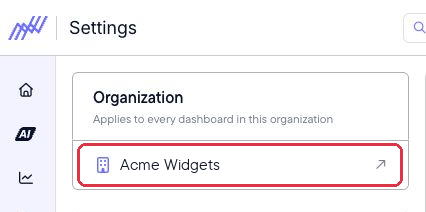
You can reach organization settings from either of these places:From a dashboard, open the menu (the three lines in the top-right corner) and select Organization Settings.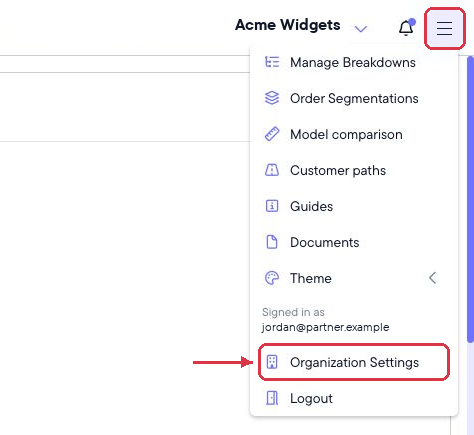
Set up SSO
1
Enter your email domains and create the configuration
In Email domains, enter each domain your team will use to sign in, such as 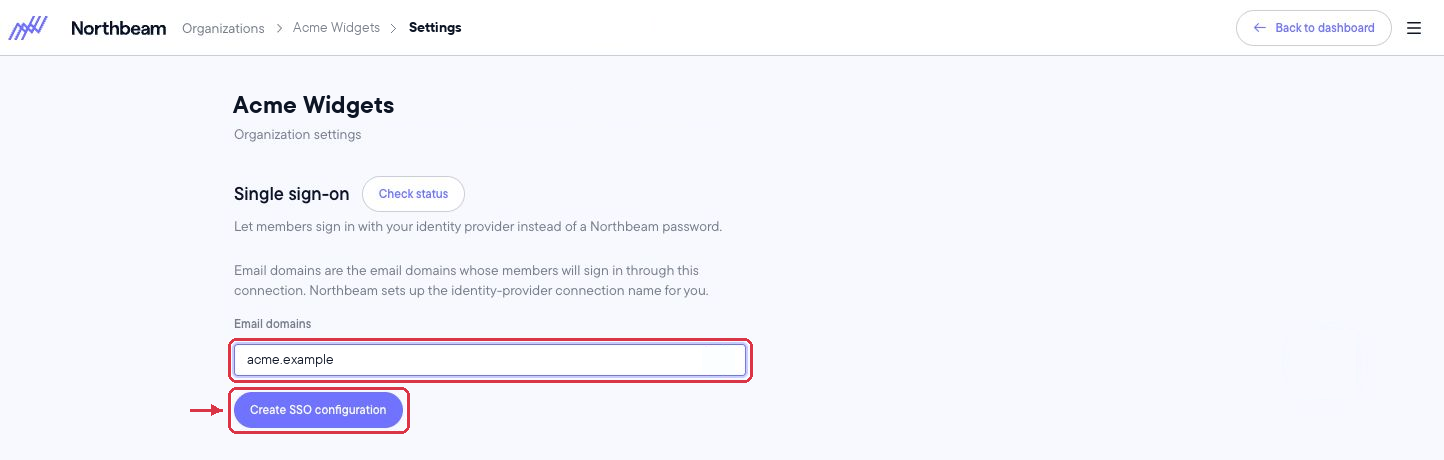
acme.example. Press Enter, comma, or space to add each domain. Enter subdomains separately if members use them in their email addresses.Click Create SSO configuration. Northbeam generates the connection name from your organization name.2
Check whether domain approval is needed
No approval is needed when every domain you enter matches your login email domain. For example, if you are signed in as 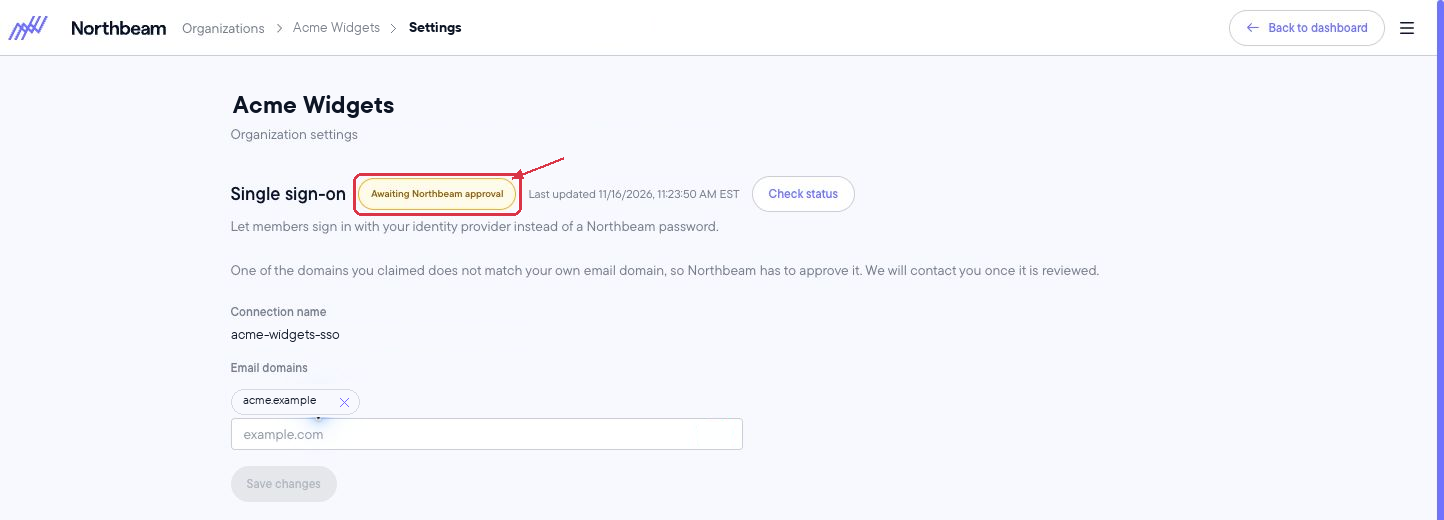 After Support confirms approval, return to this page and click Check status. Continue when the status is Setup pending. If your configuration already shows Setup pending, you can go straight to the next step.
jordan@acme.example and enter acme.example, you can go straight to Open the setup link once the status is Setup pending.If any domain you enter differs from your login email domain, the configuration shows Awaiting Northbeam approval. For example, an administrator signed in as jordan@partner.example needs approval to configure acme.example.Contact Northbeam Support with your organization name and the email domains you want to use. A Northbeam team member must review and approve the request before you can get a setup link. You cannot approve it yourself from Organization Settings.Northbeam staff can follow the internal SSO approval runbook (staff access required).3
Open the setup link
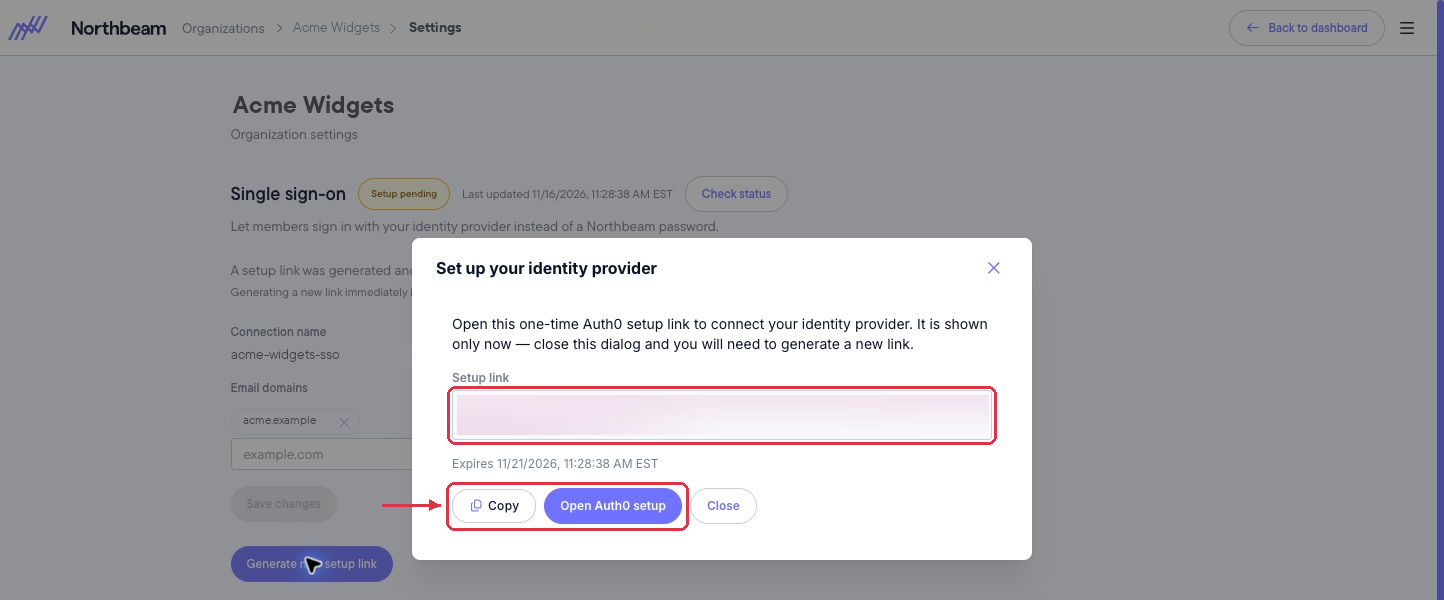
Click Set up identity provider. If a link has already been generated, the button is Generate new setup link instead.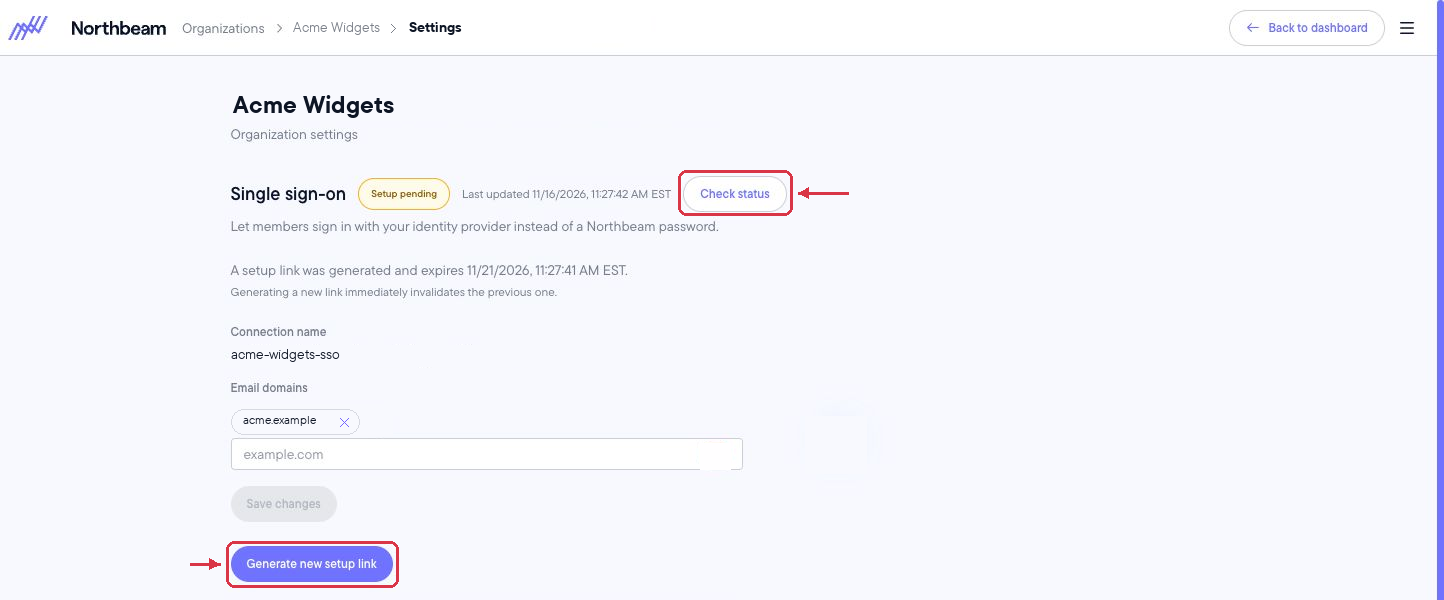 In the Set up your identity provider dialog, click Open Auth0 setup, or Copy the link for the IT administrator completing the setup. Auth0 provides the step-by-step instructions for your identity provider and its SAML or OpenID Connect (OIDC) connection.
4
Complete your IdP setup and check the status
Finish the Auth0 walkthrough, then return to Northbeam’s Organization Settings and click Check status.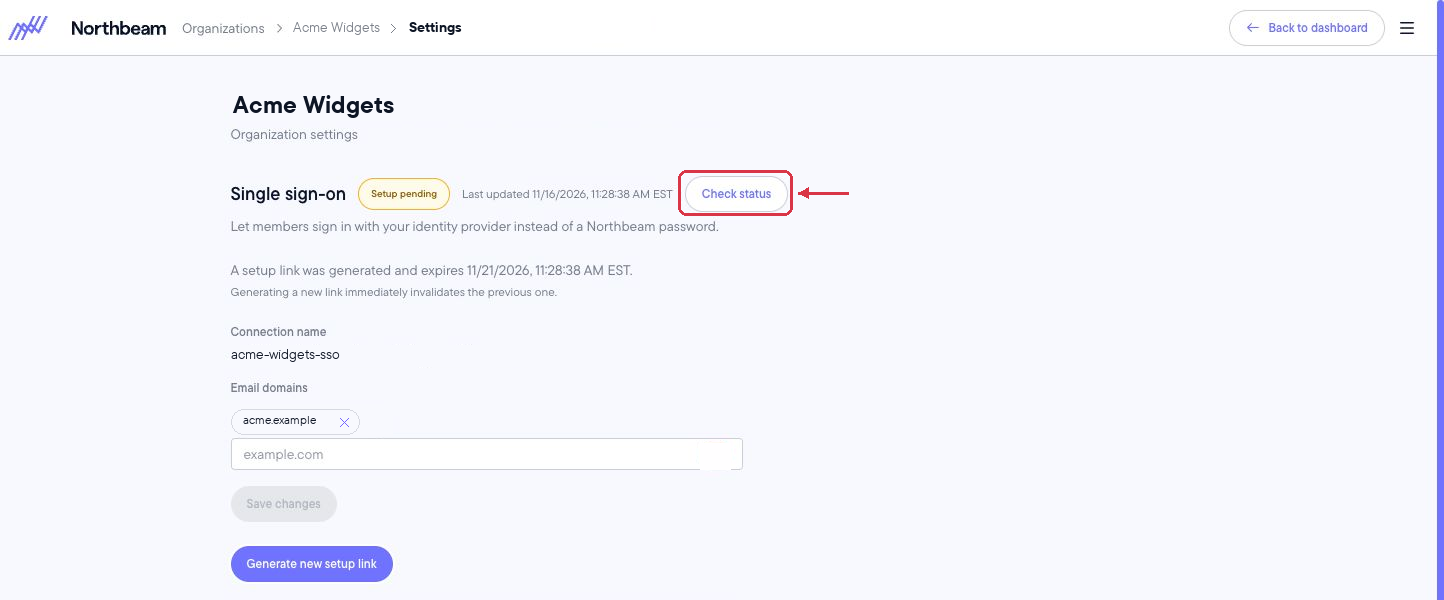 When Northbeam detects the completed connection, the status changes to SSO active. There is no separate Enable SSO step during initial setup; that button is used to turn a previously disabled configuration back on.
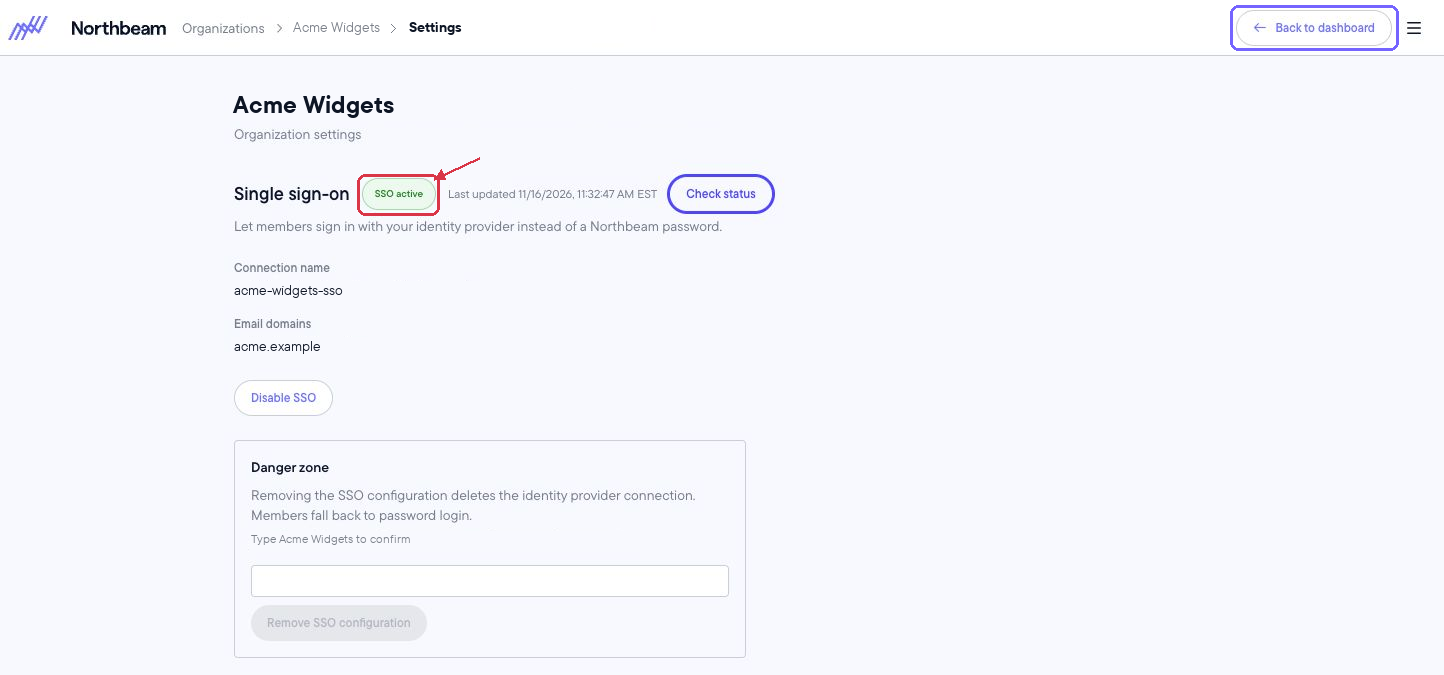 If the page still shows Setup pending, confirm that the Auth0 walkthrough is complete, then click Check status again. If it remains pending, contact Northbeam Support.
Statuses
What changes for your team
- Existing members on a configured domain use your IdP the next time they sign in. Make sure they have access to the Northbeam application in your IdP.
- New members still need an invitation to the appropriate Northbeam dashboard. While SSO is active, invitees on a configured domain receive an SSO invitation that links to the dashboard, without a password-creation link. See Adding / Removing Users.
- Members outside the configured domains, such as agency partners, keep their existing sign-in method.
Change email domains
While setup is pending, you can edit Email domains and click Save changes. Adding a domain that differs from your signed-in email domain requires Northbeam approval. Domains are read-only while the configuration is SSO active. If you need to add or change domains after activation, contact Northbeam Support before making changes so the team can help with any required approval and sign-in interruption.Disable or remove SSO
Only an organization admin with SSO management access can perform these actions:- Disable SSO stops SSO sign-ins and retains the configuration. Click Disable SSO, then Yes, disable SSO to confirm. Members will need to sign in with a Northbeam password while it is disabled. Click Enable SSO to turn it back on later.
- Remove SSO configuration, in Danger zone, deletes the identity-provider connection. Type the organization’s name exactly as displayed to enable the removal button. To use SSO again afterward, you must create a new configuration and reconnect your IdP.
Frequently asked questions
Why do I need Northbeam approval?
Why do I need Northbeam approval?
You do not need approval if every claimed domain matches your login email domain. Approval is required when a claimed email domain differs from the domain of the account you are signed in with, including when you add another domain later. This can happen when an agency or IT partner configures SSO for a customer. Contact Northbeam Support with the organization name and requested domains. After the team approves the request, click Check status in Organization Settings.
A member's first sign-in through SSO failed. What should they do?
A member's first sign-in through SSO failed. What should they do?
Ask them to try again from their invitation link or dashboard.northbeam.io using their work email. Confirm that SSO is active, their email domain is listed in the configuration, they have access to the Northbeam application in your IdP, and they have been invited to the dashboard. If they still cannot sign in, contact Northbeam Support.
Northbeam rejected one of my domains.
Northbeam rejected one of my domains.
Check the message beside Email domains. Public email domains such as
gmail.com cannot be claimed, and a domain can belong to only one organization. Enter only the domain, without https:// or an email username. Contact Northbeam Support if a domain you control is already claimed.Can I use SSO for some dashboards but not others?
Can I use SSO for some dashboards but not others?
SSO is configured for the organization and applies to the dashboards it owns. There is no per-dashboard SSO toggle. Members outside the configured email domains keep their existing sign-in method.
I can see the SSO settings but cannot change them.
I can see the SSO settings but cannot change them.
You have view-only access. Ask an organization admin to make the change, or contact Northbeam Support to check your SSO management access. Dashboard account-manager permissions are separate from organization-level SSO permissions.