

Before you start, make sure you have:
- A Neon Pixel API key
- The channel information from your Neon Pixel representative
- Contact details for your Neon Pixel representative
1. Connect the account
Paste your API key and pick your channel.
2. Finalize impressions
Ask your Neon Pixel rep to finish impression setup.
3. Enable C+DV
Turn on Clicks + Deterministic Views for Neon Pixel.
4. Confirm tracking
Check the connection and wait about 48 hours.
Connect your Neon Pixel account
- In Northbeam, go to Settings > Connections.
- Find Neon Pixel and click Connect.
- Under Neon Pixel Channels, select the channel or channels your Neon Pixel representative gave you (for example, Multi-touch).
- Paste your Neon Pixel API key into the API Key field.
- Optional: turn on Apex data sharing if you want Northbeam to send performance signals to Neon Pixel.
- Review the data sharing terms.
- Turn on Clicks + Deterministic Views so Northbeam can receive impressions for this attribution model.
- Click Connect.
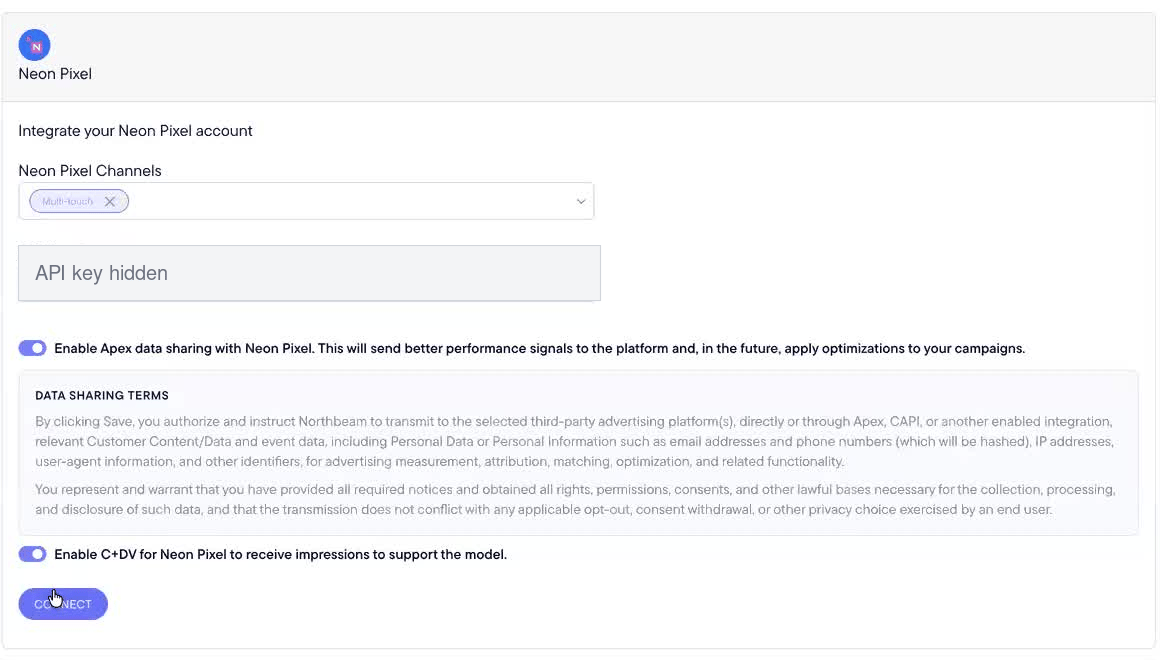
See screenshots
See screenshots
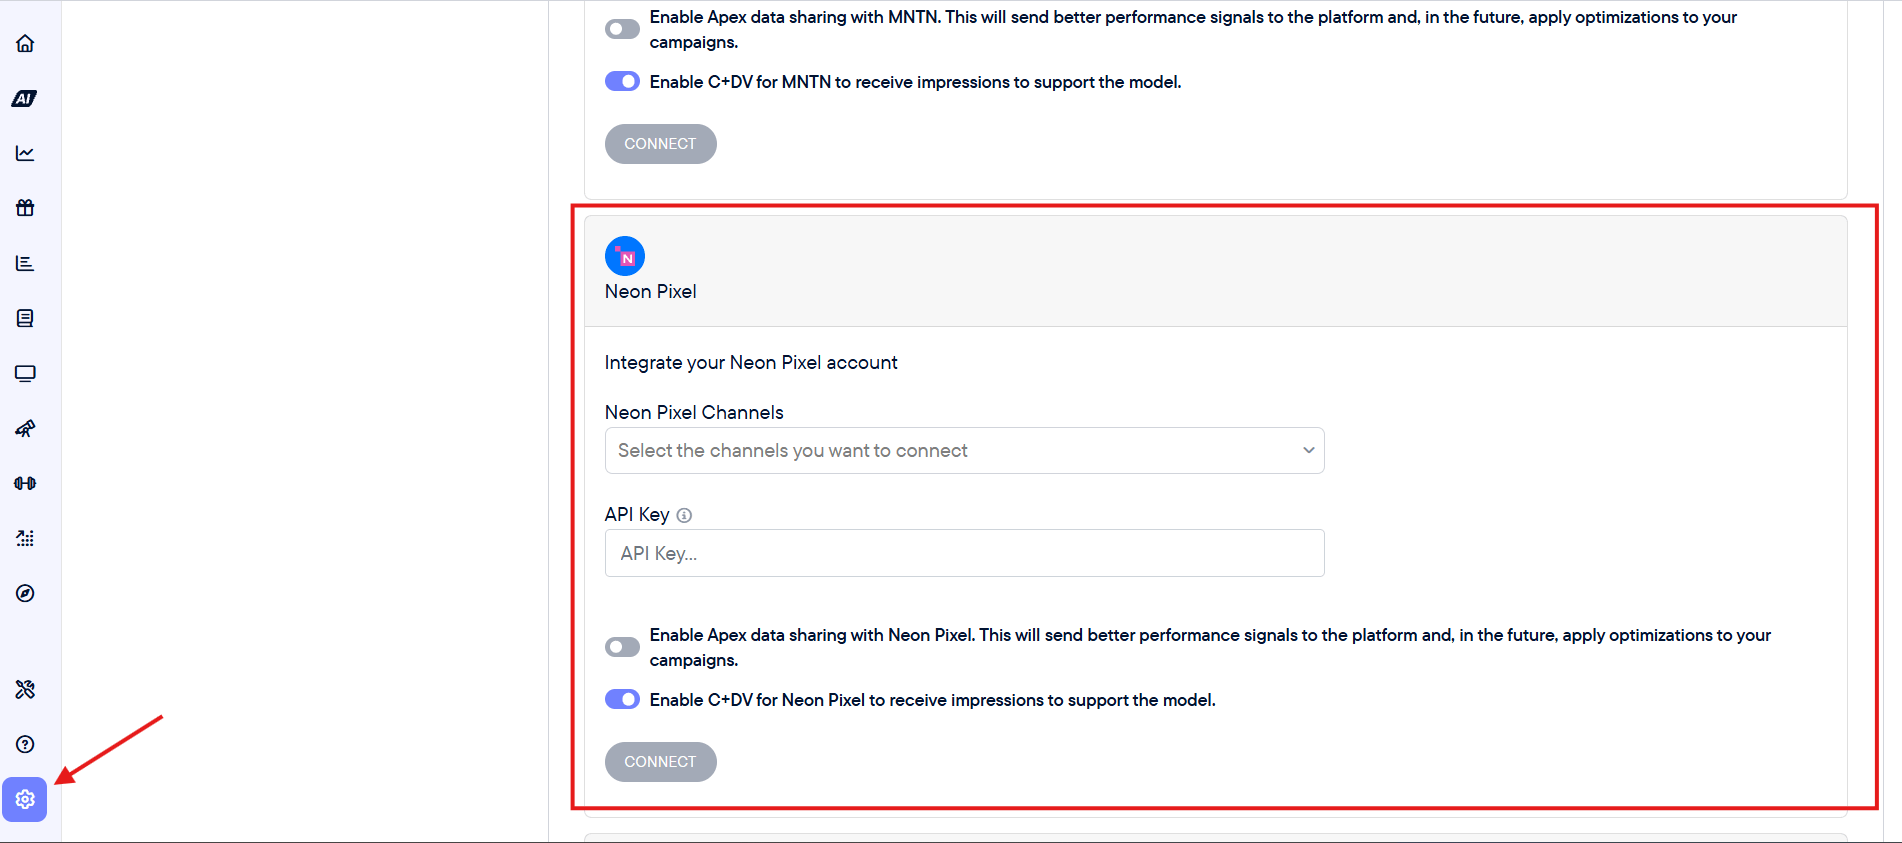
Neon Pixel connection card on the Connections page
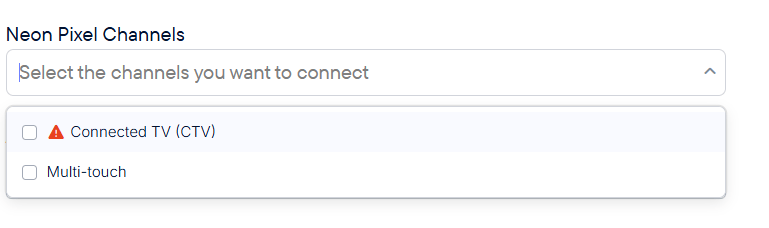
Neon Pixel Channels selector (Multi-touch shown)
Finalize impression data setup
After the account connects, Northbeam shows a Finalize Neon Pixel impression setup message.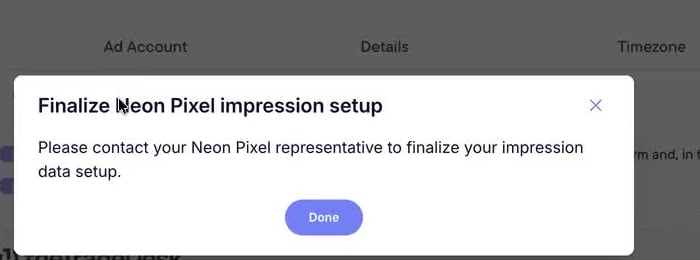
- Click Done to close the message.
- Contact your Neon Pixel representative and ask them to finalize your impression data setup.
Enable Clicks + Deterministic Views
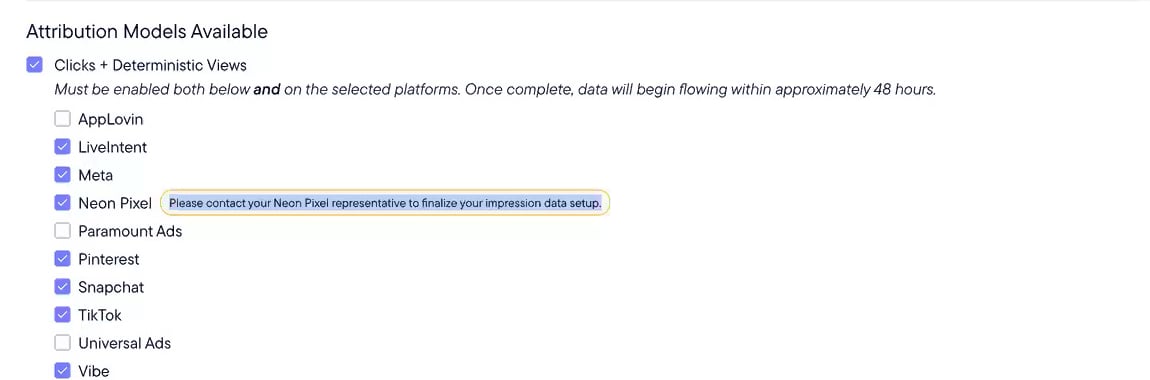
- In Northbeam, go to Settings > Model Settings.
- Turn on Clicks + Deterministic Views under Attribution Models Available.
- In the platform list below the model, select Neon Pixel.
- Save your changes if prompted.
Confirm tracking
Once the connection and impression setup are complete, allow about 48 hours for data to start flowing.Go back to Settings > Connections > Neon Pixel and confirm that: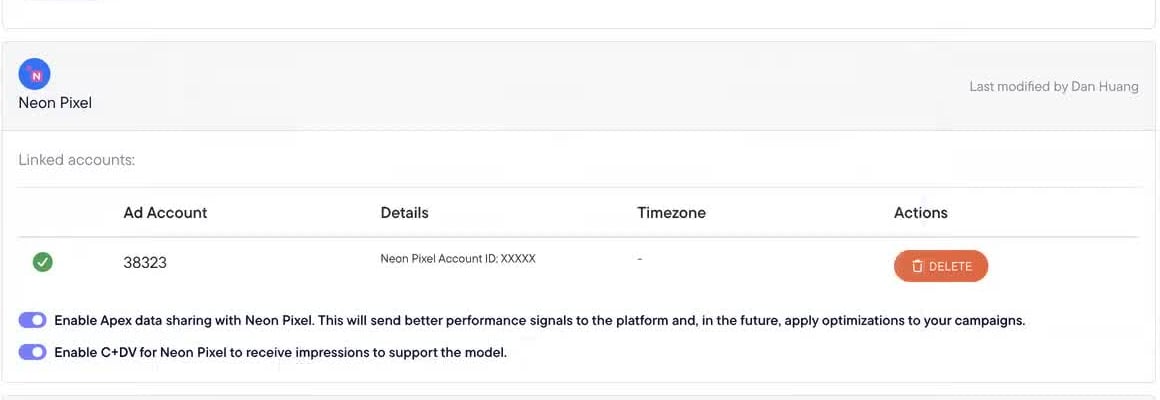
- The connection card shows a green confirmation icon.
- The correct Neon Pixel ad account ID is linked.
- Enable C+DV for Neon Pixel is turned on.
- Apex data sharing matches your preferred setting.
- Clicks + Deterministic Views and Neon Pixel are both turned on in Model Settings.
- Your Neon Pixel representative has confirmed impression setup is complete.
- In Sales Attribution, with the Clicks + Deterministic Views model selected, Neon Pixel spend appears for the expected date range.
- Revenue and ROAS populate when eligible impressions are matched to orders.
After switching: items to review
Switching to Neon Pixel doesn’t delete historical data from the previous connection. Northbeam updates built-in platform references automatically, but it doesn’t rewrite configurations you created. Saved views and columns that point to the inactive platform may show up blank. After switching, review your:- Custom metrics
- Breakdowns
- Saved views
- Scheduled exports
- Marketing Mix Modeling mappings
Need help?
Neon Pixel FAQ
Common Neon Pixel setup and reporting questions.
Troubleshooting Northbeam data
Start here if a check above fails.