> ## Documentation Index
> Fetch the complete documentation index at: https://docs.northbeam.io/llms.txt
> Use this file to discover all available pages before exploring further.
# Shopify Migration: Preserving Customer Stages
**This guide is for existing Northbeam customers migrating from a custom order management system using Orders API to Shopify.**
It covers one specific task: preserving your historical Customer IDs so Northbeam can continue accurately classifying customers as **New** or **Returning** after migration.
> This guide does not cover full order or customer data migration into Shopify..
***
## Why this matters
Shopify generates its own unique Customer IDs when customer records are imported. Northbeam relies on consistent Customer IDs to determine whether a customer is New or Returning.
Without this step, every existing customer will appear as a **New customer** in Northbeam — because Shopify-generated IDs have never been seen before.
To prevent this, you'll store your historical Customer IDs in a Shopify customer **metafield**, which Northbeam's engineering team will then map to your existing customer records.
***
## Before You Start
Make sure you have:
* Access to your Shopify admin
* A customer export from your previous system with **Customer IDs and email addresses intact**
* Your Northbeam pixel still active on your storefront
**Important:** Do not remove the Northbeam pixel until your Shopify integration is fully verified. Running both systems in parallel during the transition prevents gaps in attribution data.
***
## Step 1: Create a Customer Metafield in Shopify
Do this **before** starting your migration.
1. **Login to your Shopify store** at [shopify.com](https://www.shopify.com) if you haven't already
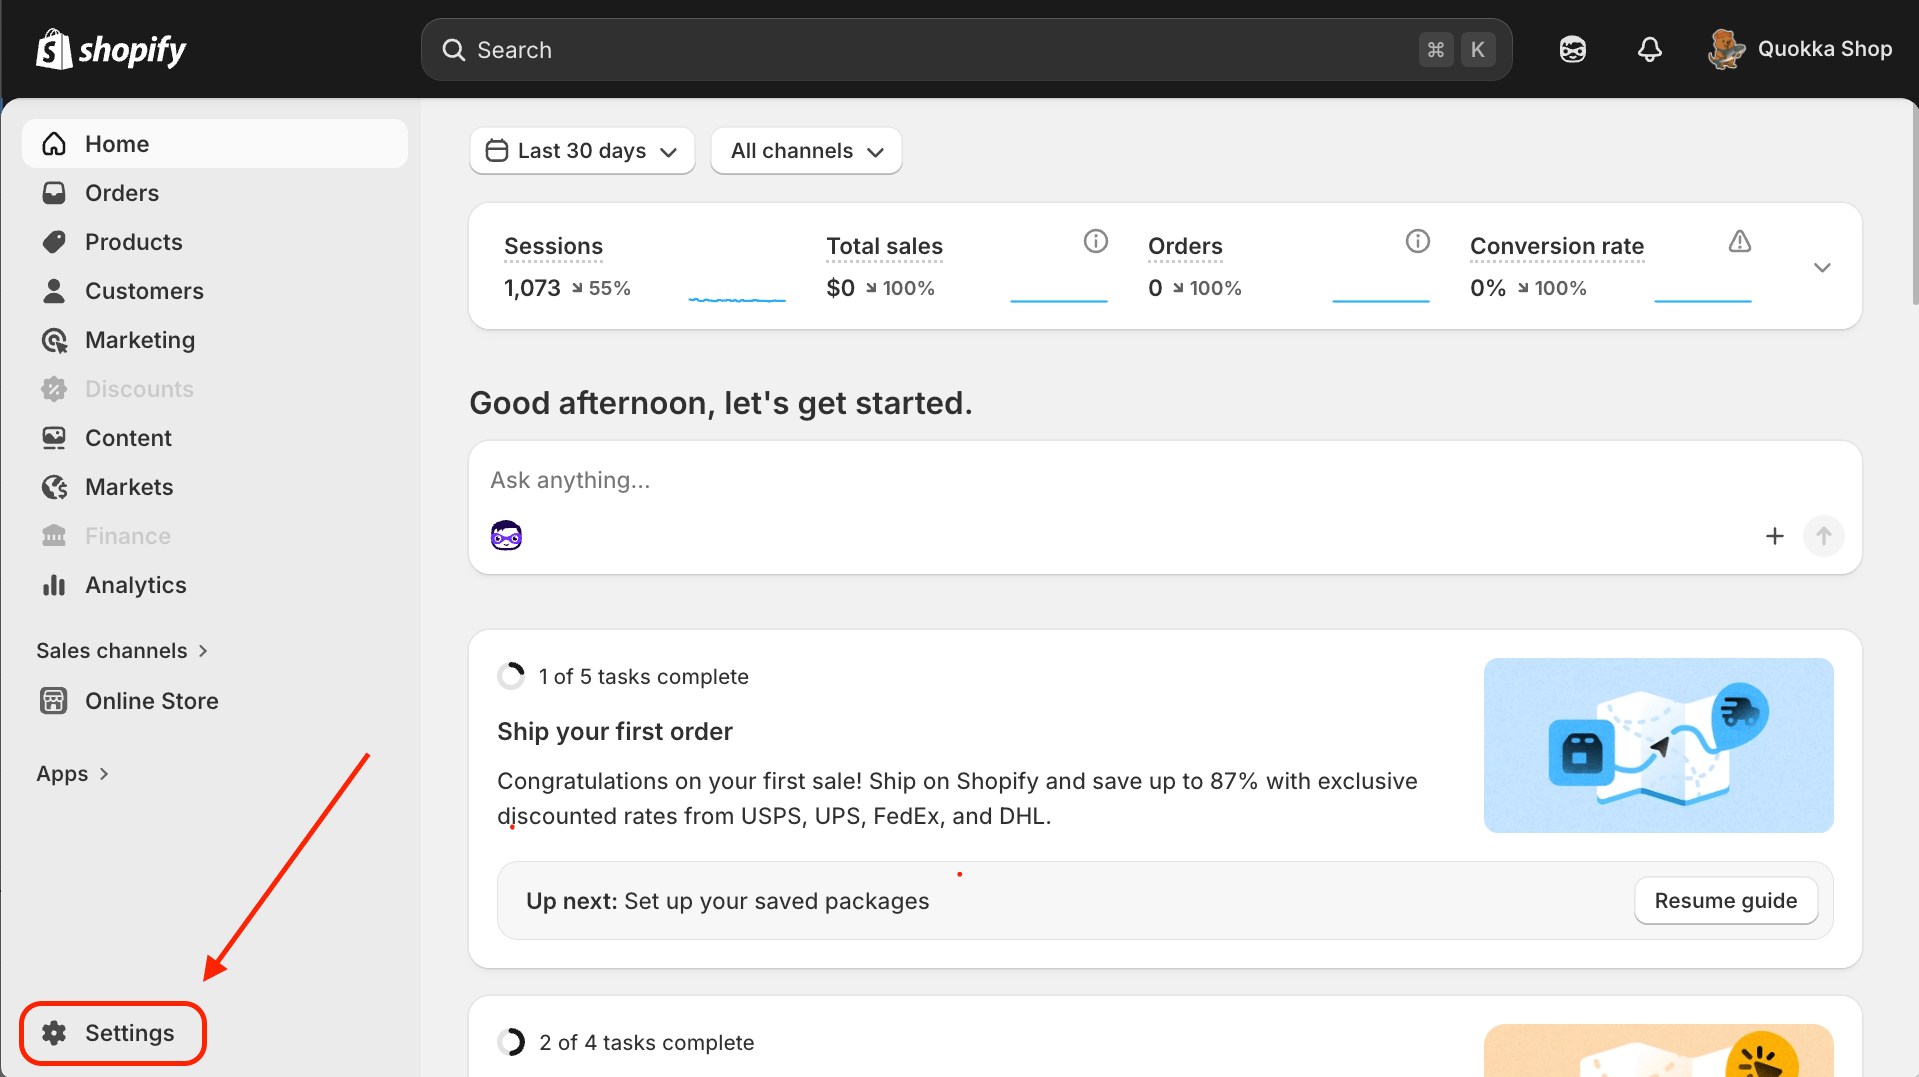 2. **Click on Settings** — find this in your Shopify homepage on the bottom left corner
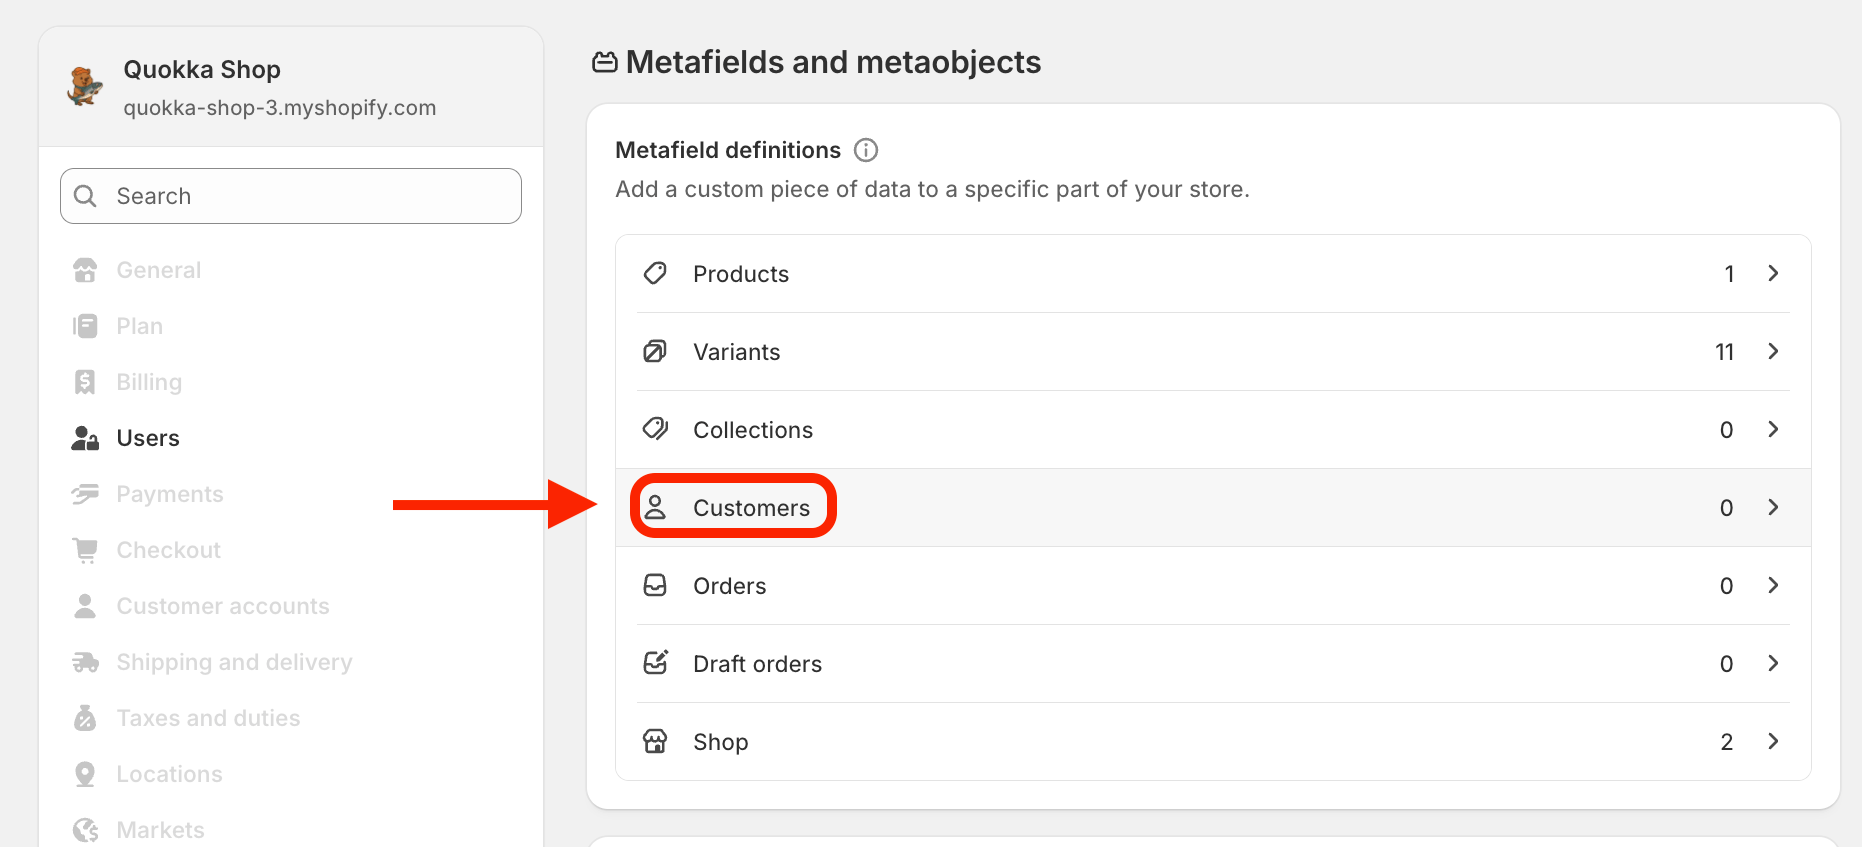
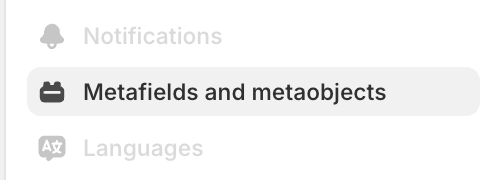 3. **Click on Customers**
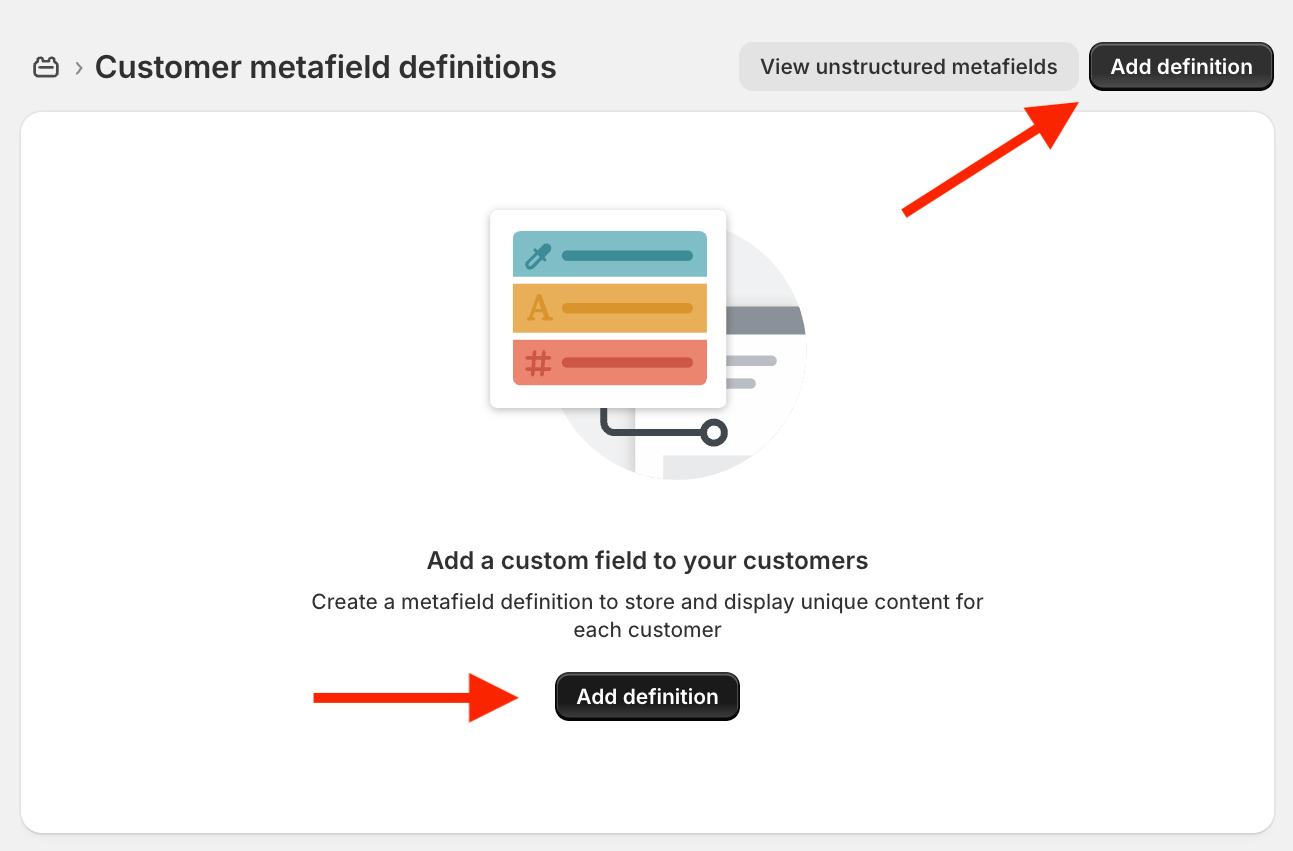
 4. **Click Add definition** If you haven't added one before, this button will be center-stage!
 5. **Customer Metafield Details**
1. Name: `legacy_customer_id` — note this name exactly, you'll need it later.
2. Type: **Single line text**
3. Validation: minimum of **1** and max of **256**
5. **Customer Metafield Details**
1. Name: `legacy_customer_id` — note this name exactly, you'll need it later.
2. Type: **Single line text**
3. Validation: minimum of **1** and max of **256**
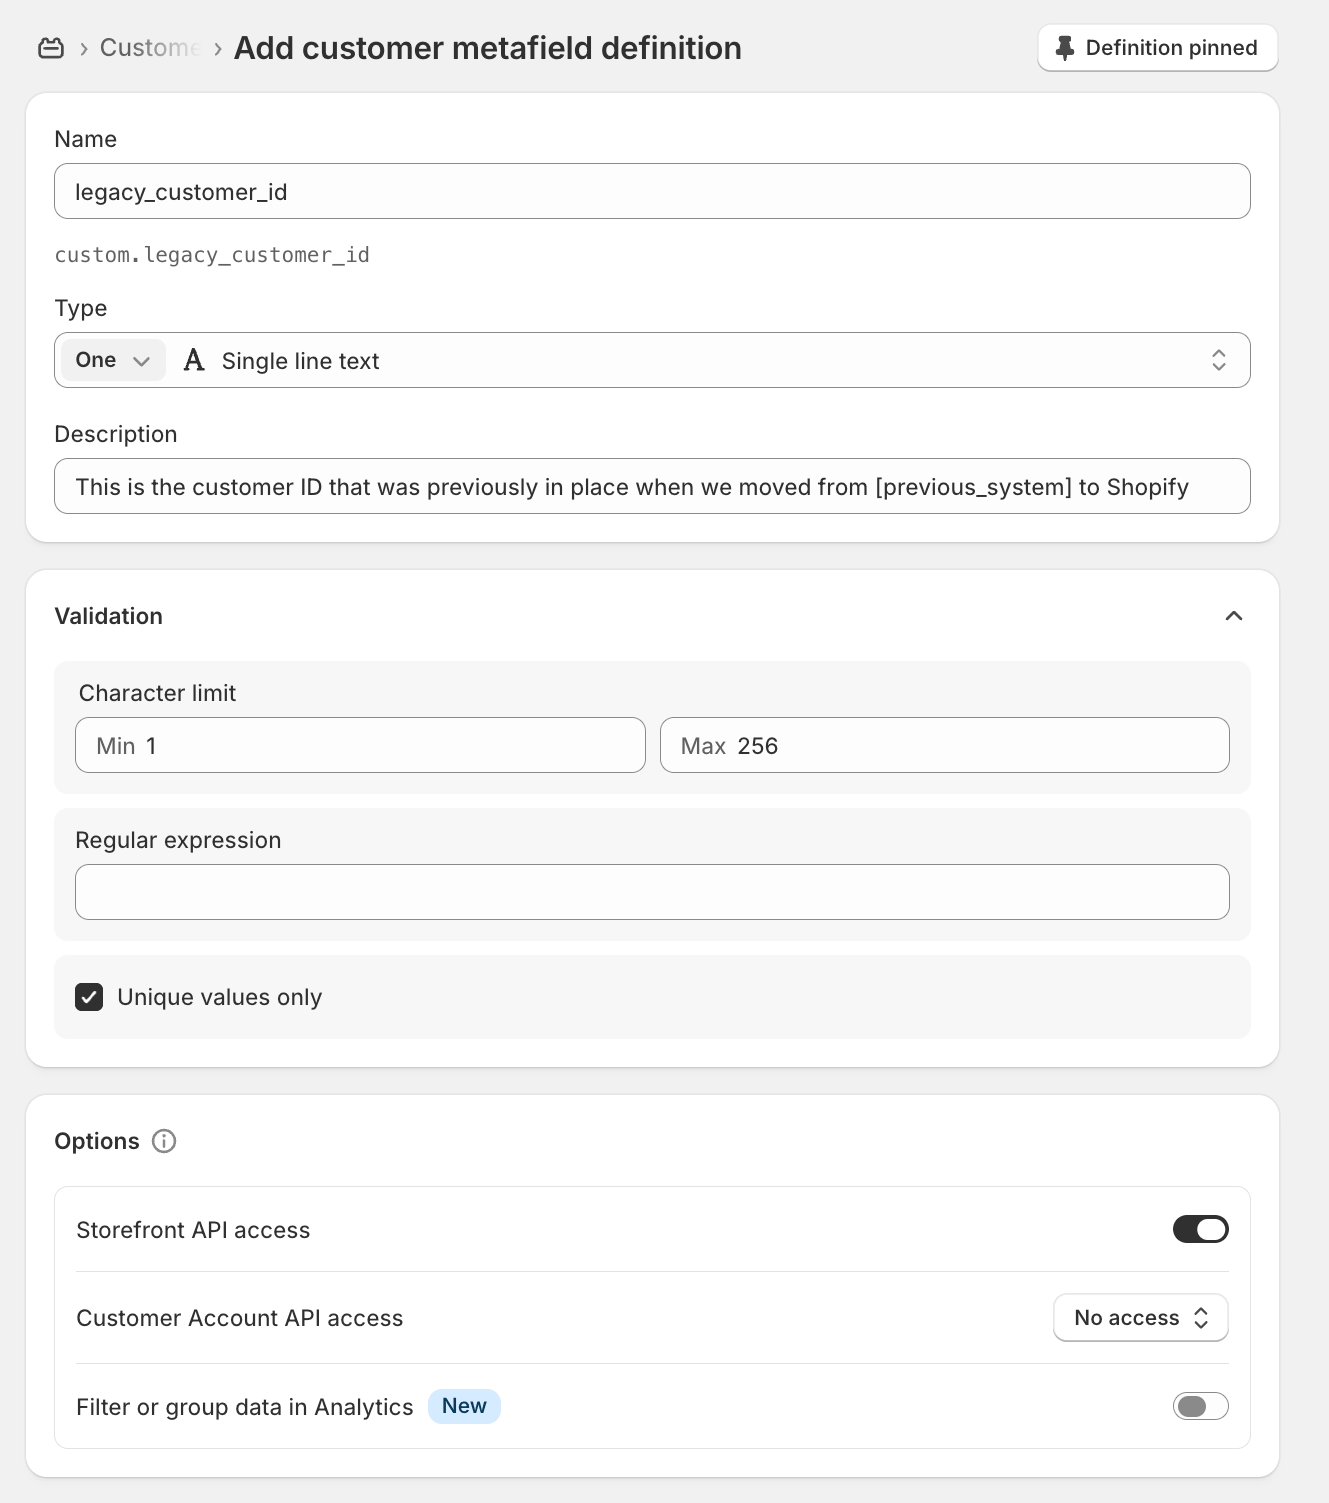 6. Click **Save**
The metafield namespace will default to `custom`, making the full field key `customer.metafields.custom.legacy_customer_id`
This is the column header you'll use in your CSV import.
***
## Step 2: Export customer data from your current system
Before disconnecting your old system, export your customer list. At minimum, your export must include:
* **Customer ID** (from your legacy system)
* **Email address**
Store this export securely — you'll use it to populate the import file in Step 3 and to verify your data in Step 4.
***
Do not remove the Northbeam pixel from your website until your Shopify integration is fully verified. Running both in parallel during the transition prevents gaps in attribution data.
***
## Step 3: Format Your Customer List for Shopify
Use the [Northbam Shopify Import Template](https://docs.google.com/spreadsheets/d/1x17iJWc7gx8f13ML5hq15MeCo4D5tqg3Sb4T-9vpKa8/edit?usp=sharing) to format your data
The most common formatting mistake is getting the metafield column name wrong. It must be **exactly**:
`customer.metafields.custom.legacy_customer_id`
***
## Step 4: Import your Customers into Shopify
Proceed to your **Customers** page in Shopify.
1. In the top left corner, click Import:
6. Click **Save**
The metafield namespace will default to `custom`, making the full field key `customer.metafields.custom.legacy_customer_id`
This is the column header you'll use in your CSV import.
***
## Step 2: Export customer data from your current system
Before disconnecting your old system, export your customer list. At minimum, your export must include:
* **Customer ID** (from your legacy system)
* **Email address**
Store this export securely — you'll use it to populate the import file in Step 3 and to verify your data in Step 4.
***
Do not remove the Northbeam pixel from your website until your Shopify integration is fully verified. Running both in parallel during the transition prevents gaps in attribution data.
***
## Step 3: Format Your Customer List for Shopify
Use the [Northbam Shopify Import Template](https://docs.google.com/spreadsheets/d/1x17iJWc7gx8f13ML5hq15MeCo4D5tqg3Sb4T-9vpKa8/edit?usp=sharing) to format your data
The most common formatting mistake is getting the metafield column name wrong. It must be **exactly**:
`customer.metafields.custom.legacy_customer_id`
***
## Step 4: Import your Customers into Shopify
Proceed to your **Customers** page in Shopify.
1. In the top left corner, click Import:
 2. Import your CSV files!
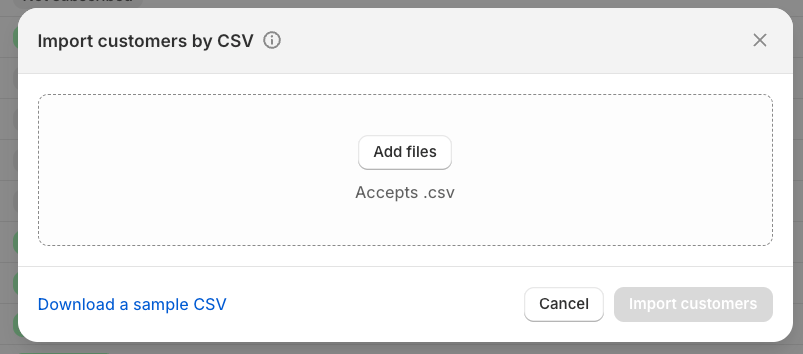 *We recommend following the [following template](https://docs.google.com/spreadsheets/d/1x17iJWc7gx8f13ML5hq15MeCo4D5tqg3Sb4T-9vpKa8/edit?usp=sharing) for guidance -- as the template that Shopify provides does not account for Customer metafields*
***
## Step 5: Notify your CSM at Northbeam
Once your data has been uploaded, inform your CSM at Northbeam along with the name of your **legacy customer\_id** field. Once we have this, the Northbeam engineering Team can map your old Customer IDs into your dashboard, preserving customer stages.
*We recommend following the [following template](https://docs.google.com/spreadsheets/d/1x17iJWc7gx8f13ML5hq15MeCo4D5tqg3Sb4T-9vpKa8/edit?usp=sharing) for guidance -- as the template that Shopify provides does not account for Customer metafields*
***
## Step 5: Notify your CSM at Northbeam
Once your data has been uploaded, inform your CSM at Northbeam along with the name of your **legacy customer\_id** field. Once we have this, the Northbeam engineering Team can map your old Customer IDs into your dashboard, preserving customer stages.