> ## Documentation Index
> Fetch the complete documentation index at: https://docs.northbeam.io/llms.txt
> Use this file to discover all available pages before exploring further.
# Neon Pixel: Connect the account
## Step 1: Connect your Neon Pixel account
1. In Northbeam, go to [**Settings > Connections**](https://dashboard.northbeam.io/settings/connections).
2. Find **Neon Pixel** and click **Connect**.
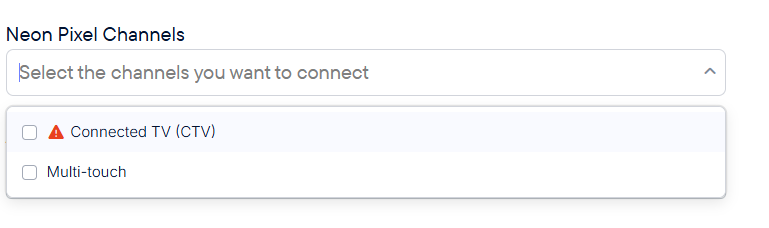
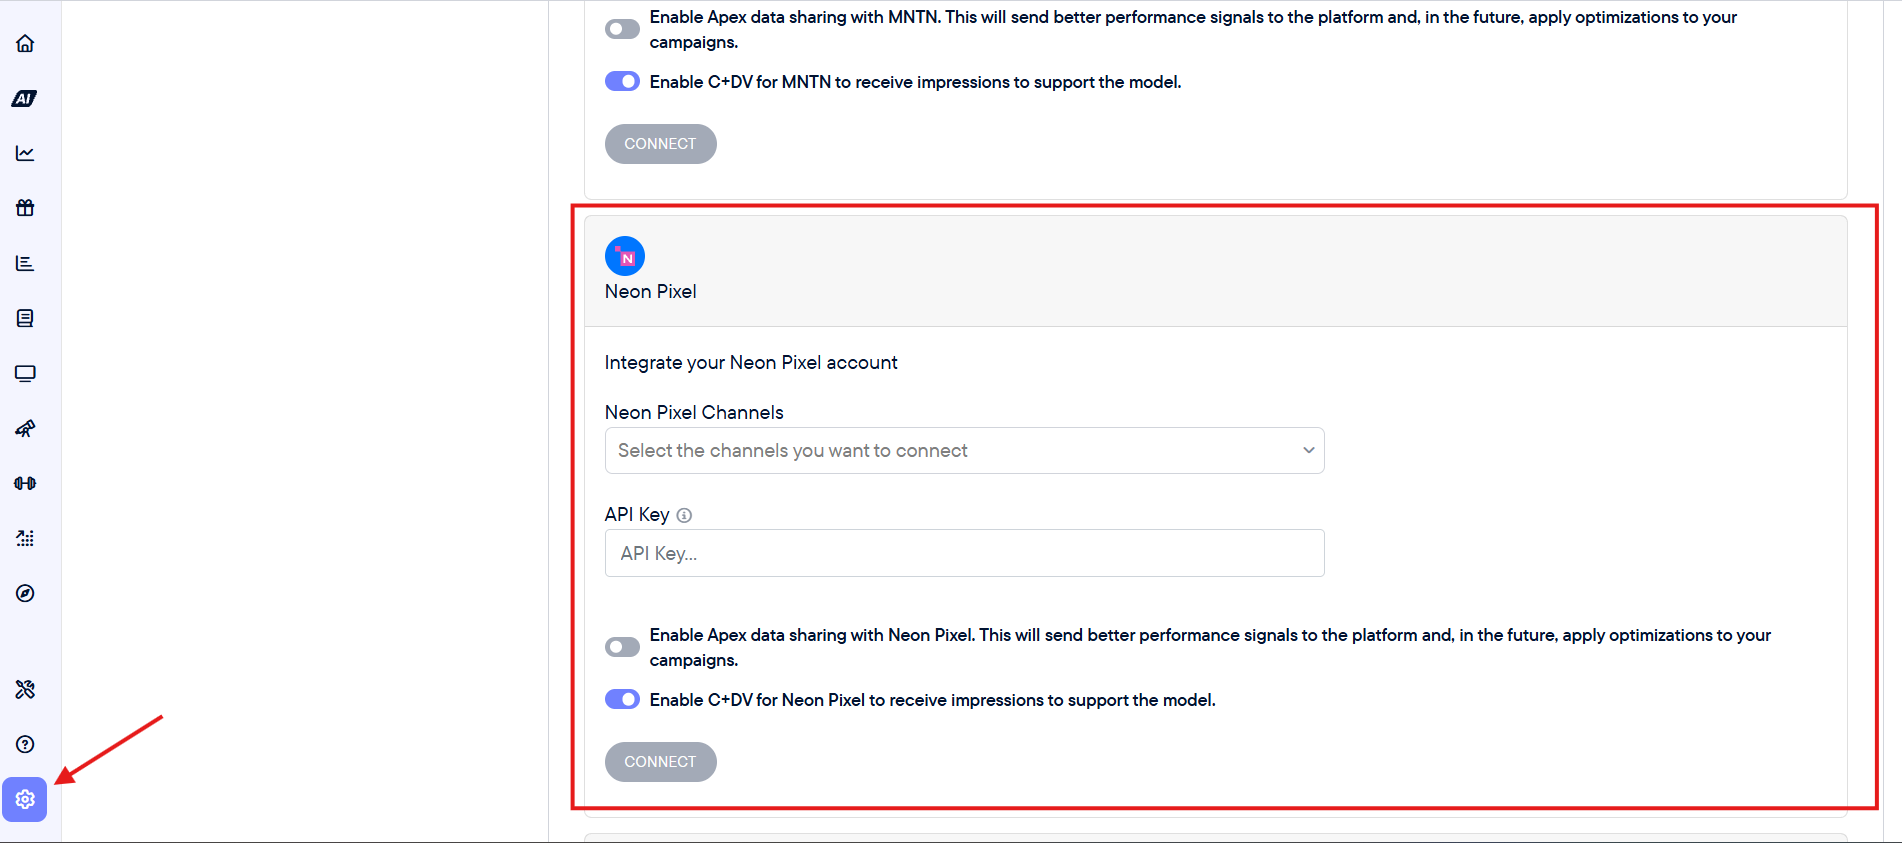 3. Under **Neon Pixel Channels**, select the channel or channels provided by your Neon Pixel representative. The example below uses **Multi-touch**.
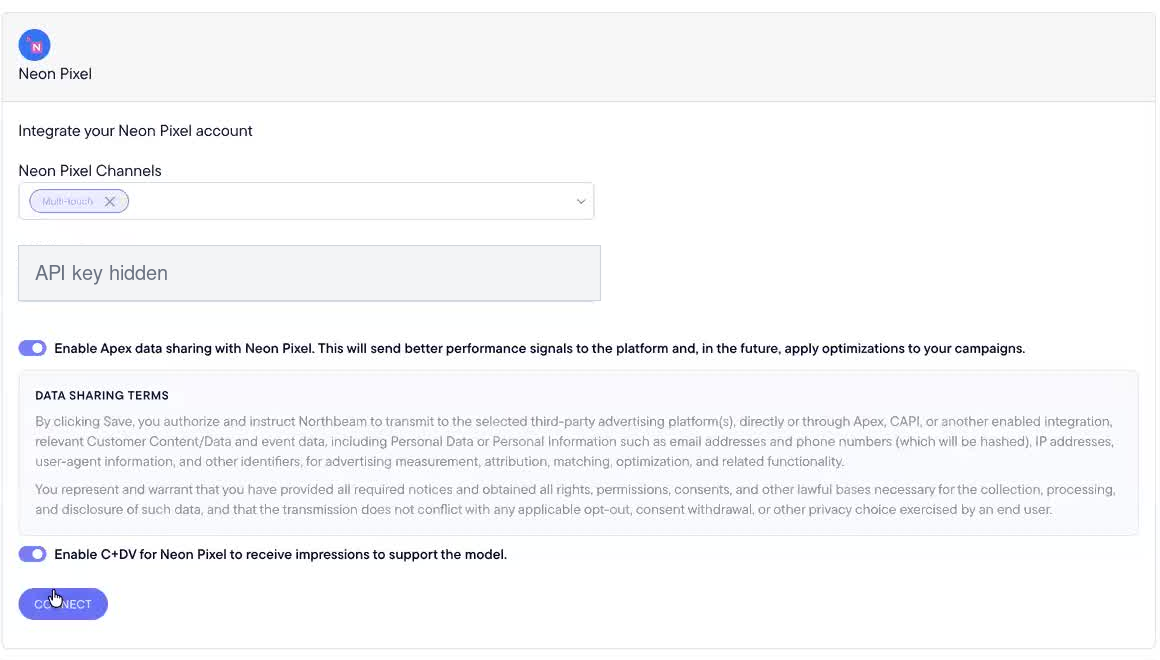
 4. Paste your Neon Pixel API key into the **API Key** field.
5. Optional: Enable **Apex data sharing** if you want Northbeam to send performance signals to Neon Pixel.
6. Review the data sharing terms.
7. Enable **Clicks + Deterministic Views** so Northbeam can receive impressions for this attribution model.
8. Click **Connect**.
4. Paste your Neon Pixel API key into the **API Key** field.
5. Optional: Enable **Apex data sharing** if you want Northbeam to send performance signals to Neon Pixel.
6. Review the data sharing terms.
7. Enable **Clicks + Deterministic Views** so Northbeam can receive impressions for this attribution model.
8. Click **Connect**.
 ## Step 2: Finalize impression data setup
After the account connects, Northbeam displays a **Finalize Neon Pixel impression setup** message.
## Step 2: Finalize impression data setup
After the account connects, Northbeam displays a **Finalize Neon Pixel impression setup** message.
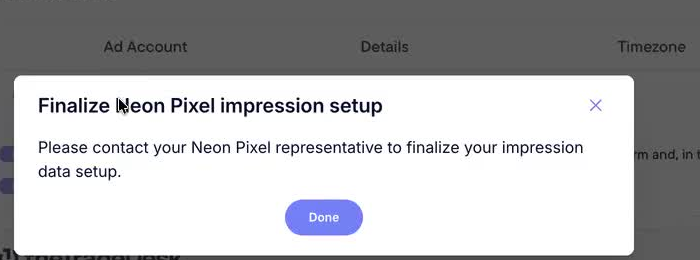 1. Click **Done** to close the message.
2. Contact your Neon Pixel representative and ask them to finalize your impression data setup.
### Required for view attribution
Connecting the account does not complete impression setup. Your Neon Pixel representative must finalize it before deterministic impression data can flow to Northbeam.
## Step 3: Enable Clicks + Deterministic Views
1. In Northbeam, go to [**Settings > Model Settings**](https://dashboard.northbeam.io/settings/model-settings).
2. Enable **Clicks + Deterministic Views** under **Attribution Models Available**.
3. In the platform list below the model, select **Neon Pixel**.
4. Save your changes if prompted.
1. Click **Done** to close the message.
2. Contact your Neon Pixel representative and ask them to finalize your impression data setup.
### Required for view attribution
Connecting the account does not complete impression setup. Your Neon Pixel representative must finalize it before deterministic impression data can flow to Northbeam.
## Step 3: Enable Clicks + Deterministic Views
1. In Northbeam, go to [**Settings > Model Settings**](https://dashboard.northbeam.io/settings/model-settings).
2. Enable **Clicks + Deterministic Views** under **Attribution Models Available**.
3. In the platform list below the model, select **Neon Pixel**.
4. Save your changes if prompted.
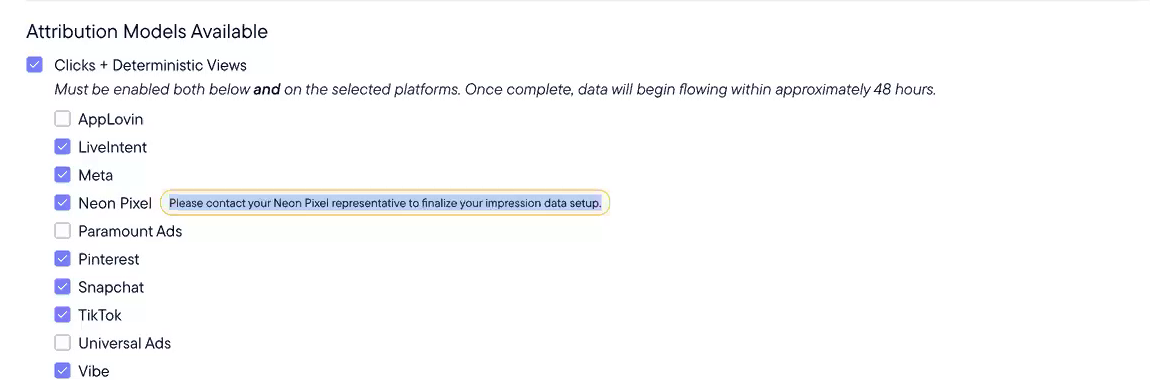 The model must be enabled both in Model Settings and for Neon Pixel. Once the connection and impression setup are complete, data should begin flowing within approximately 48 hours.